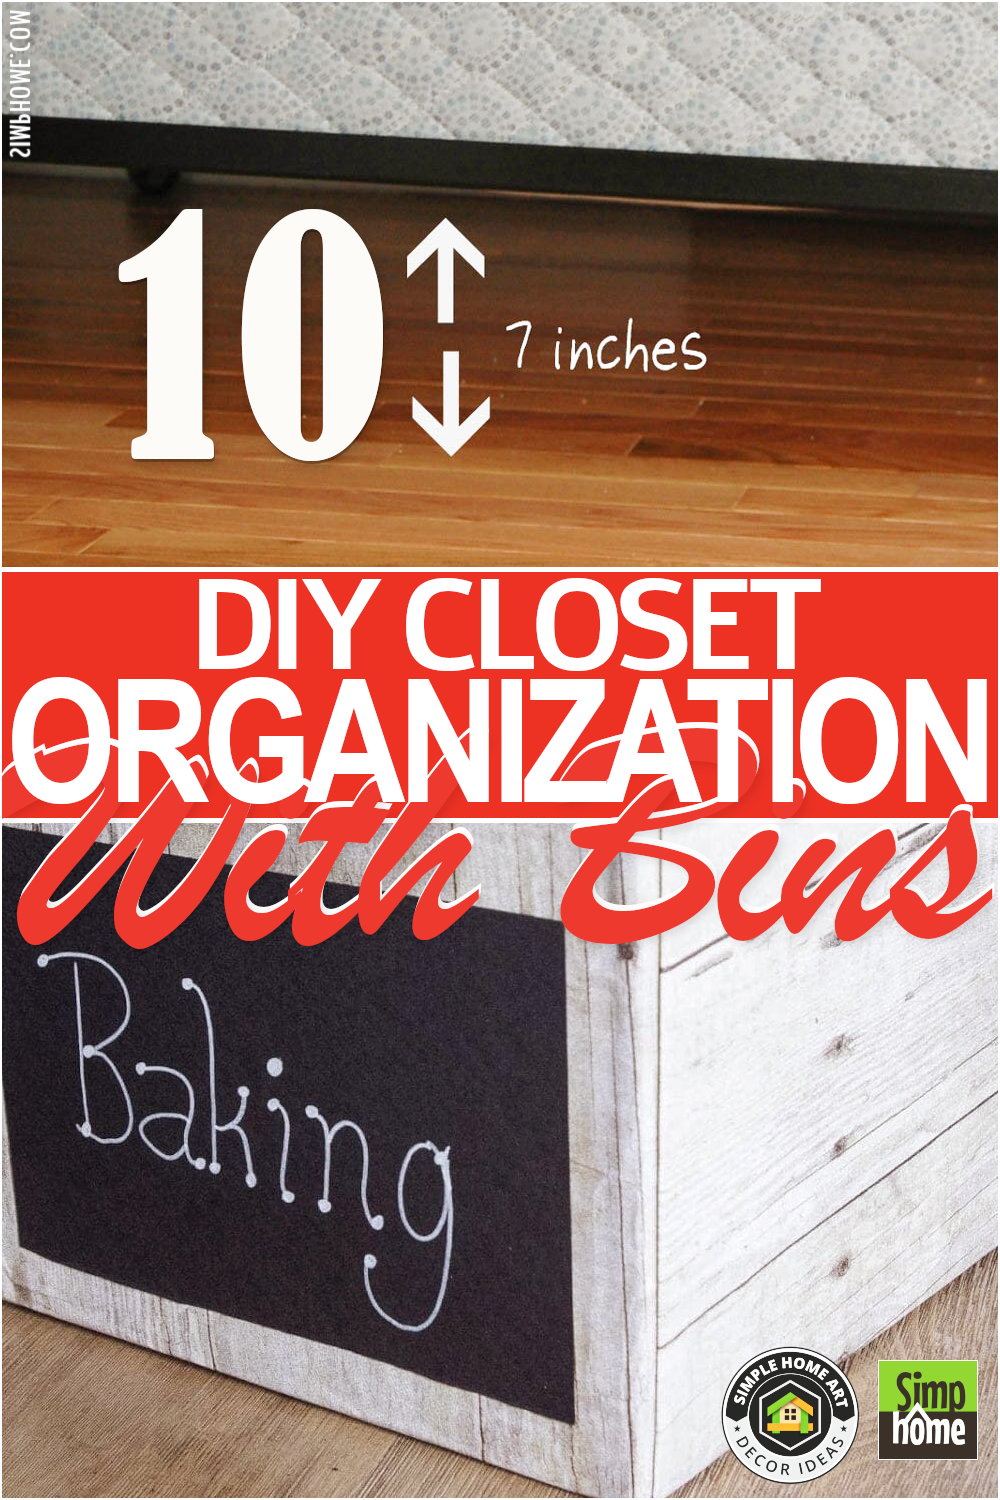
You can do many things to get your closet organized. You can add some shelves, install hooks, and even use bins.
If you think storing your clothes in containers is rather dull, check out these 10 DIY closet organizations with bins that will keep clutter at bay and level up your closet look. Following previous videos published in the channel, Simphome presents you with the list.
10 DIY Closet Organizations with Bins Video:
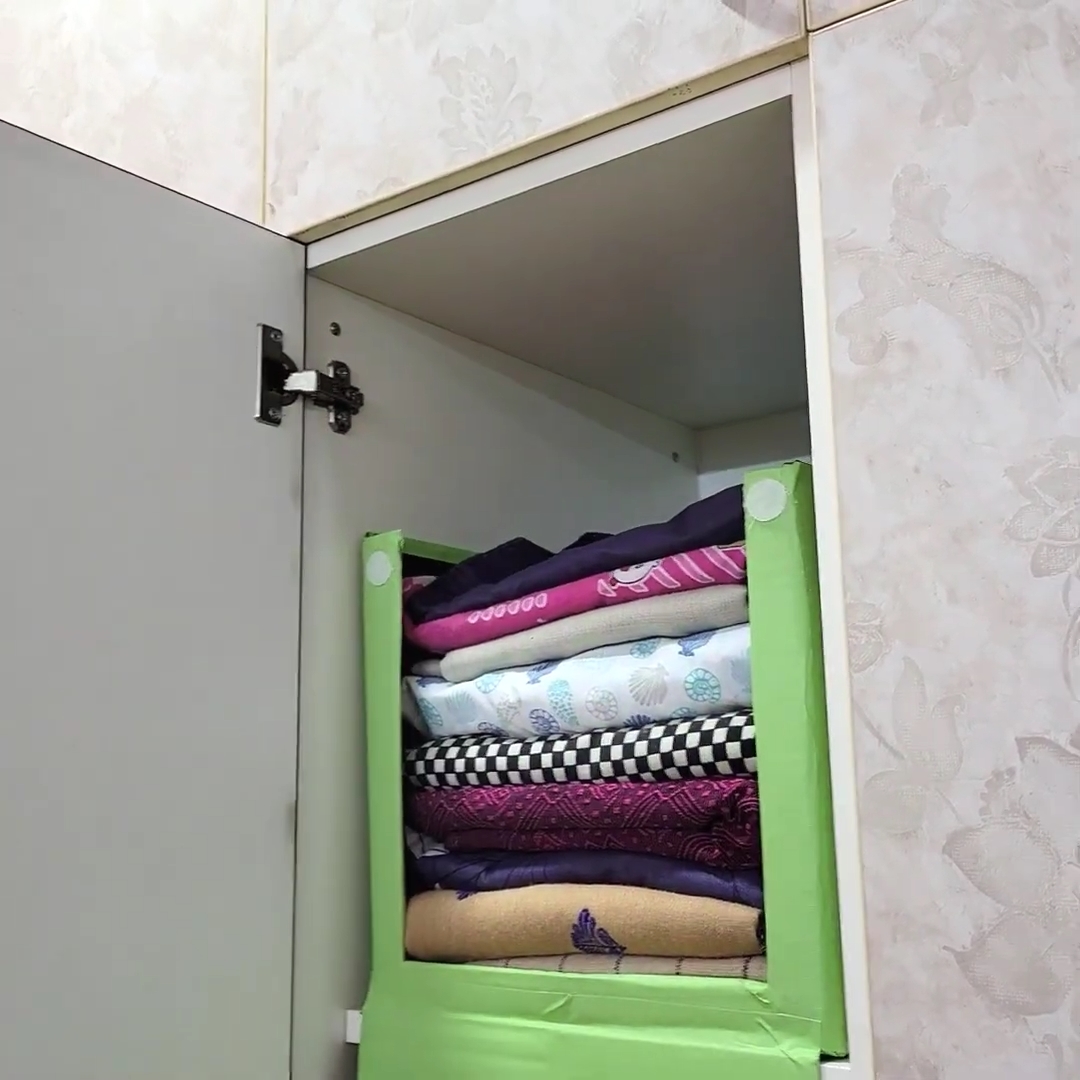
10. Create Your Own Organizer Box
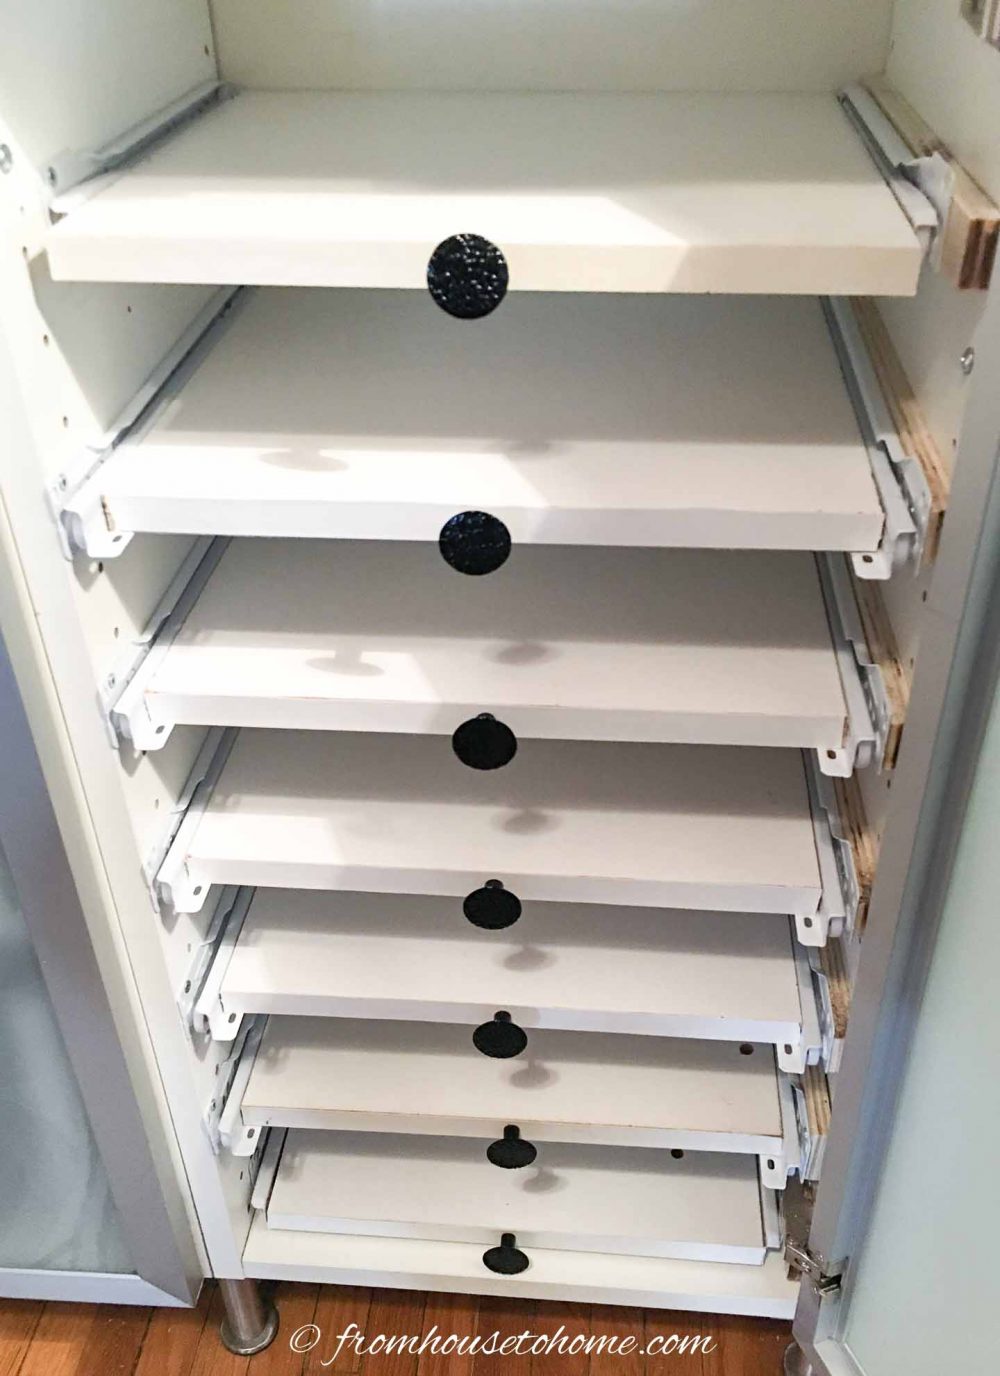 This box organizer idea has a sliding design that is easy to pull. Below are the guides and materials for it.
Before making the boxes, make sure your closet has shelves sitting in sliders. If it does not have it, take your time to create several sliding slides using wooden boards and drawer slides.
Measure the box you are going to make. Be sure there is still space left between the shelves so you can easily take it out.
Once you have the measurement, cut your regular cardboard or corrugated plastic. You can also use a framing square to ensure the corners are at the desired angle.
Glue each side that you are about to fold. Then, fold the pieces until it becomes a box. Please wait until it is dry.
Tip: Cut out approximately 1/8″ from the inside and outside edges of the flaps. This way, the assembling process becomes much easier.
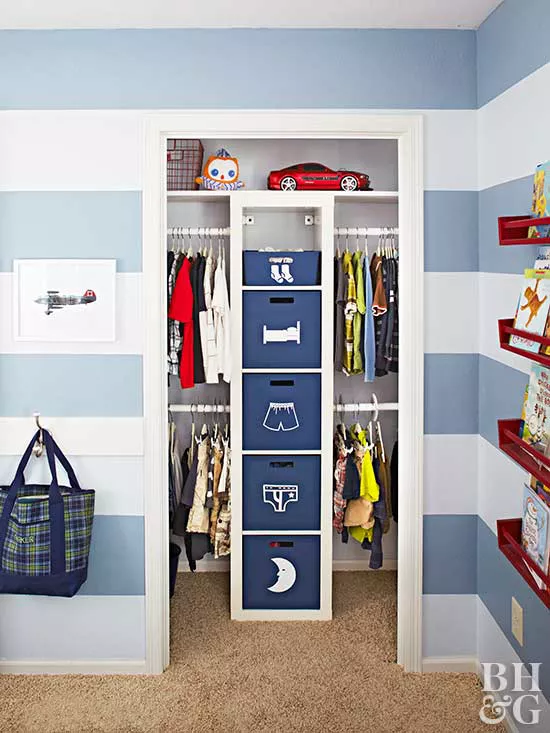
9. A DIY Contemporary Custom Closet
 This closet fits kids. It is simple enough and does not require complicated steps to follow. You can install the French cleats on the wall. Hang the shelves and hook them onto the cleats.
Calculate how firm the cleats are on the wall before putting one or more baskets on it. You can repeat the steps for the same kind of DIY closet for kids.
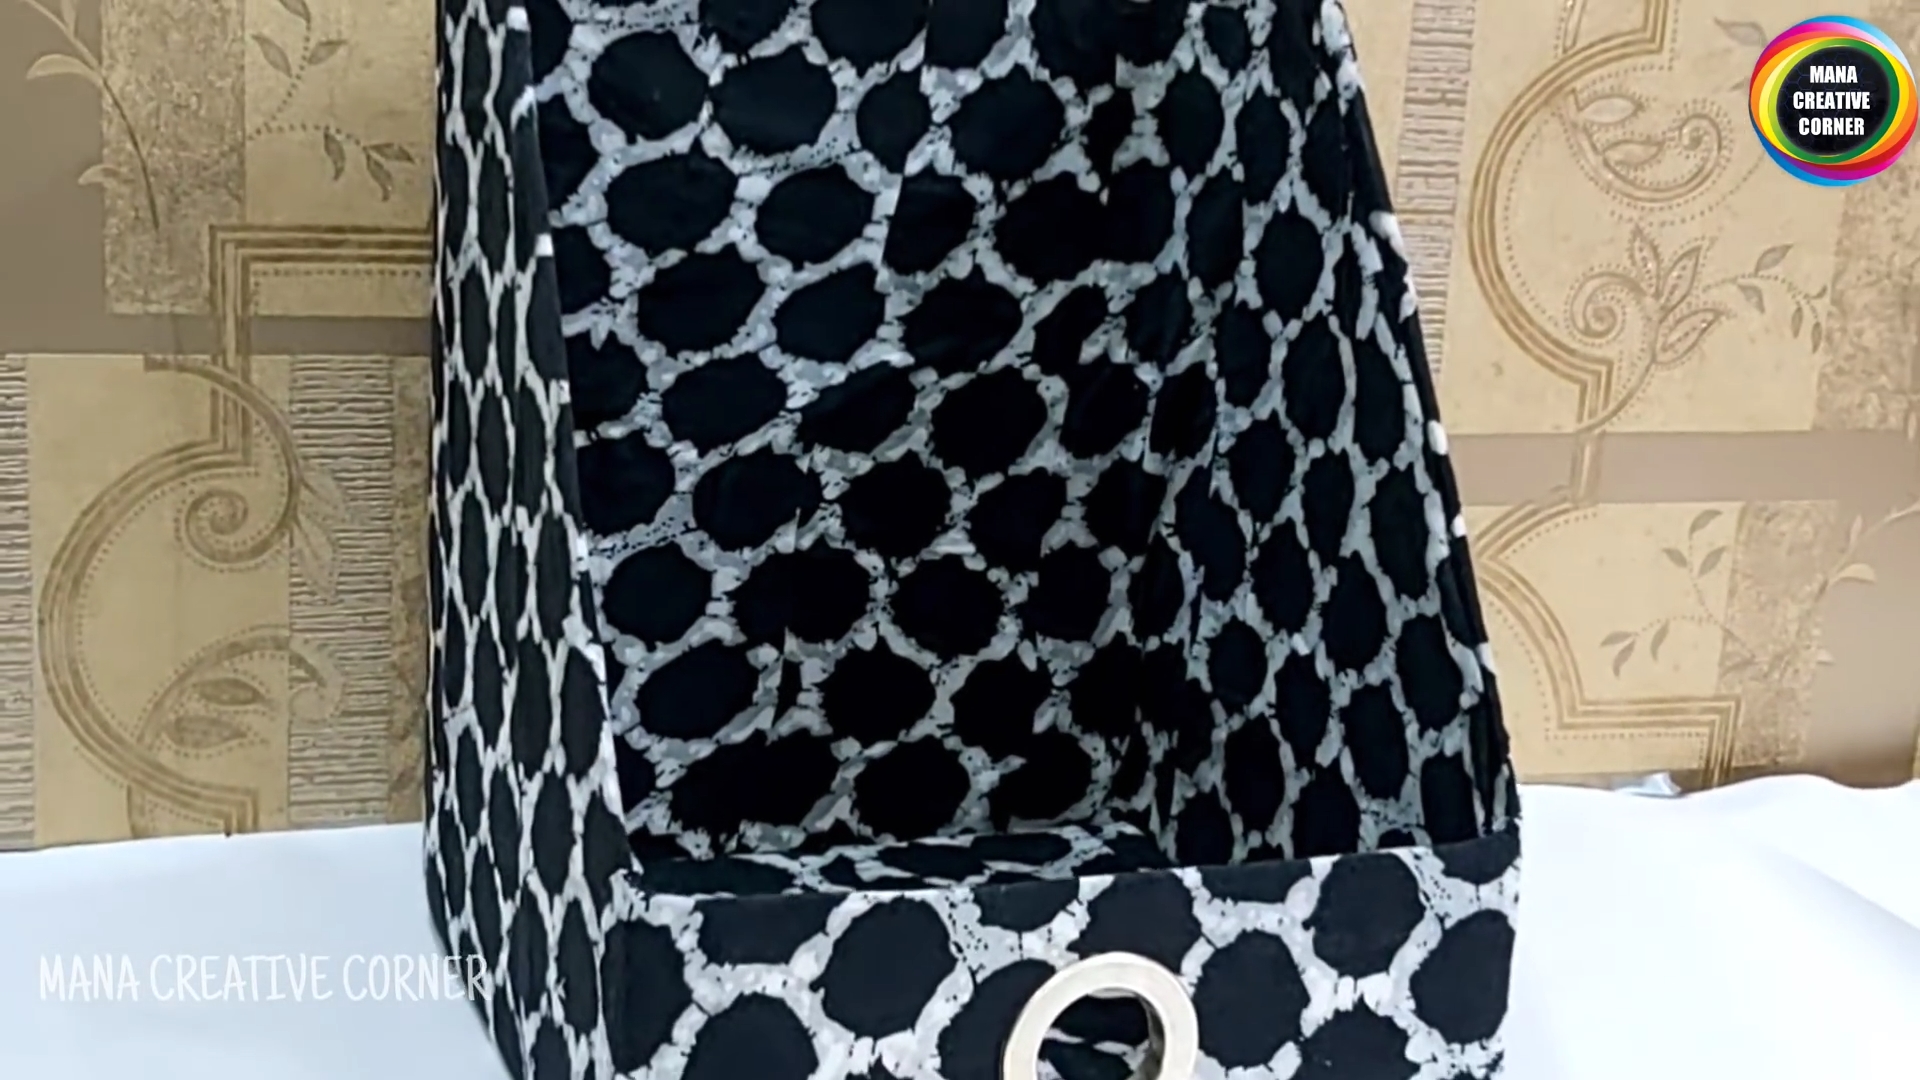
8. Jazz up Your Closet with Cardboard Bins
 After some time of purchasing things, you do not realize how high the pile of cardboard in the room is.
It’s time to turn them into something worth using or displaying. This picture is an excellent example to start with.
Pick a plain cardboard, a thick fabric, spray adhesive, wide ribbon, trim, a hot glue gun, and glue sticks.
The folding box flaps down inside the box. Put the cardboard on top of the fabric, and cut the fabric in a plus sign shape. Use the spray adhesive, and glue the fabric to the box’s inside, bottom, and sides.
Hot glue the ribbon to the outside of the box. Then, glue the trim to the top outside of the box.
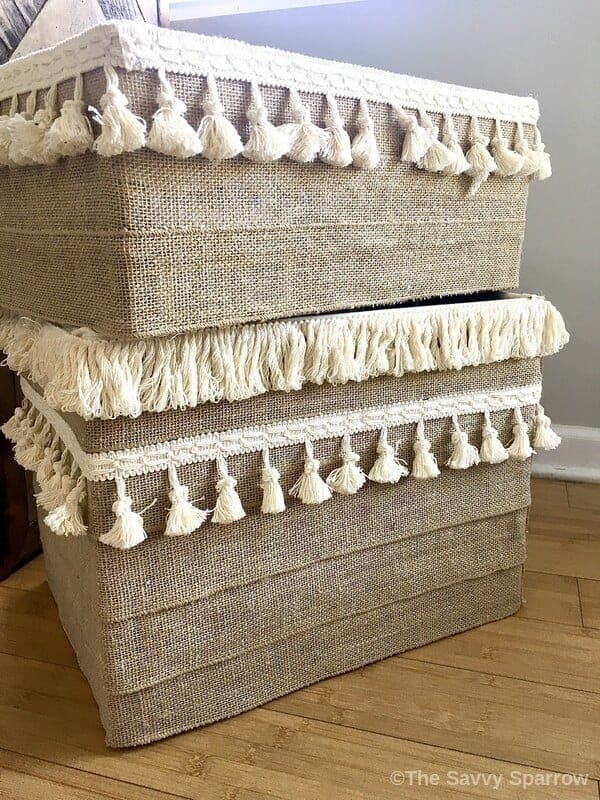
7. Add Textural Elements with Rope Basket
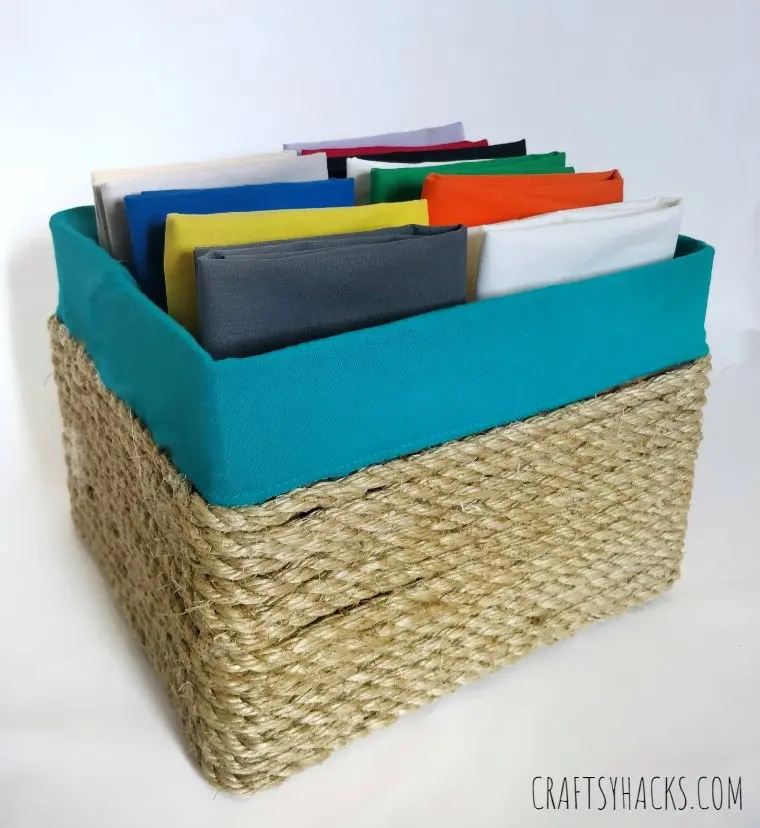 There are many ways to decorate a box. You can use a ribbon, spray paint, or even a rope.
First, get a box and a rope. Remove the flaps. Glue the box with the glue gun and start using the rope to cover the box from the bottom. When covering 2/3 of the box, cut the rope on the corner.
Cover the rest of the box with fabric and glue it. And then flip it inwards the remaining fabric.
6. Use Symbols instead of Words
You can draw it on each box if you are skilled at drawing. Draw the symbol or logo with a marker, cut it out using scissors, and stick it on the box.
Or you can make a print iron-on vinyl using a Cricut. Create the symbol on the Design Space. Push the “Make it” button. Reverse the design and put it on the cutting mat with the shiny side down.
Be sure your design faces down or mirrored. Weed away any unnecessary things on the design. Now stick the design on the box.
5. Don’t Throw Away the Bins
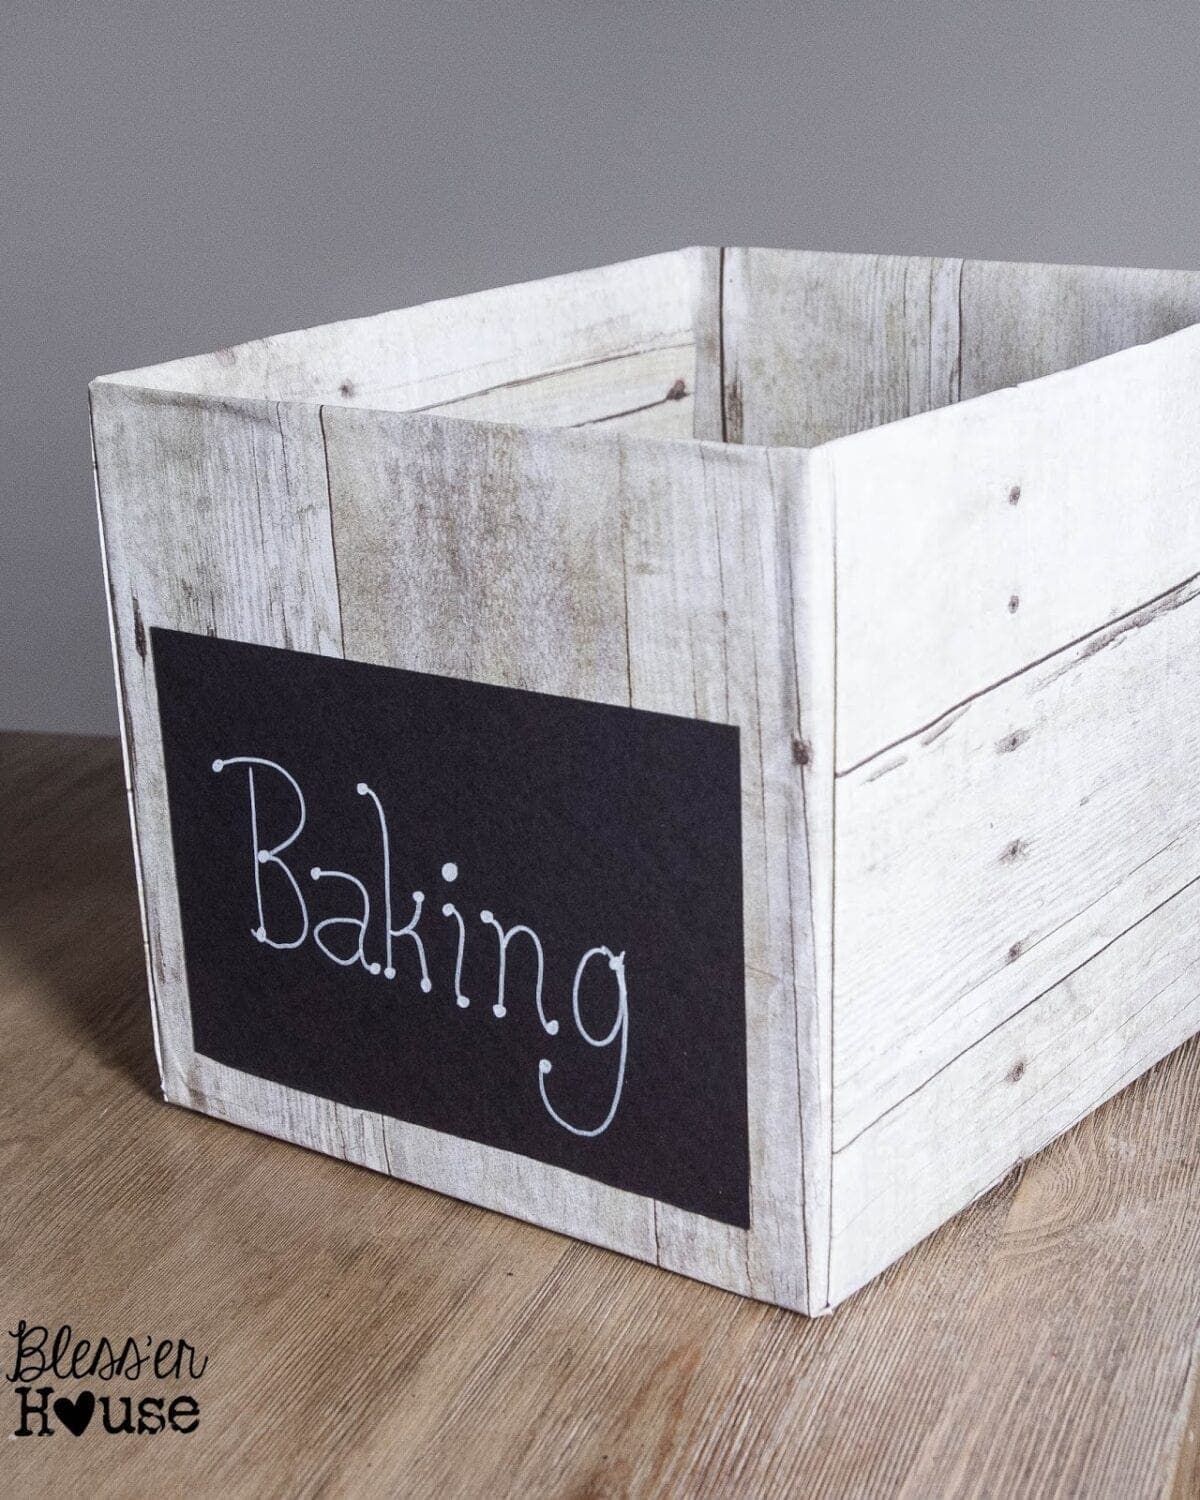 You have seen some of our closet collections. Now, we will give a simple DIY box that will take less time to make. This DIY is an easy and clever way to clear out boxes at home. If you are considering recycling waste in your house, this project will help you with that.
To make these well-worn bins, you will need empty cardboard diaper boxes. Then, remove the top parts with scissors. After that, glue the bin and wrap it with faux wood-printed craft paper. Lastly, write a name or label to identify the items the box houses.
4. Do More with Cardboard
 Folding clothes are prone to be messy in your closet. You can get them more organized by making these awesome boxes.
First, get cardboard, and remove the flaps. Second, make a square door on the front. Next, create two triangles on the two sides with a cutter. Then, tape all the sides to make them smooth before covering them with paper.
After that, cover the inside part with dark paper. Now make the door with cardboard and cover it with the same color. Attach it to the main box. Use the glue gun and stick the velcro on the two sides of the front. Lastly, give a warped paper to the door.
3. Additional DIY Storage under the Bed
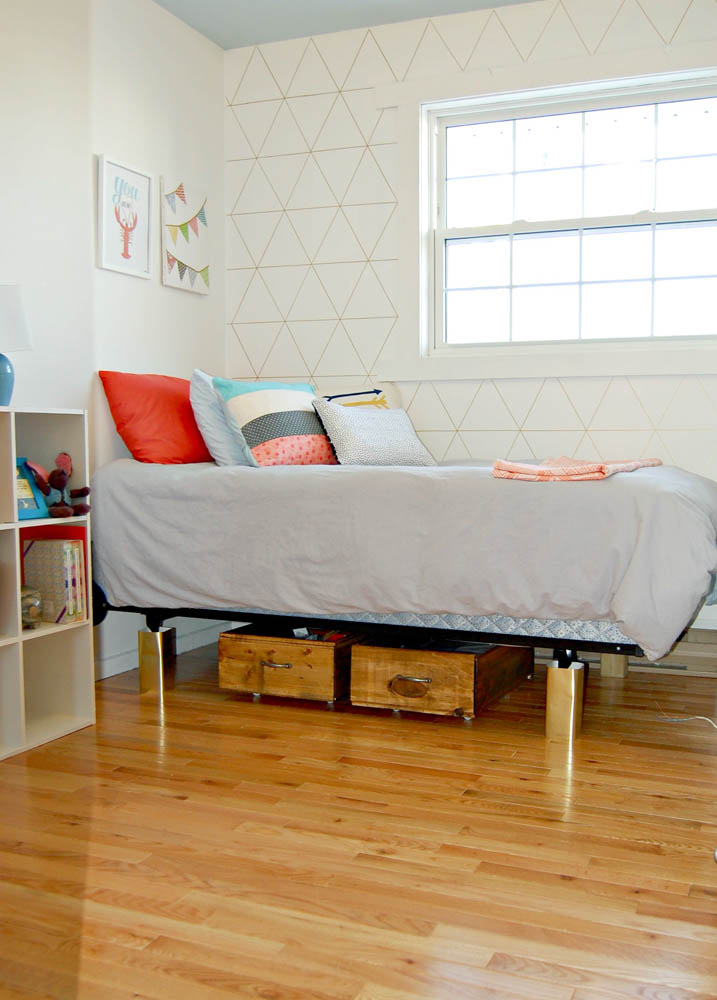 When you do not want to put more materials in the closet, you can put them in another place like this storage that you can simply slide under the bed.
Firstly, make sure the box can slide under the bad. Secondly, cut the wood piece down according to the decided length. Next, assemble all the parts, nail them, and glue them. Once the frame’s ready, then attach the bottom part.
After that, sand and stain it, and let it dry for some time. Then, install the wheels in the same direction to make them easy to move. Lastly, give a handle on it so that you can drag it.
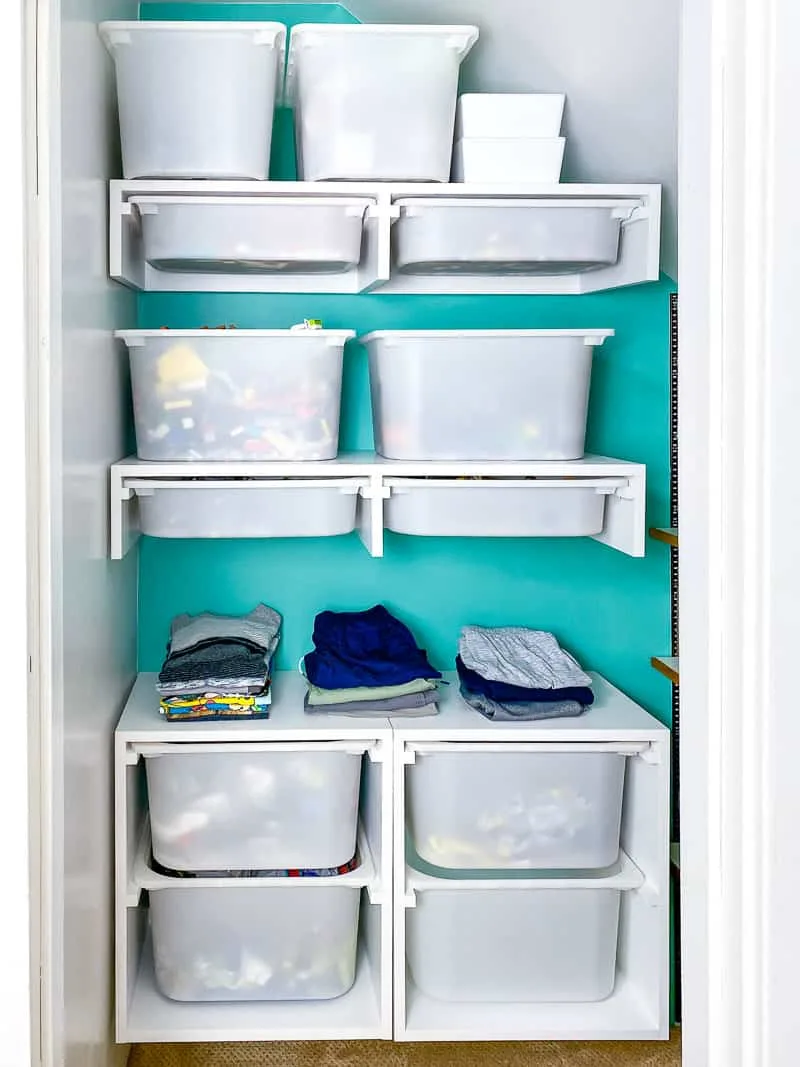
2. Organize Your Tools Effortlessly With Reach in
 Different objects require different tools, so you’ve got so many tools in the closet. It means you’re going to need bins for them.
Putting them in a special bin can avoid confusion when you’re about to use a certain tool. Therefore, try to put anything back in its space after using it.
Second idea,
A tape measure box, a sharp toolbox (the tallest one), a tiny toolbox (for screwdrivers, pliers, and Allen wrenches), or other bedroom necessities are all included in the revamped storage system for the project.
Make sure the baskets have working pegs to move around easily.
A piece of 1/4-inch plywood about 2 feet by 4 feet will do nicely for the pegboard. To ensure that your holes are evenly spaced, measure and mark off intervals of 2 inches. When you see how close they will be, you merely mark every other corner, so they are 4 inches apart. The ability to drill more holes into the product is a simple afterthought.
For this, you’ll need a drill with a 1/2-inch bit.
You should pick a bit with a point so it won’t slide around.
Please take your time, so the plywood doesn’t peel and split around the hole.
Don’t freak out if you end up with some splintered pieces. To repair the damage, choose a stainable wood putty that will blend in seamlessly with the existing finish.
1. A DIY Shirt Organizer Idea
 When you prefer to fold your shirts instead of hanging them, this DIY shirt organizer is an excellent thing to try.
Get a box and remove the flaps. Grab your ruler and measure 10cm from one side on the two top parts and 10 cm from the bottom to up. Make a triangle line and cut it through the line. Create a hole in the front.
Put some glue on the box and wrap it up with a fabric you like. Make sure you cover it inside out. Put the curtain ring on the hole.
References:
10. Fromhousetohome.com
9. Thehandymansdaughter.com
8. Thesavvysparrow.com
7. Craftsyhacks.com
6. Bhg.com
5. Blesserhouse.com
4. Youtube.com
3. Diypassion.com
2. Bhg.com, Blog.minwax.com
1. Youtube.com