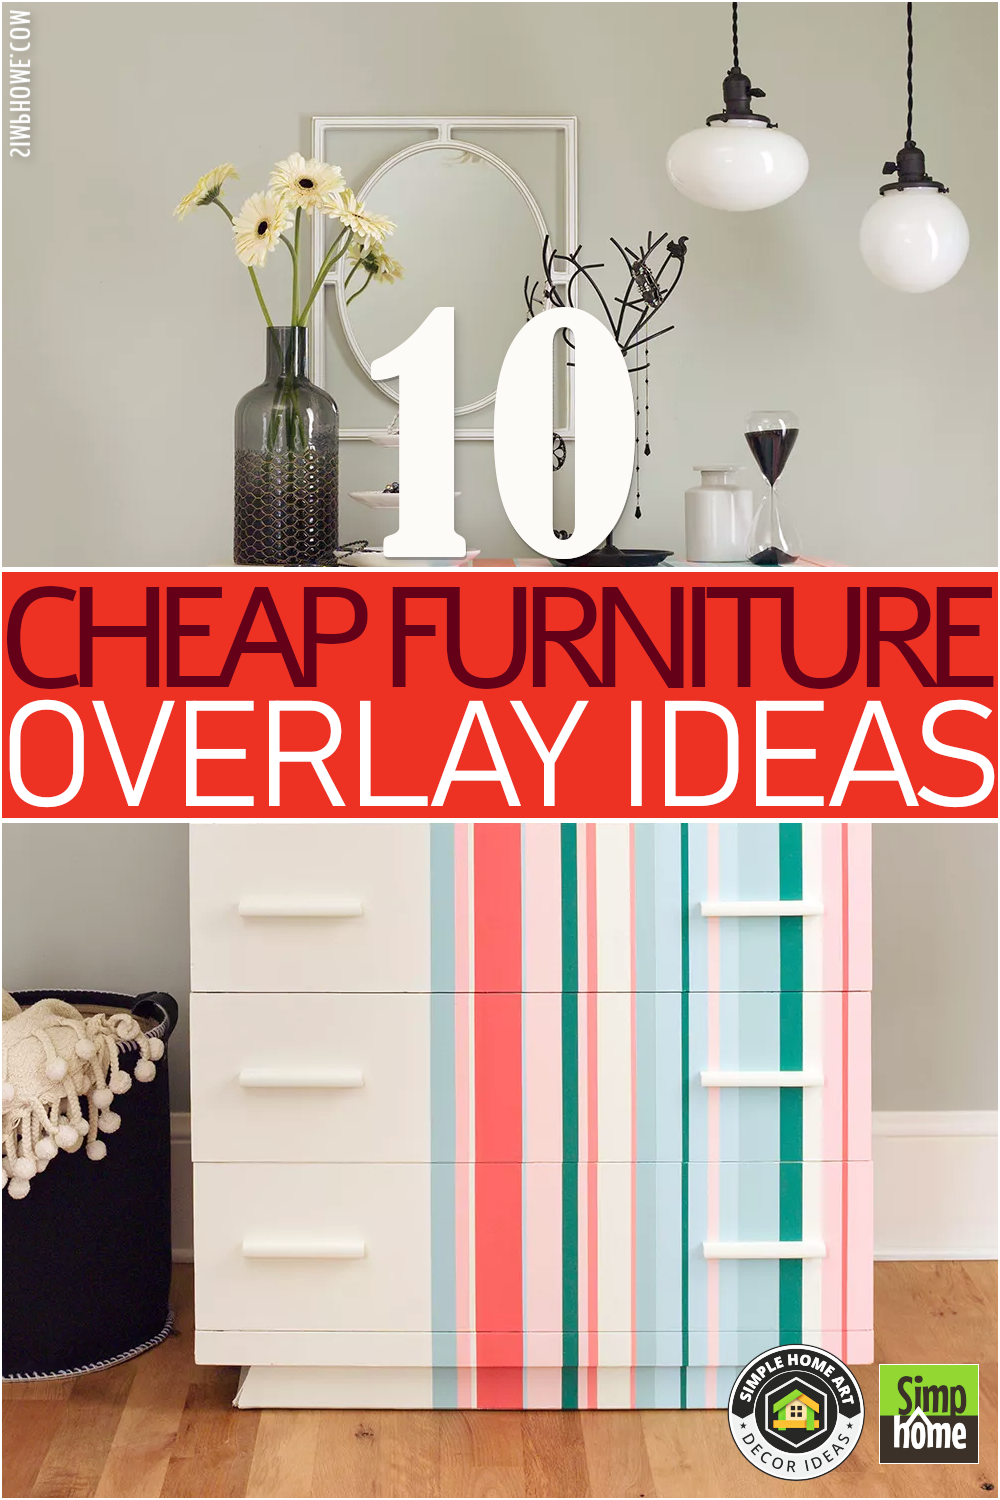
If your current furniture lacks character or is too plain or monotonous, try giving it a new facelift. By adding your personal touch, though not intricate or luxurious, you will be able to complement your home’s aesthetic value. Adding an overlay to your current furniture, for example, will give your furniture the booster it needs to lift your confidence.
Not to forget, you don’t need to spend a lot of money to start and finish new furniture overlay projects. This countdown will discuss ten cheap and easy DIY furniture overlays for you to adopt. As always, check out the Simphome link inside the description to find out all the details.
10 Cheap DIY Furniture Overlays Video
10. Stencilled Overlay
 You can give your boring dresser a whole new look with only a little paint and some practice using a stencil. Begin cleaning all equipment and materials once they have assembled them. Then prime the outside surfaces, inside and outside. Brush on a base coat once the priming has dried.
When the paint is dry, you may give the dresser a distressed look by rubbing it with steel wool. To finish, take out the drawers and stencil the exterior side. The two most common methods are purchasing a pre-made design and drawing your own.
9. Gold Greek Overlay
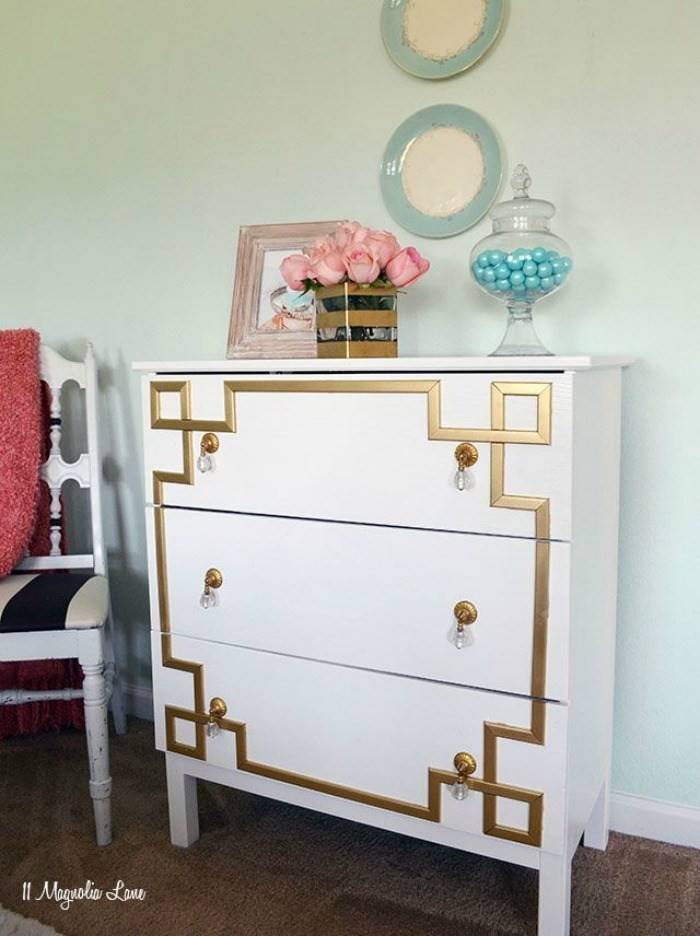 The old-plain white drawer looks more elegant with a Greek pattern and gold accents. You’ll need to sketch up the entire set of plans before re-constructing the furniture.
You should measure the dresser’s dimensions while you draft the pattern. The next step is to round up your equipment and paints and get ready to start to work. Applying a gloss or semi-gloss spray finish to the dresser is highly recommended to astound everyone with the final result.
Separate the screen trim into smaller pieces. Identify the pieces that will be placed in the corners and put a mark next to them. Before you screw them into the dresser, lay them out to ensure you have the proper size and style. And then you should give them a gold coat of paint. Apply glue after all the components have dried completely, then start by putting together the corner pieces. Finally, move on to the rest of the puzzle.
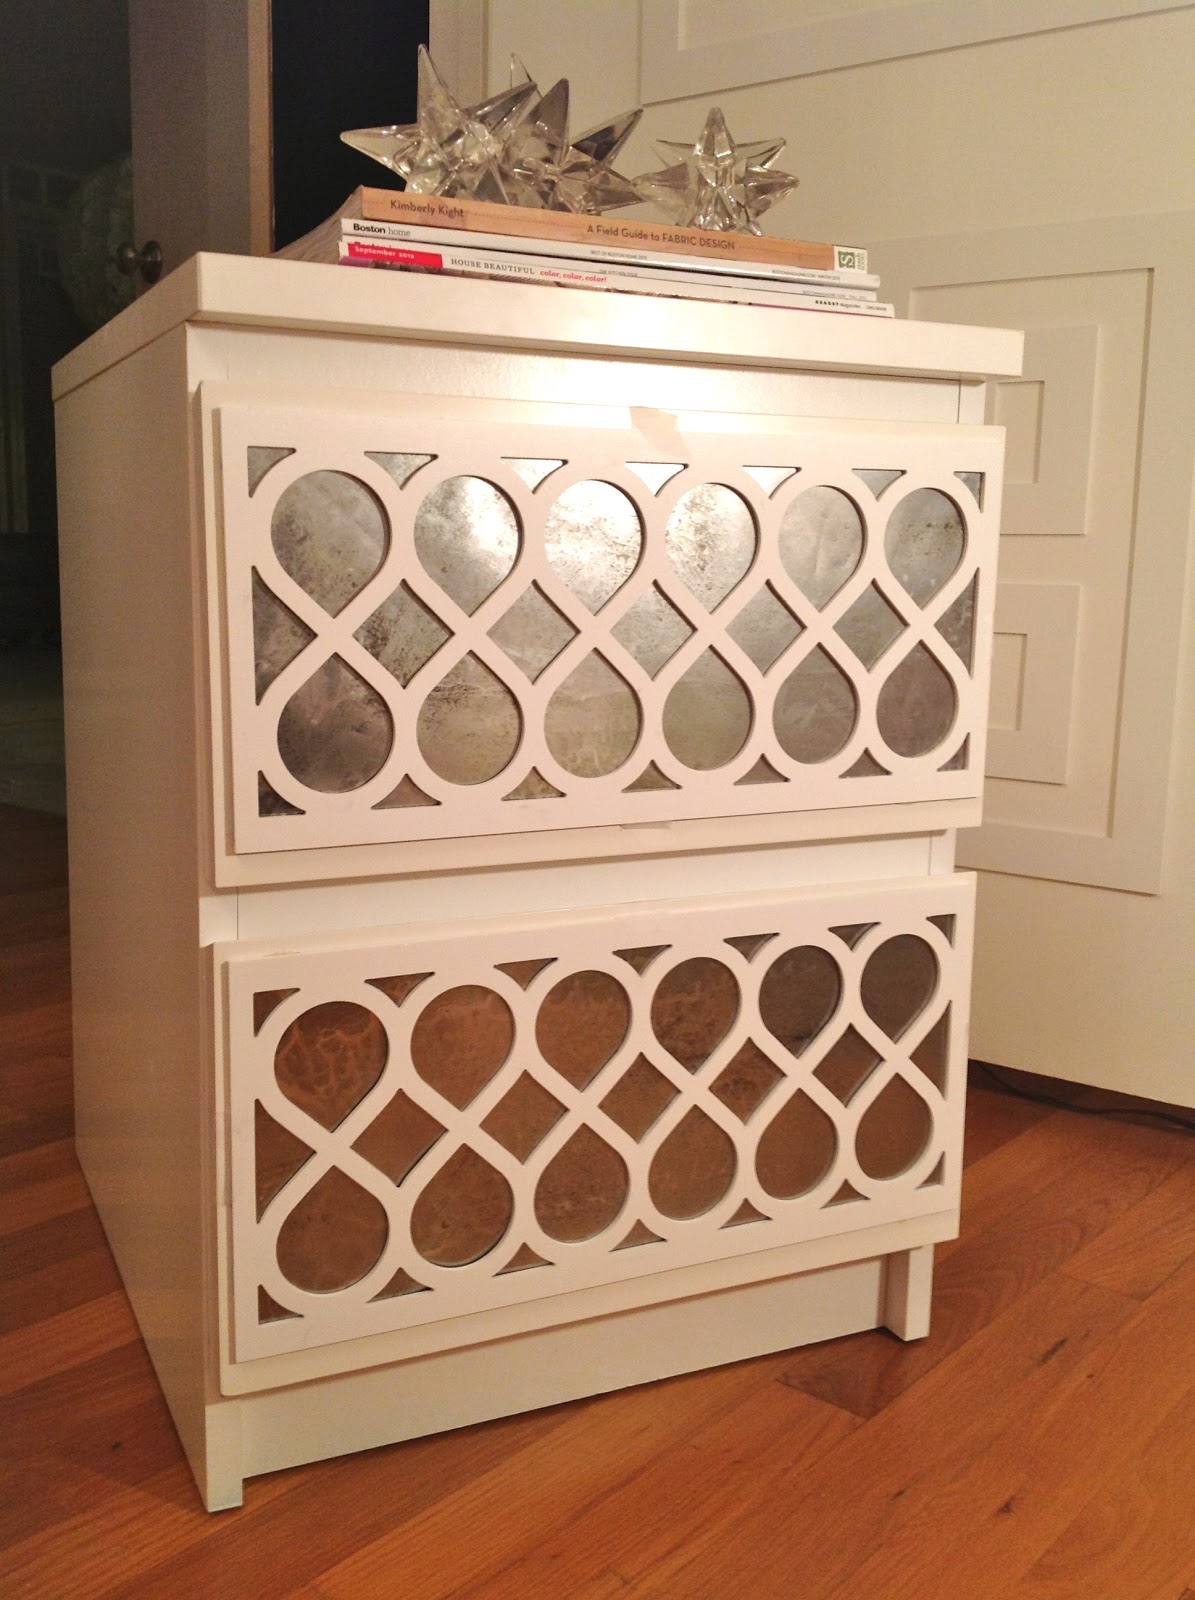
8. Overlay your Furniture with O’verlays
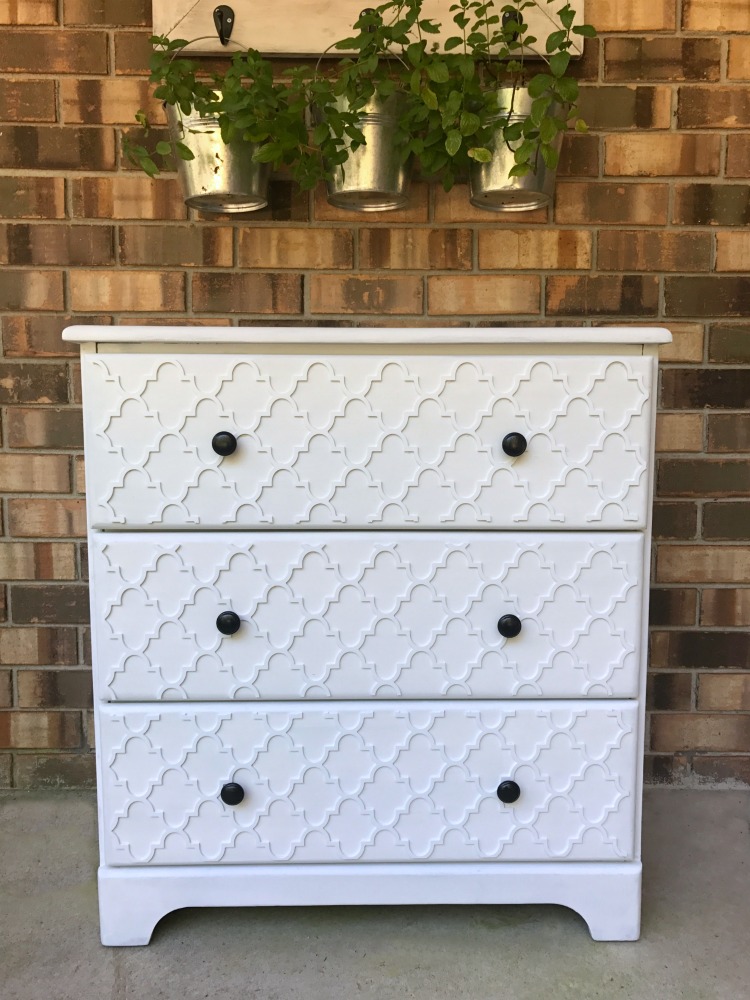 There are nearly infinite designs and sizes available for decorative fretwork panels. The easiest way to personalize your furniture is to choose a lightweight material that can be painted and is easy to work with.
For instance, the dresser featured in the image has a Jasmine design. Myoverlays.com stores sold the item. The product came in white so the buyer could paint and fit it with their decor. You only need to cut the panel to the correct size for your front drawer. Afterward, sever the panel and adhere it to the piece of furniture.
The options for fashionable O’verlay patterns are practically endless. You may dress up your boring furniture with ease. The dresser in the video was given a facelift with a panel of the Jasmine pattern, measuring 24 by 36 inches.
7. The metallic finished Overlay
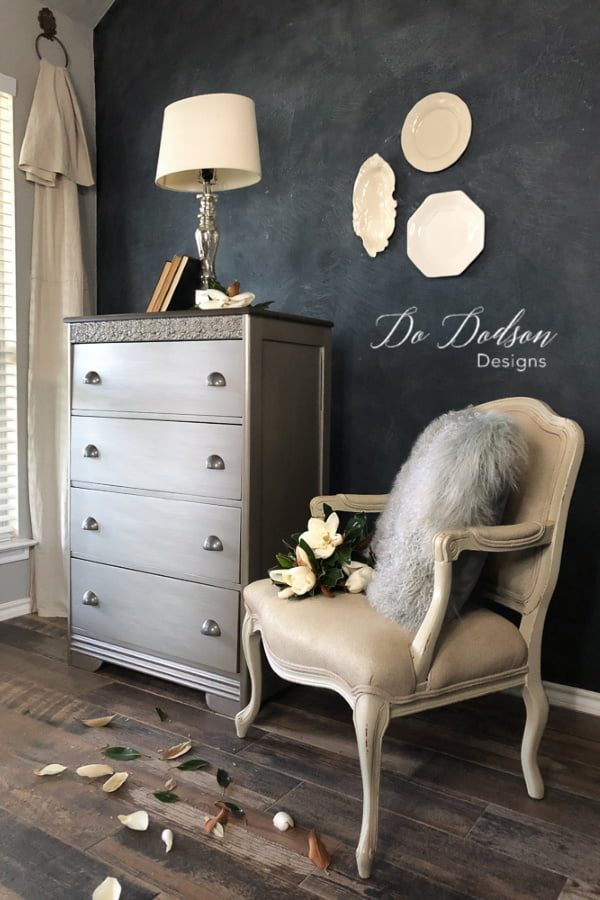 For the basecoat, match the metallic paint hue. Apply one coat of Dried Sage Chalk Mineral Paint. Make sure you have a solid color base coat and that the surface is very smooth before applying metallic paint. Choose the finest paintbrush for the finest finish. Use a Finishing Pad to polish chalk mineral paint flaws. Alternatively, use sandpaper. After metallic paint is applied, lumps and irregularities will stand out and flaw your final.
Metallic paints are not chalky; that’s the reason coverage requires more coats. Apply 2-3 coats over the base coat. Apply metallic paint in one direction with long, uniform strokes on flat surfaces to reduce streaking. Keep your coating consistent because metallic paints are tough and retain patterns based on brushstroke direction.
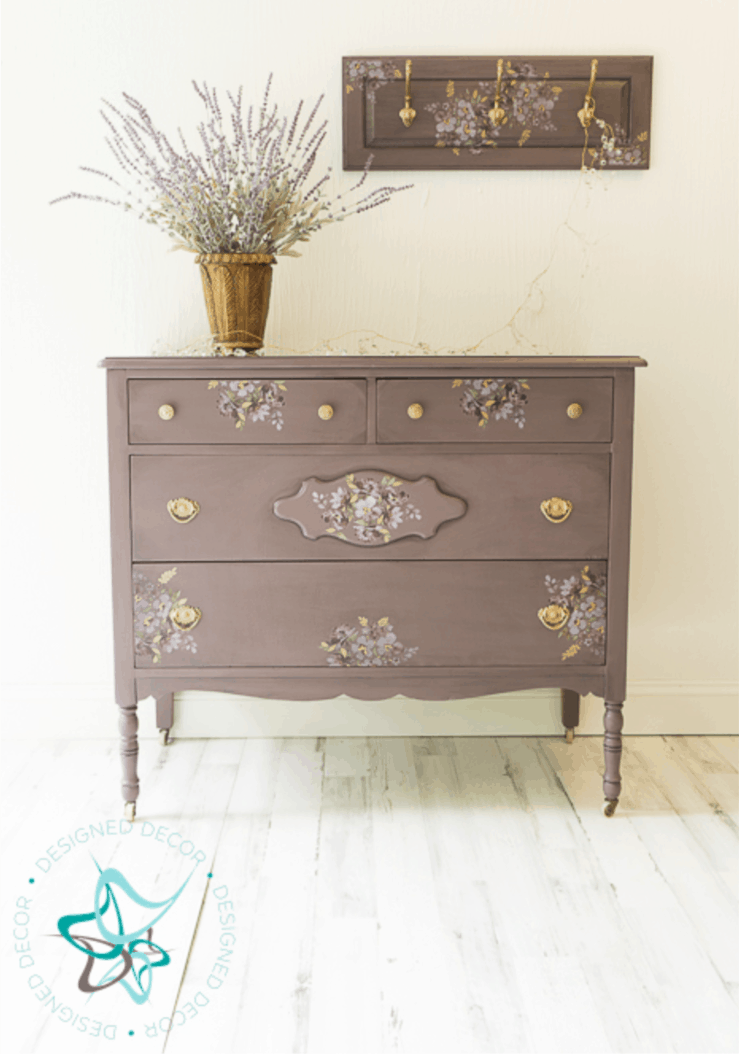
6. The Floral Finishes Overlay
To complete your work,
The following recommendation could be the best for your transformed furniture. It is 10 Small house furniture arrangement ideas. The countdown will optimize your space’s utility without sacrificing the beautification of your new artwork. Go and check it out.
With that said, let’s continue our countdown with
5. Floral Damask Overlay
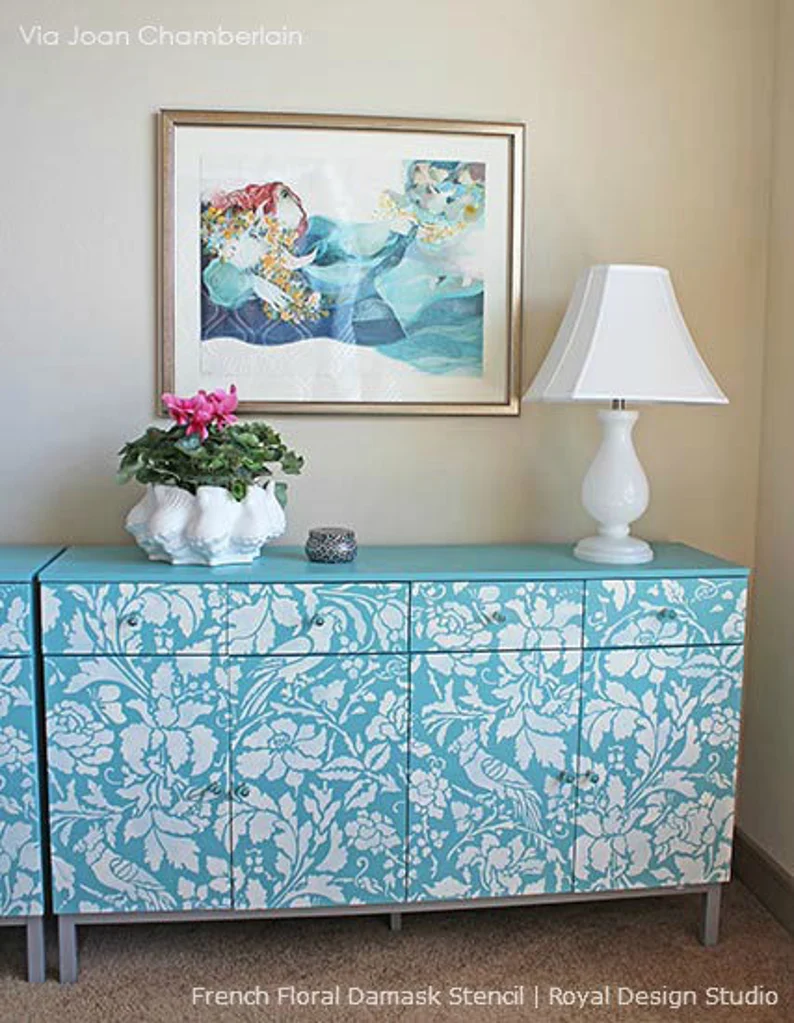 For the project, you need Provence Chalk Paint® decorative paint by Annie Sloan for the exterior to skip sanding the piece. To stencil your working space, use Old White Chalk Paint® applied with a foam roller.
After the stenciling has dried, sand the whole piece with fine grit sandpaper and use two coats of Annie Sloan Clear Soft Wax for the final finish.
1). Don’t strip unless necessary. Kilz, Aquabond, and other bonding primers allow you to sand, clean, and prime over previously finished surfaces without stripping. Annie Sloan’s exquisite Chalk Paint® decorative paint lets you paint brilliant colors on almost any surface with a durable bond and lovely matte finish.
2). Limit your palette. Stick to 2-4 colors to mix patterns smoothly. Combine patterns with different scales. Like fabrics, pair a huge design with a little print. Stripes and checks make a coordinated, fascinating artwork.
3). Conserve your art. Furniture wears out. Protect your time and creative investment using Annie Sloan Soft Clear Wax or at least three coats of a satin-finish water-based varnish (the oil will be yellow, so avoid it on white and light backgrounds).
4. Geometric Pattern Overlay
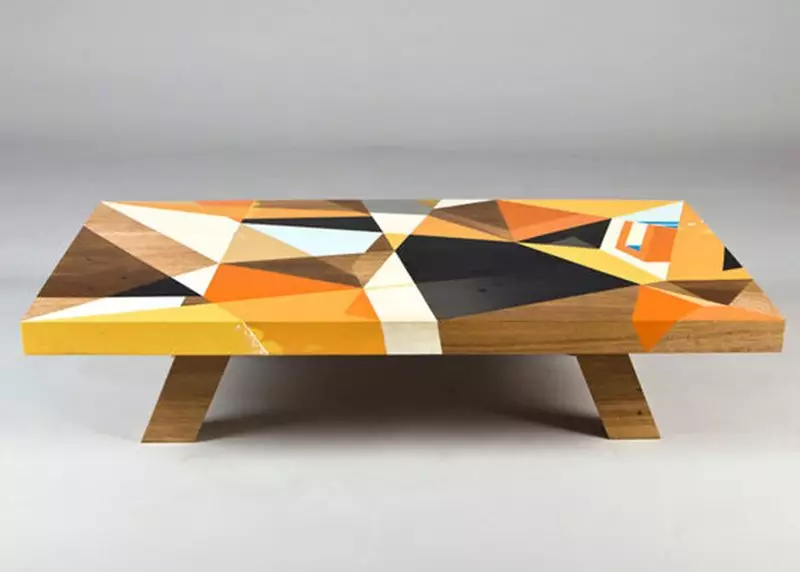 When you use geometry with confidence and assurance, you can produce a stunning overlay. It’s a big job, but a little tape and a stencil will make a big difference. Don’t let your mind wander and come up with a new take on the design.
To begin, pick an item of furniture you’d like to alter. Then, prepare it by scraping off any peeling varnish or loose pieces of wood.
You’ll need to sand the object before applying new paint to it. Then, cover the entire thing with a base coat. Next, print out your pattern and color it digitally.
Next, tape the grid and label your items with lines. Use tape that won’t peel the primer off. Then secure it with tape beyond the border. Next, create a painting. Take care that the paint doesn’t leak through the tape. When it’s done, peel off the tape and continue to the next color.
3. A Glow in the Dark Overlay
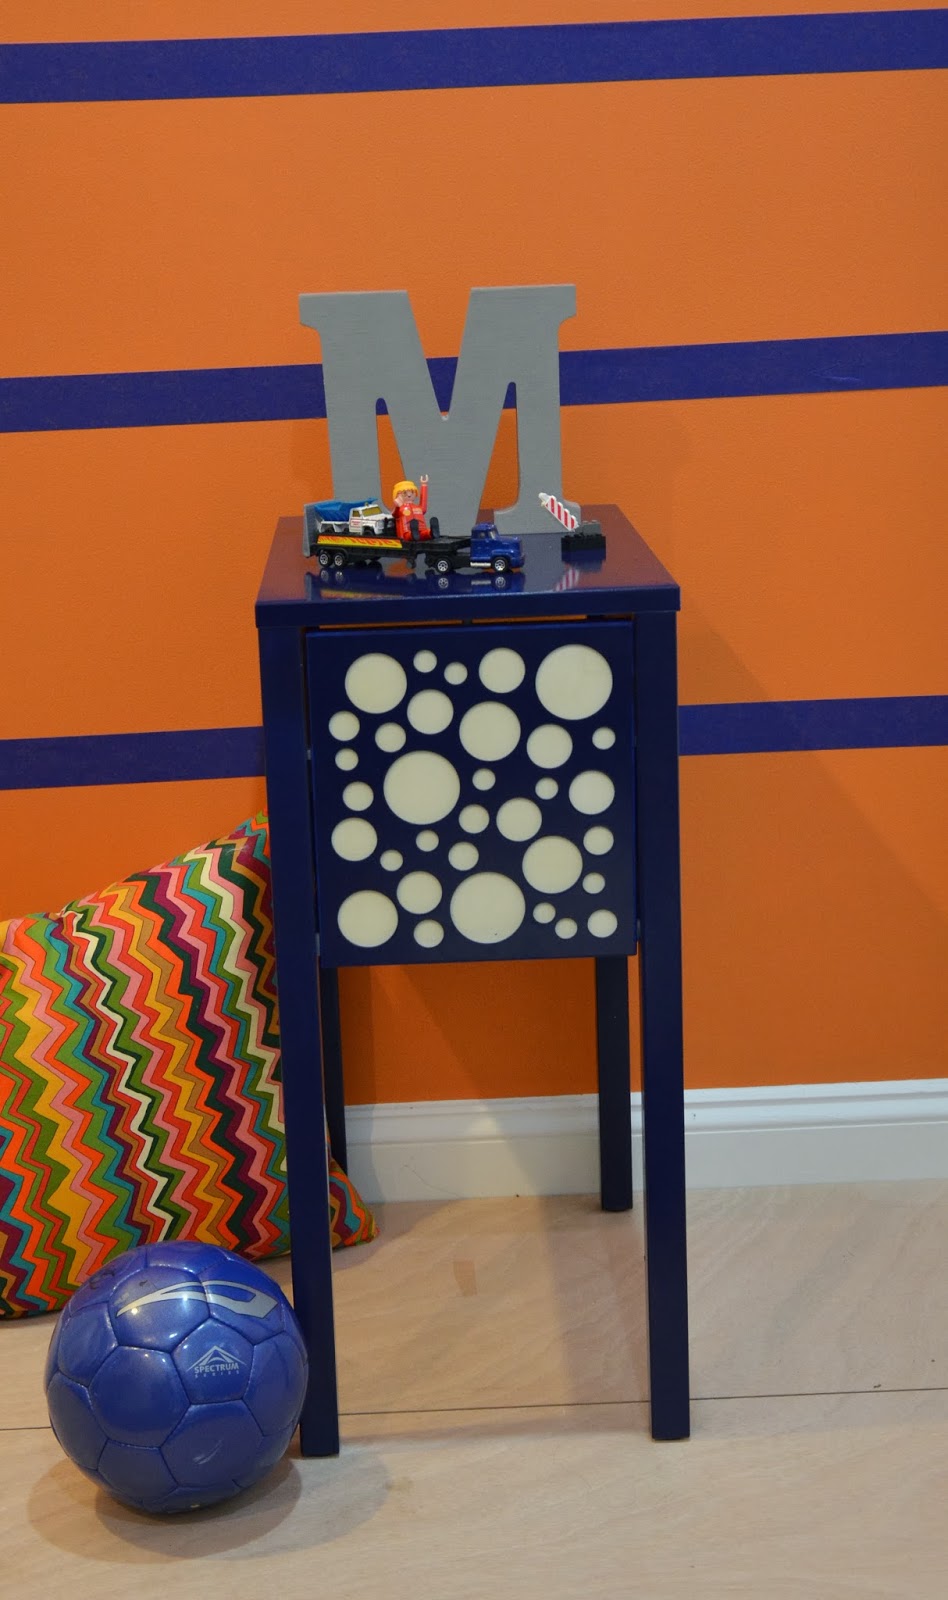 Prime your nightstand with “Gripper paint,” then remove the front center panel so you can paint it separately. Following the image, you need to use Navy blue paint to give the O’verlay panel a uniform look with the bedside table. Make sure you don’t get any paint on the panel that faces out when you paint the nightstand. This accent will emit light in the dark.
You can finish the panel’s frame the same color as your nightstand. If you want to keep the front side clean, tape it down. Next, spray the inside of the center door panel of your dresser with Rust-o-glow-in-the-dark Leum’s paint to make it glows. The O’verlay panel is then glued in place using adhesive (LiquidNails).
2. A Wallpapered Overlay Idea
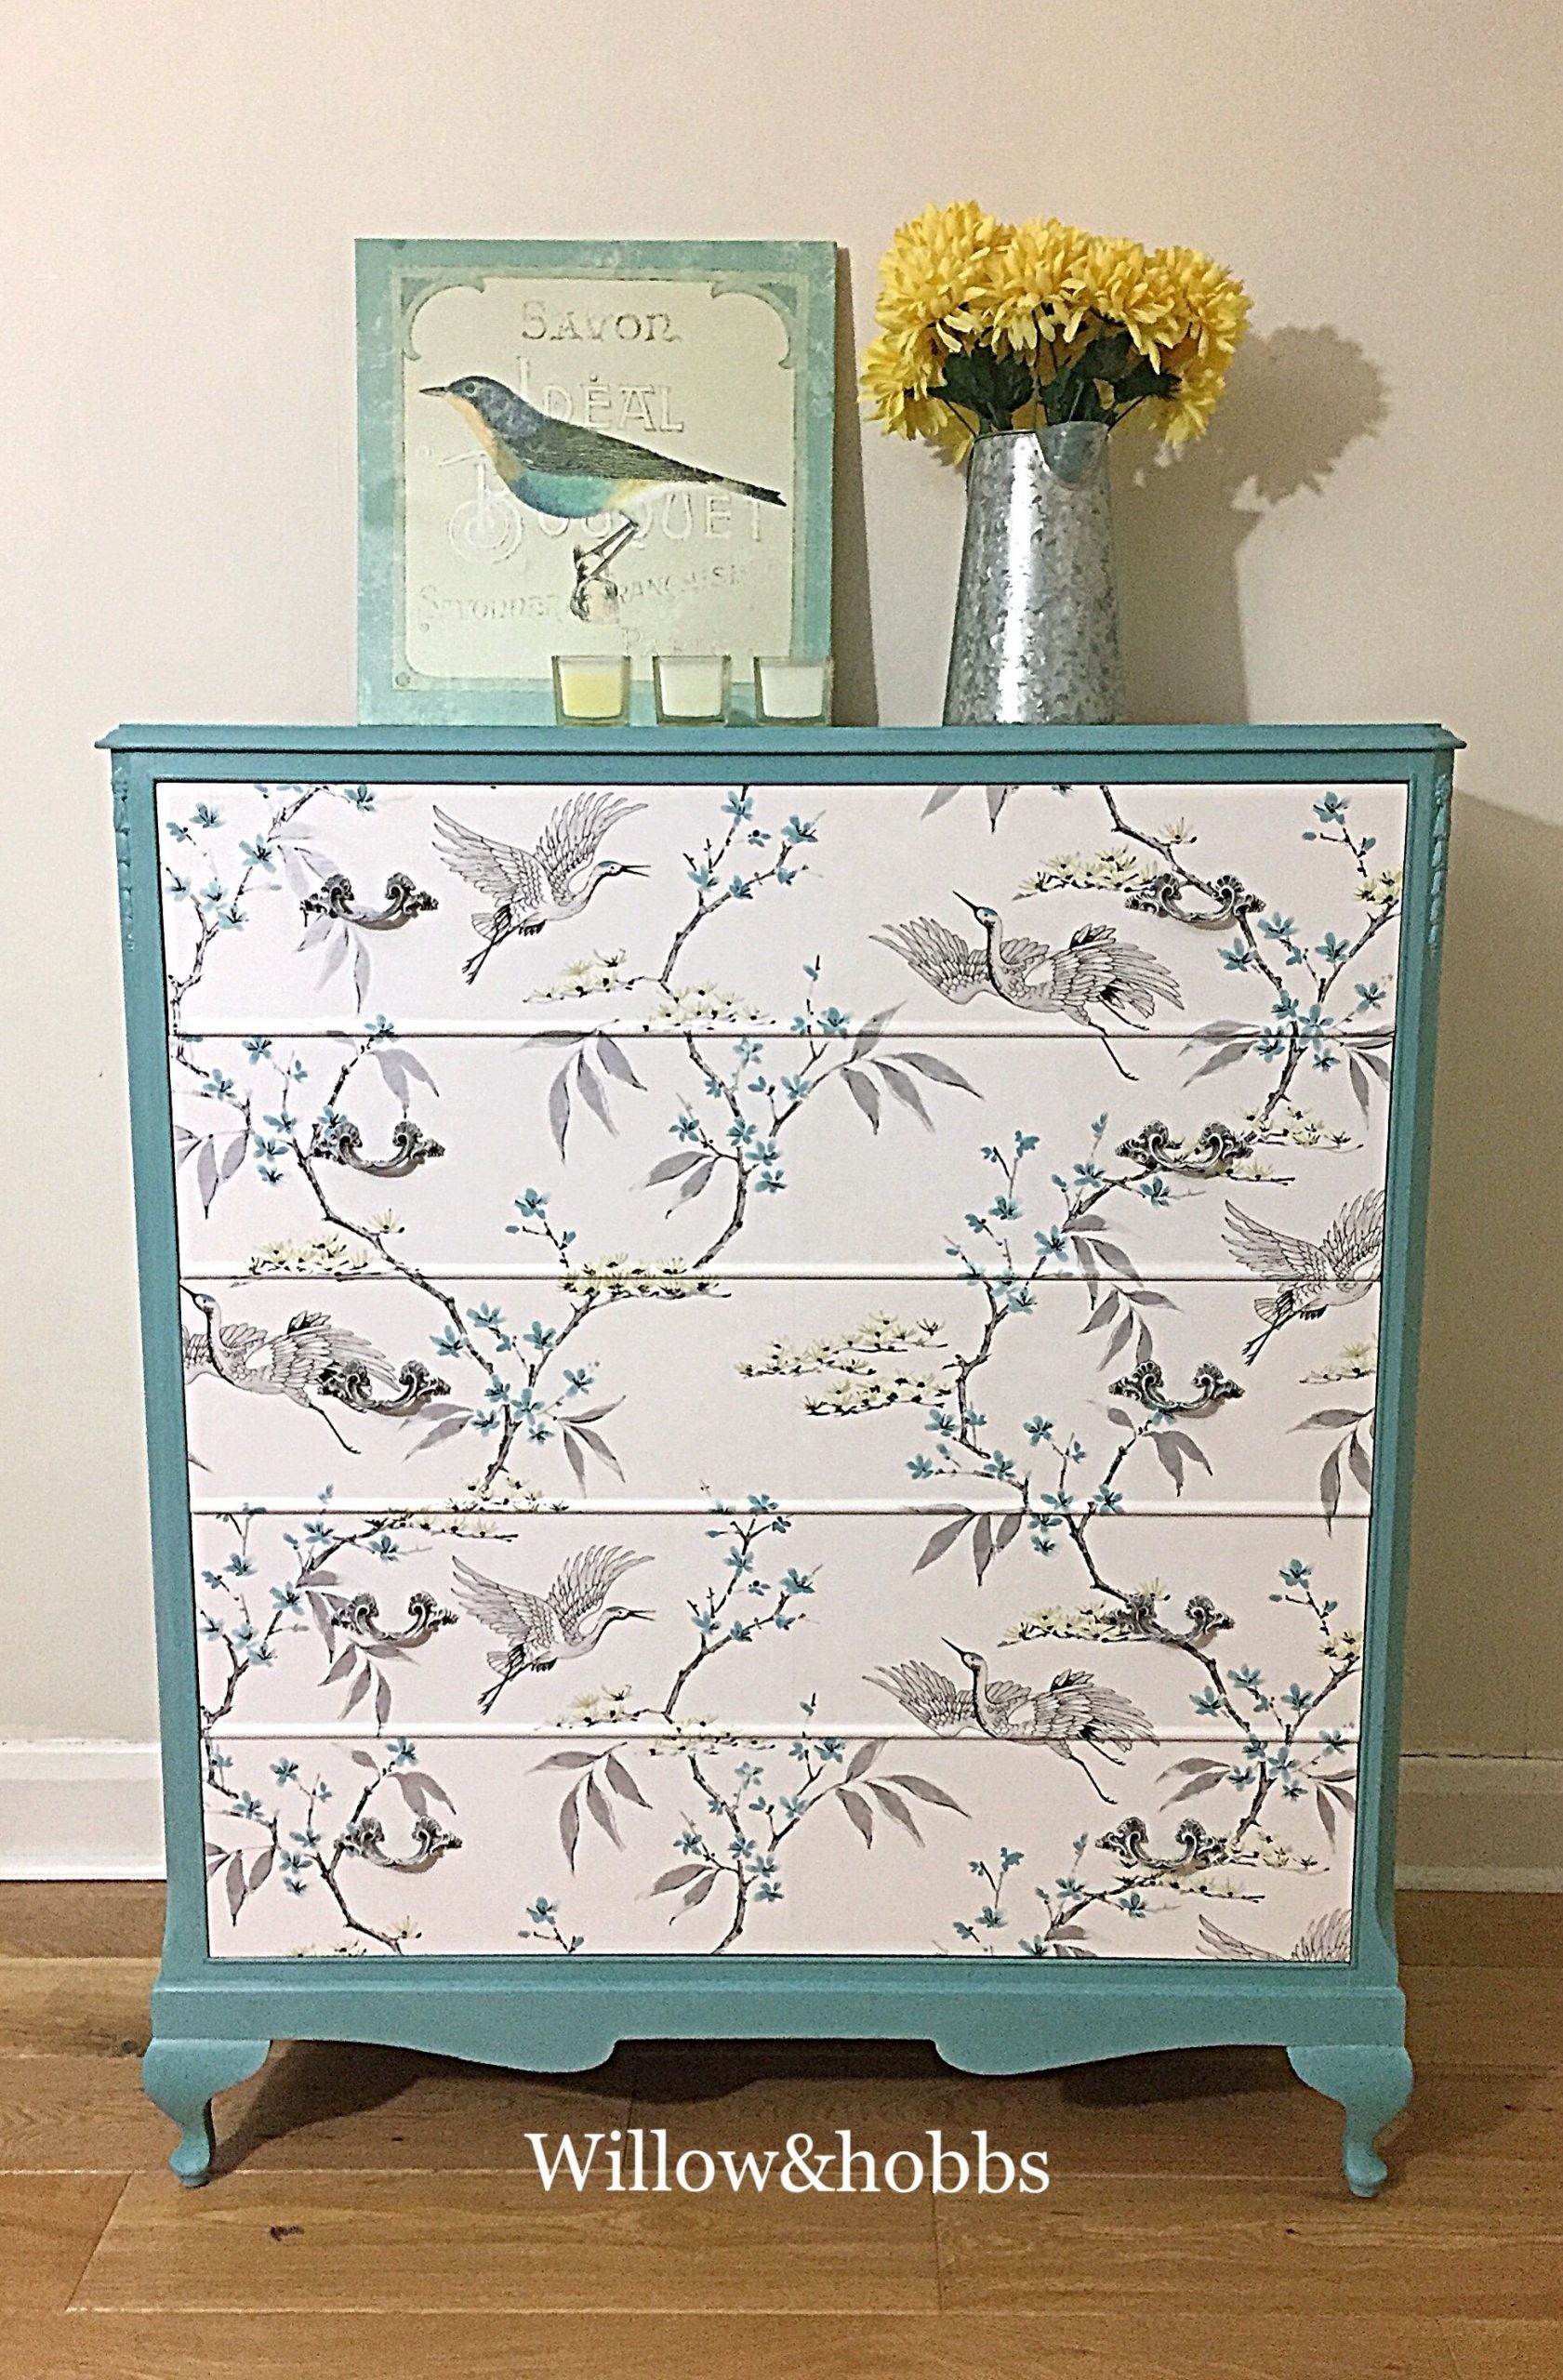 Use wallpaper with a print, pattern, or texture that you adore to give a worn dresser new life. Ensure the front of the drawers is smooth since the wallpaper might not look good on a textured surface. The beauty of utilizing wallpaper to revamp a dresser is that a tiny, affordable roll may cover four drawers.
You can give the dresser a good foundation by sanding, priming, and painting it. Use a utility knife to cut the wallpaper to size after measuring it. Use spray glue and make sure there are no air bubbles before attaching. Optional, visit a second-hand store to find unique vintage knobs for your recently refinished dresser.
1. A Stripped Overlay Idea
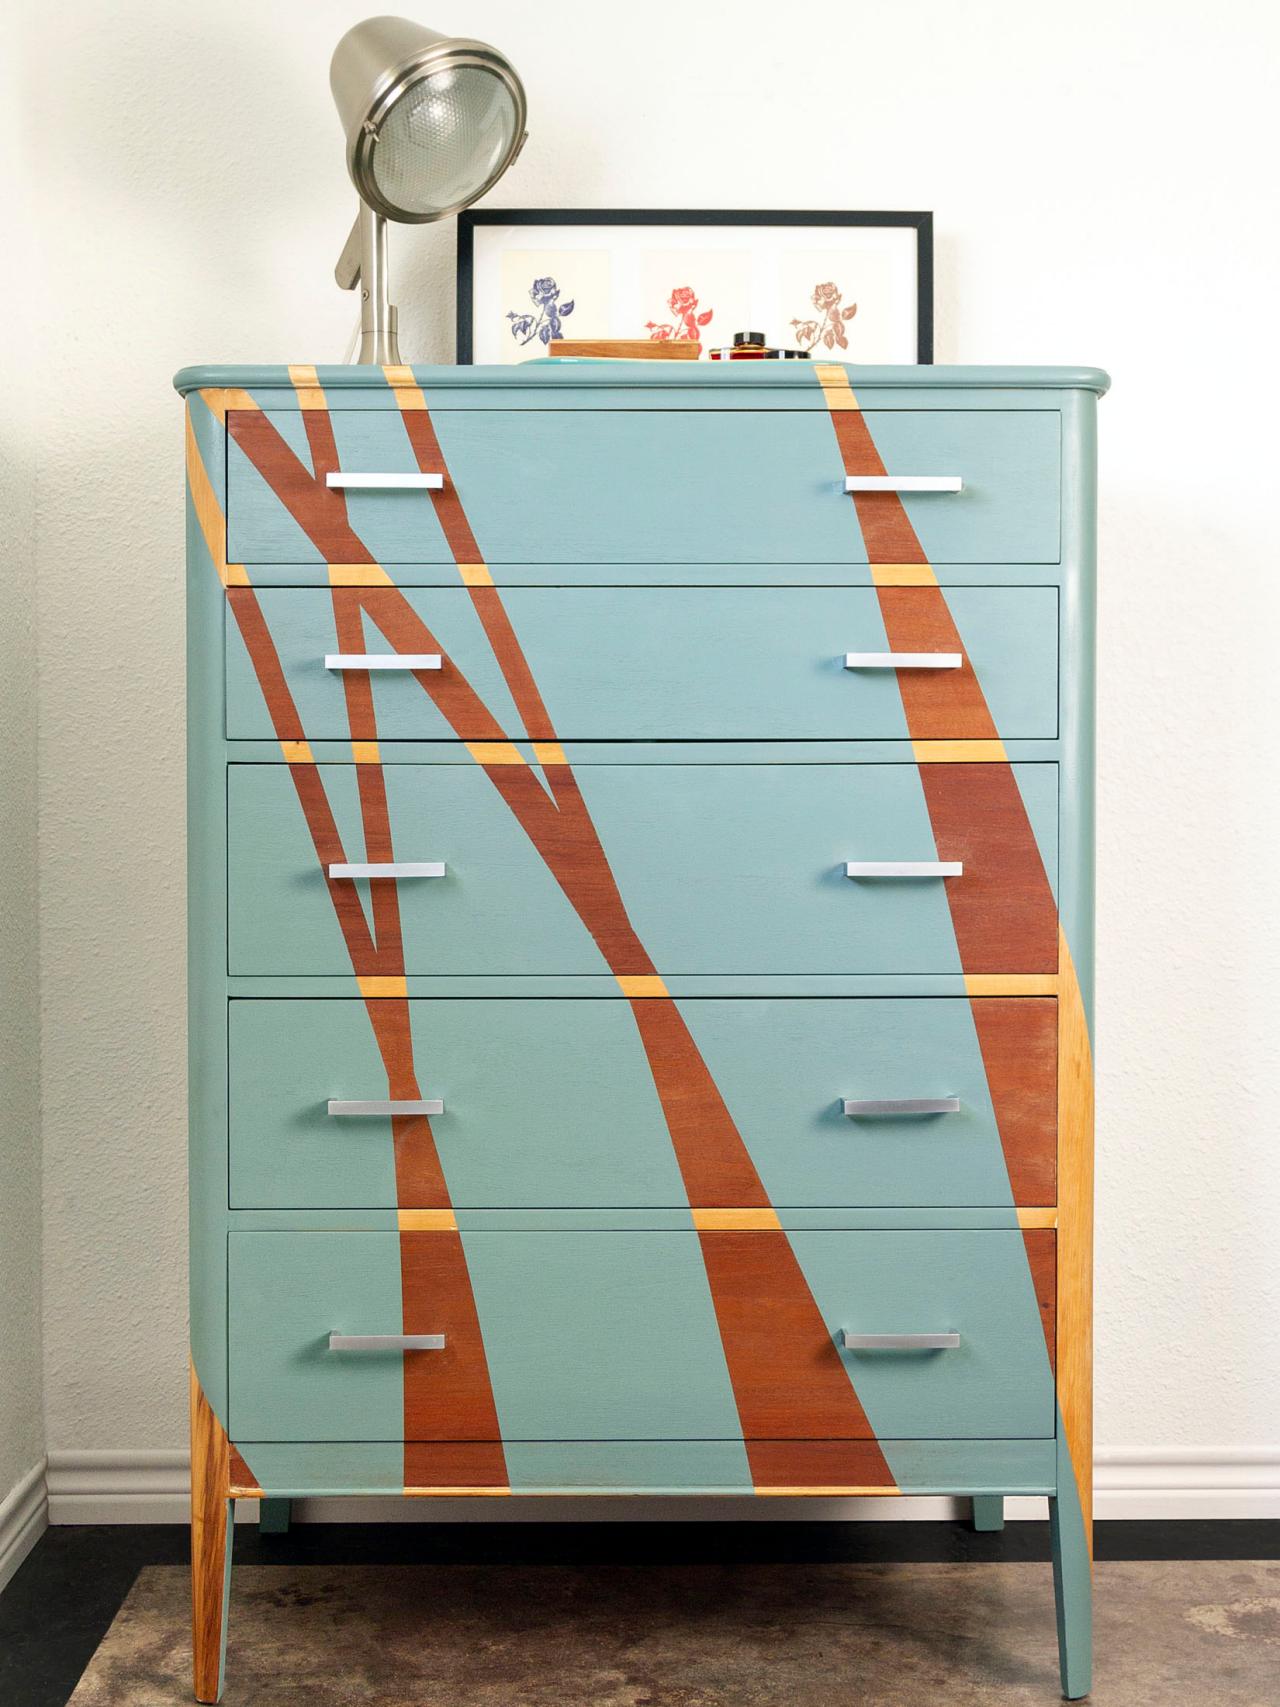 Stripes often give boring furniture a daring new look. As a bonus, you can bring the design with minimal effort and expense. You can use these steps to add a graphic slash to your furniture in any direction you desire, whether that be horizontal, vertical, or diagonal.
Priming and sanding should be your first order of business, as usual. Then, using painter’s tape, make parallel stripes. Adjust the tape’s width and spacing to your liking. Use paint colors that are in the same family as one another and one that stands out to produce contrast. You should then use paint to fill in the stripes. When the paint is dry, take off the tape and repeat the process with the other colors.
References:
10. Thisoldhouse.com
9. 11magnolialane.com
8. Justalittlecreativity.com
7. Dododsondesigns.com
6. Designeddecor.com
5. Royaldesignstudio.com
4. Kingstonlaffertydesign.com
3. Myoverlays.com
2. Bhg.com
1. Bhg.com