Without gutting your kitchen wall, repainting it, or going on an all-out splurge, these makeovers tips can transform your kitchen into something special.
So please don’t go anywhere as I present to you twelve excellent compilation kitchen updates from Simphome.com that are also friendly to the pocket.
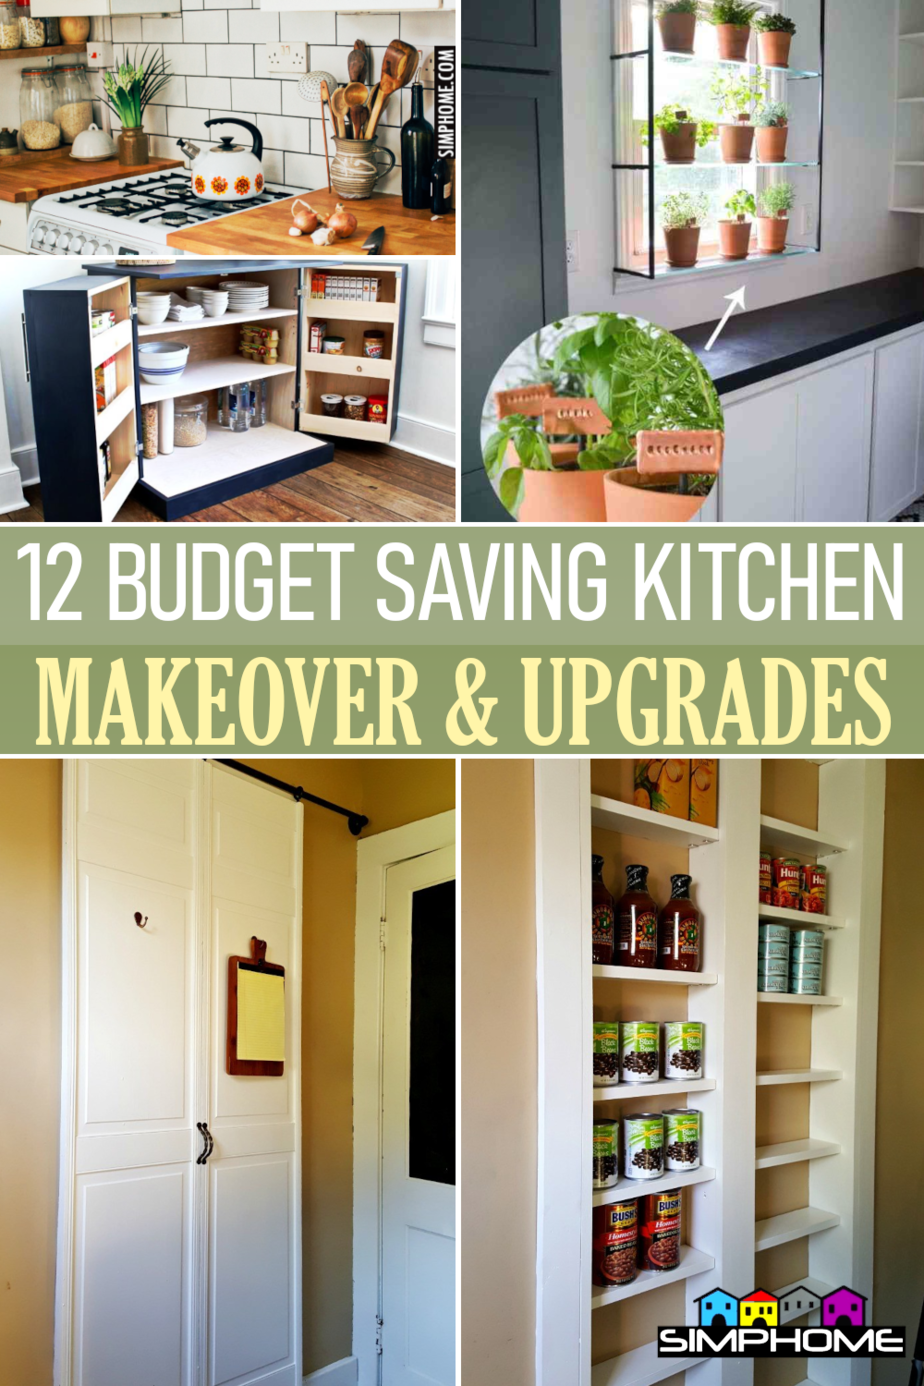
🔊12 Budget-Saving Kitchen Makeover Video:
List Entries
12 Kitchen Sink Transformation and Organizations
12 Kitchen Pantry Organization Systems
125 Kitchen Makeover Ideas for 2020 and Beyond
12. Budget Saving Secrets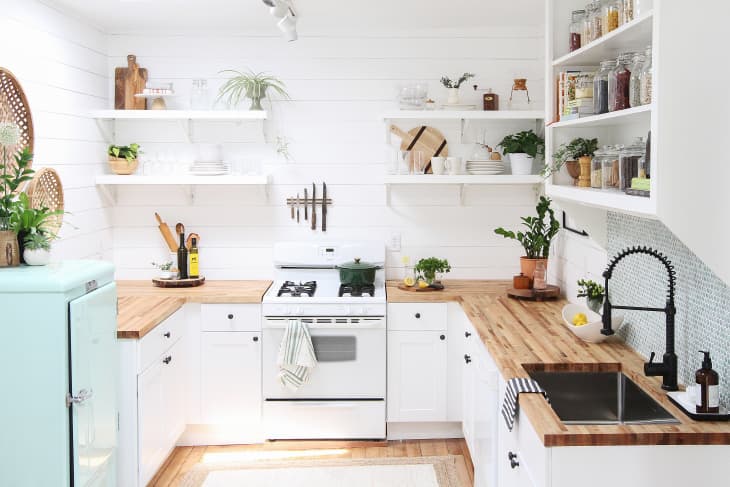
A surefire way to rack up expenses is by moving the electricals and plumbing around. Doing so would mean additional labor costs.
It would also mean ripping apart your walls and floors, resulting in more material expenses. As much as possible, design your kitchen around the old connections.
Not everything has to be brand new. Keep the old but excellent features and appliances. Incorporate as much open shelving as you can into the design. And choose more affordable materials for the updates.
With some good old fashioned elbow grease, you can complete more DIY makeover tasks and save a ton from expenses.
11. Transform your Butcher Block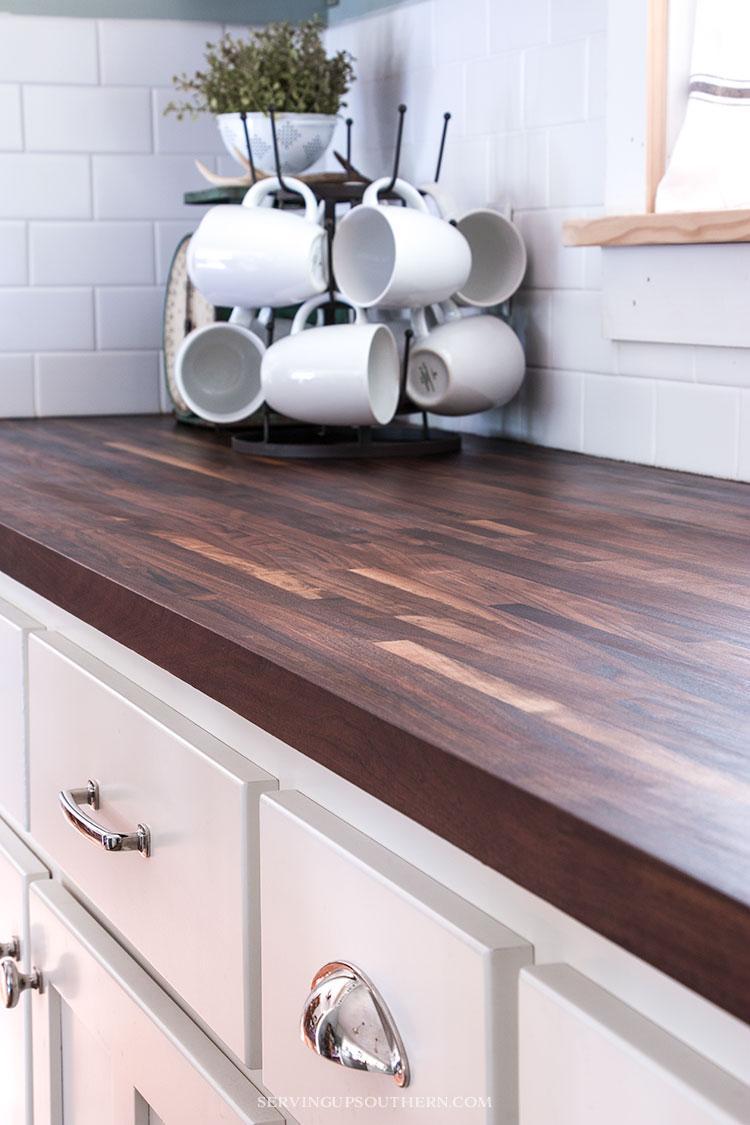
Wooden surfaces are particularly vulnerable to scrapes and scratches. Over time, countertops will take a beating.
Here’s a great way to protect your wood countertops, keep them looking fantastic, and make them last longer.
So what is this wonder product? It’s called “Half & Half” from The Real Milk Paint Co. It’s a pure 50-50 mixture of tung oil and orange peel solvents.
First, lightly sand not only the damaged areas but also the entire surface with 150 grit sandpaper. It’s best applied with a sponge brush. Pour some of the liquid on top and brush it evenly across the whole countertop.
10. Try This Super Budget Rental House Kitchen Makeover
If you’re living in a rental and thinking of sprucing up the kitchen, you want to spend as little as possible.
It’s smart to negotiate a deal with your landlord. In this case, the residents convinced the owner to change the ugly pink plastic countertops. The wooden tops turned out to be the most significant improvement.
They painted the walls with white trade emulsion paint bought on the cheap. They also chose white for the cabinet doors.
Instead of adding cupboards, they went for more affordable open shelving. A few more inexpensive touches, such as the subway tile backsplash, completed the massive transformation.
9. Build a New Pantry Between Wall Studs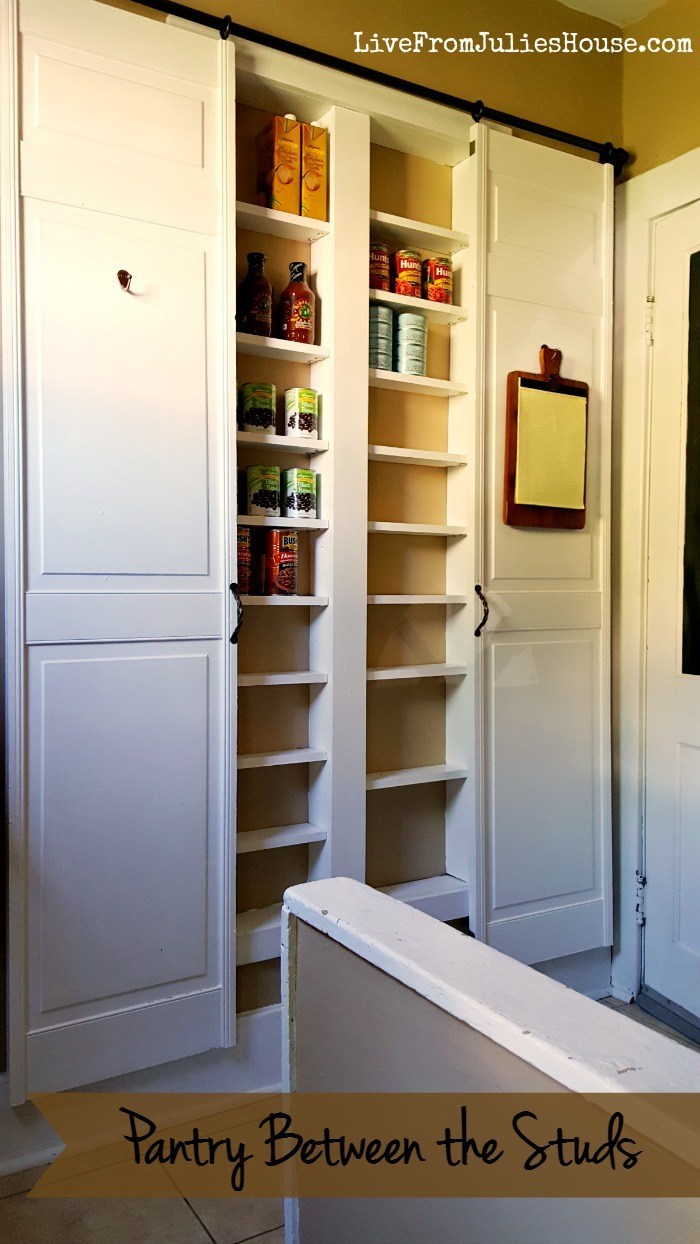
When you run out of options, sometimes you have to take extreme measures.
Take, for example, this small kitchen. It’s filled with all sorts of space-maximizing solutions yet still left no room for a proper pantry.
The owner wouldn’t be denied and came up with a nifty idea. Why not rip out the drywall and use the space between the studs for shelving.
It was a simple matter of adding trims and backing for a more attractive built-in look. After that, all the shelves were added. After painting all the shelves and frames white, they gave a more distinct style with white double barn doors.
8. Craft a New Concrete Countertop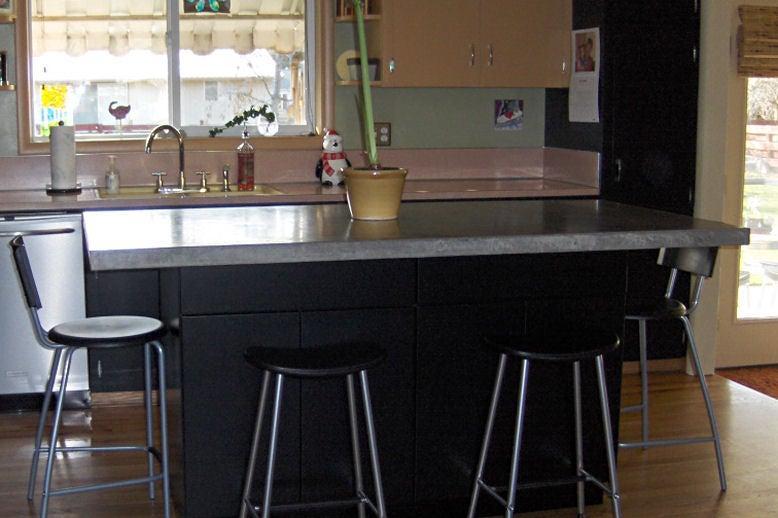
Cut four long slats 2” wide from an 8’x4’x3/4” melamine. You’ll use them as sidings in a rectangular mold for a concrete island countertop. Use the remaining melamine piece as the base and build the form using 3” screws.
Lay down a grid 1/8” mesh tied with wires to 3/8” rebar frame near the edges. Insert temporary 1” foam spacers underneath to raise it.
Tie the rebar to 1-5/8” drywall screws drilled around the outside of the sidings and spaced 16” apart. Once you’ve poured the concrete, cut the all protruding wires and push the ends into the still wet mixture.
With a long straight board, screed the surface with a sawing motion. Begin tapping all around the form with a rubber mallet to remove any air bubbles. Use a float to smoothen the concrete.
Then wait for the concrete to cure about 7-10 days before you polish it by sanding. Finally, seal it with coats of urethane.
7. Install a Docking Drawer Outlet (Play Video)
To install an outlet into a docking drawer, unbox the outlet and tear off the included template. Remove the drawer and stick the template with tape in the center at the back. Drill the four holes.
Remove the template and draw the lines of the cutout using the holes as guides. Use a jigsaw to cut out the rectangular hole. Then put the drawer back in.
Next, insert the outlet from the back and secure it with screws. Screw the mounting bracket inside the back end of the cabinet. Ensure there’s a smooth motion when moving the drawer.
Finally, attach the cover plate.
6. Craft This Unique DIY Freestanding Kitchen Pantry Cabinet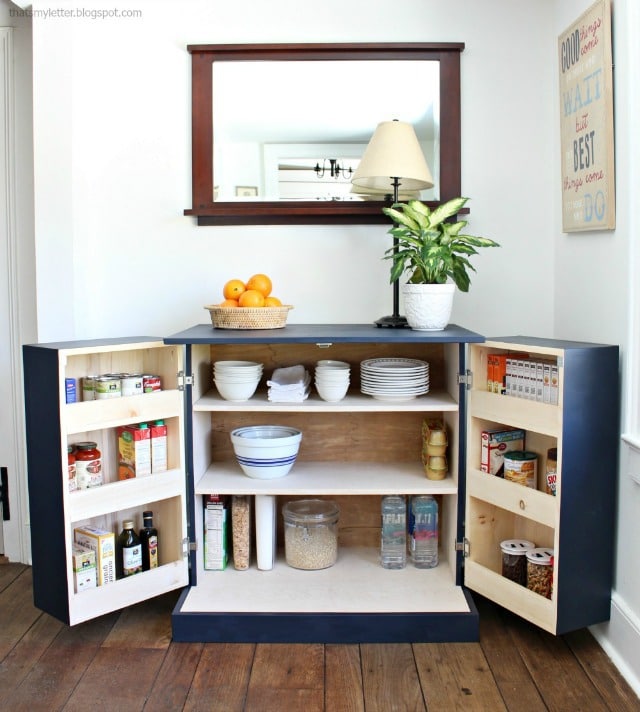
Use 1-1/4” pocket hole screws, brads, and glue to assemble this nifty pantry Cabinet.
The side and top panels and lower shelf are of 3/4” plywood 15” deep. There’s a second height-adjustable shelf attached to the sides via predrilled holes.
Mount this frame at the backend of a square plywood floor with notches for the side panels. Attach a 1”x4” base under the cabinet. Next, attach a plywood top the same size as the base. Cover the back with 1/4” plywood.
The doors are mini cabinets flush to the plywood floor. They each have two shelves with 1”x3” rails.
5. Complete Your Walk-In Kitchen Pantry With a Garden Window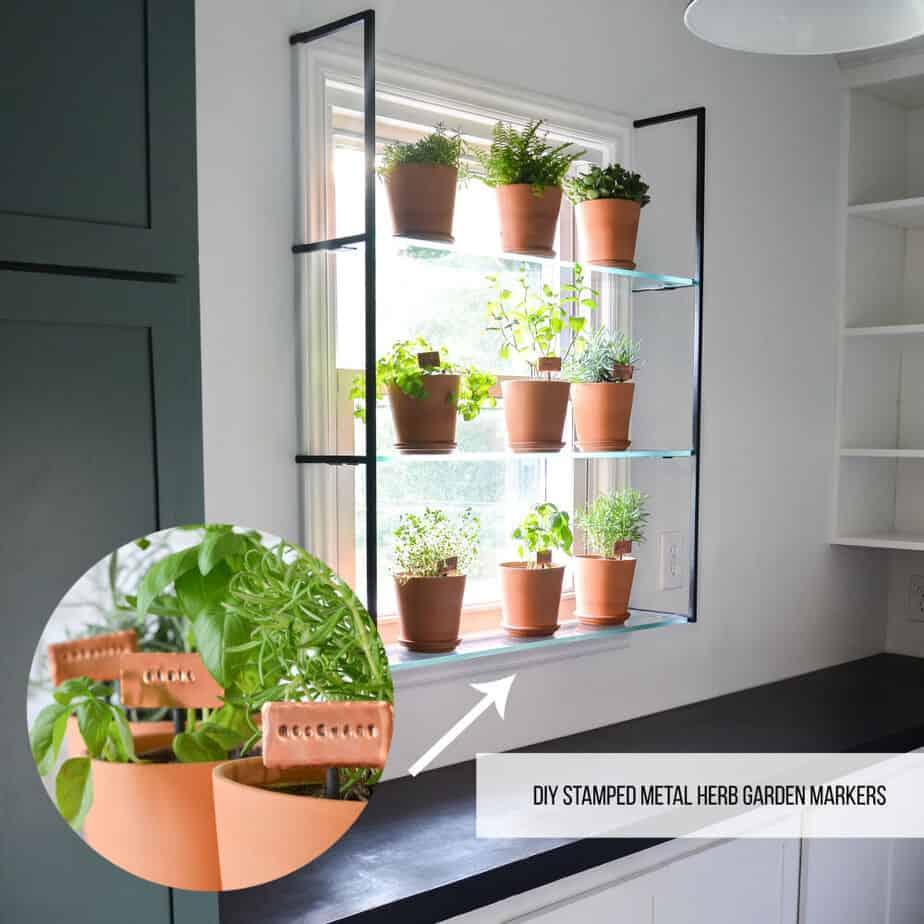
This beautiful garden window will give life and add character to any walk-in pantry.
You order the shelf brackets at the Etsy shop and have them custom made and closely following your specifications. These brackets are of 1/2” black square tubing and installed on the sides of an existing window.
They hold three included glass shelves cut to the width of the window frames. You can arrange lovely potted plants that will give the space a more pleasant vibe.
The bright natural light coming in would make an excellent backdrop for the plants.
4. How to Clean Calcium off Your Kitchen Faucet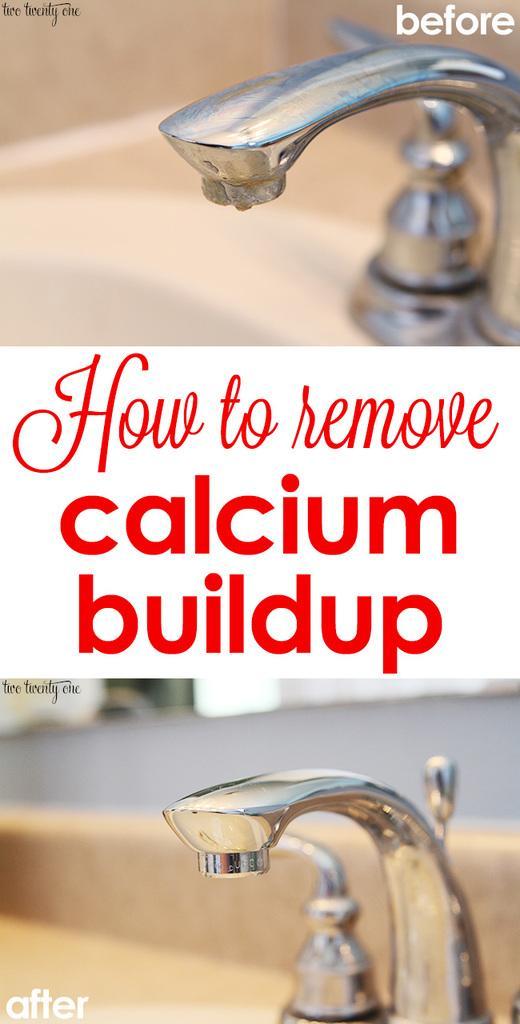
Calcium buildup on your faucet can turn ugly if left unchecked.
It’s a common occurrence suffered by neighborhoods with hard water concentration. Thankfully, there’s an effective cleaning solution to get rid of it.
It’s called CLR or Calcium Lime Rust.
Fill a small plastic bag with enough of this liquid. Secure the bag with rubber bands around your faucet and let it soak.
After a few hours, remove the bag, wipe off the remaining buildup with a rag, and voila! You have your shiny faucet back.
Use a Magic Eraser for better results than a rag.
3. Give Your Kitchen Peninsula or Island a Shiplap Look for Under $25!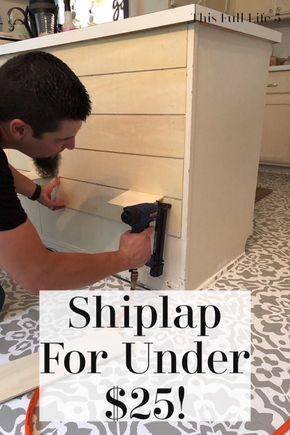
Instead of using expensive shiplap boards for paneling, you can buy an 8’x4’x1/4” plywood for around $23 and achieve a similar look. If you don’t have a table saw, have the store cut the slats to your specifications.
After that, it’s all a matter of sawing the pieces you need as you nail them to the island or peninsula. You can position them vertically or horizontally. The choice is yours.
Use scraps of 1/4” plywood as spacers between the slats. When finished, use caulk to conceal unwanted gaps and nail holes. Finally, paint it to the color you want.
2. Build This DIY Mobile Pantry Cabinet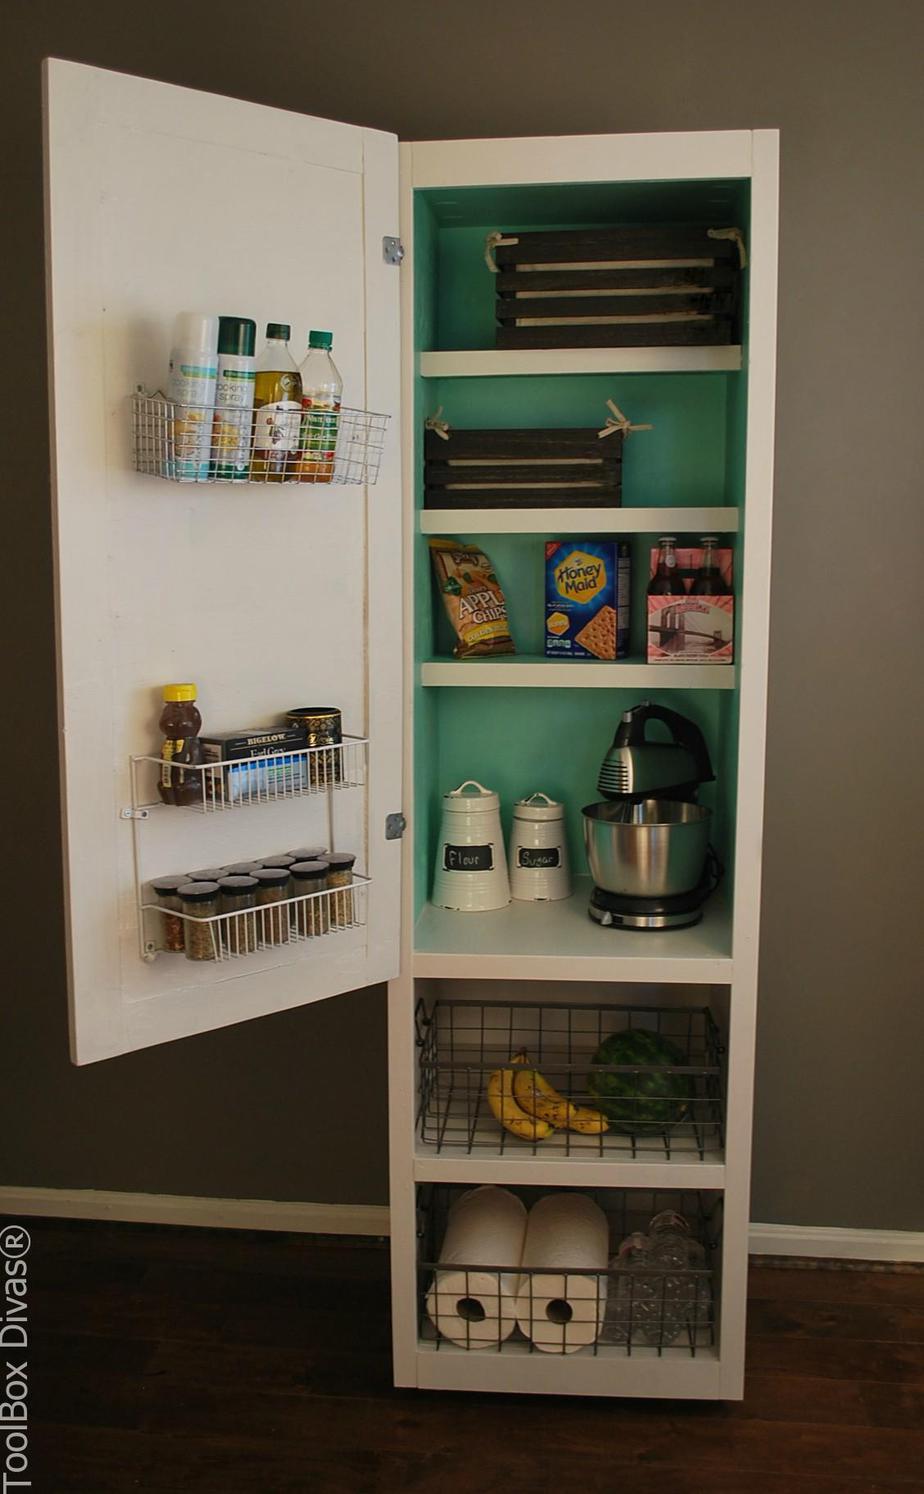
If you’ve run out of space in your pantry to store small appliances, a convenient mobile pantry cabinet will do the trick.
It has three recessed shelves behind a door and two open shelves flush to the face below it. The cabinet floor sits about 3” above the feet.
First, cut the frame panels and shelves from 3/4” plywood. Assemble them with glue and pocket hole screws. Use brads to cover the bottom with a 1”x3” trim and add 1”x2” trim to all front edges.
The door covers the upper face, so cut a 3/4” plywood piece to size and add fake 1”x3” Shaker style frames. Finally, install four casters under the cabinet floor.
Lastly, Number 1. Magical Transformation From an Office Desk to an Island Counter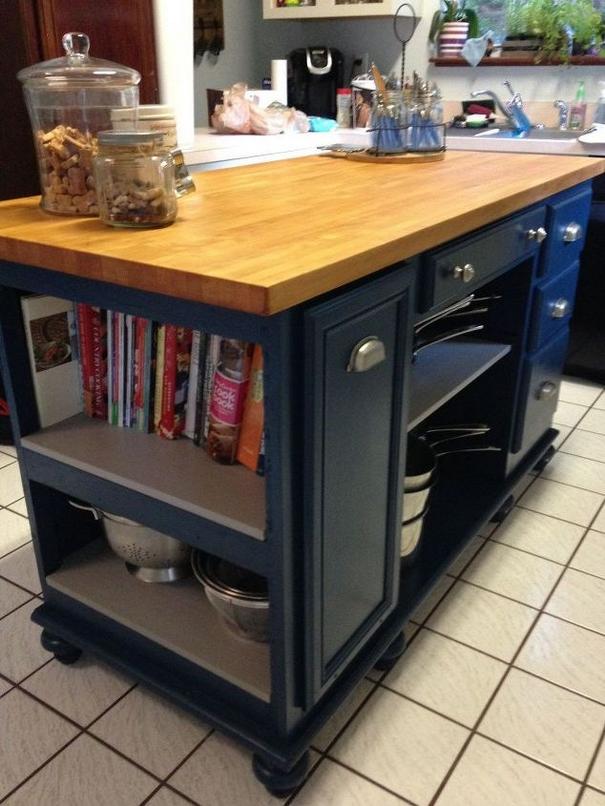
This last DIY transformation isn’t only fabulous, but it’s also practical. If you have an office table you no longer use, you can turn it into a kitchen island counter.
Remove the top and attach it to the bottom to serve as a base. Install a butcher block countertop and set the island on eight bun feet.
Remove the left panel and replace the drawers on that side with shelves. Also, add one under the middle drawer. Next, add shiplap panels at the back and right side.
Paint everything below the butcher block a dark blue. Then install shell pull handles on the door and drawer faces.
Conclusion:
No matter how limited or substantial your budget is, determine a spending cap first before embarking on a makeover project.
You don’t want to keep pouring funds into your home and turn it into a “money pit,” just like in the same-titled movie. So it’s best to plan and figure out all the costs involved beforehand.
To find more brilliant makeover ideas and other home-improvement nuggets, head over to Simphome.com.
Reference:
12. Thekitchn.com
11. Servingupsouthern.com
10. Hannahbullivant.com
9. Livefromjulieshouse.com
8. Instructables.com
7. Youtu.be, Dockingdrawer.com
6. Jaimecostiglio.com
5. Simplicityinthesouth.com, Simplicityinthesouth.com
4. Twotwentyone.net
3. Thisfulllife5.com
2. Toolboxdivas.com
1. Hometalk.com