We cannot tell you how many times in our life we have finally got the whole house in order and everything cleaned up, only to find that with just one little thing, it all goes back to chaos.
Have you ever wondered why clutter always occurs in your house, although you have done the tidying and cleaning stuff hundreds of times in a day? It probably happens because you have been doing it wrong. Or, maybe you just need to incorporate more storage.
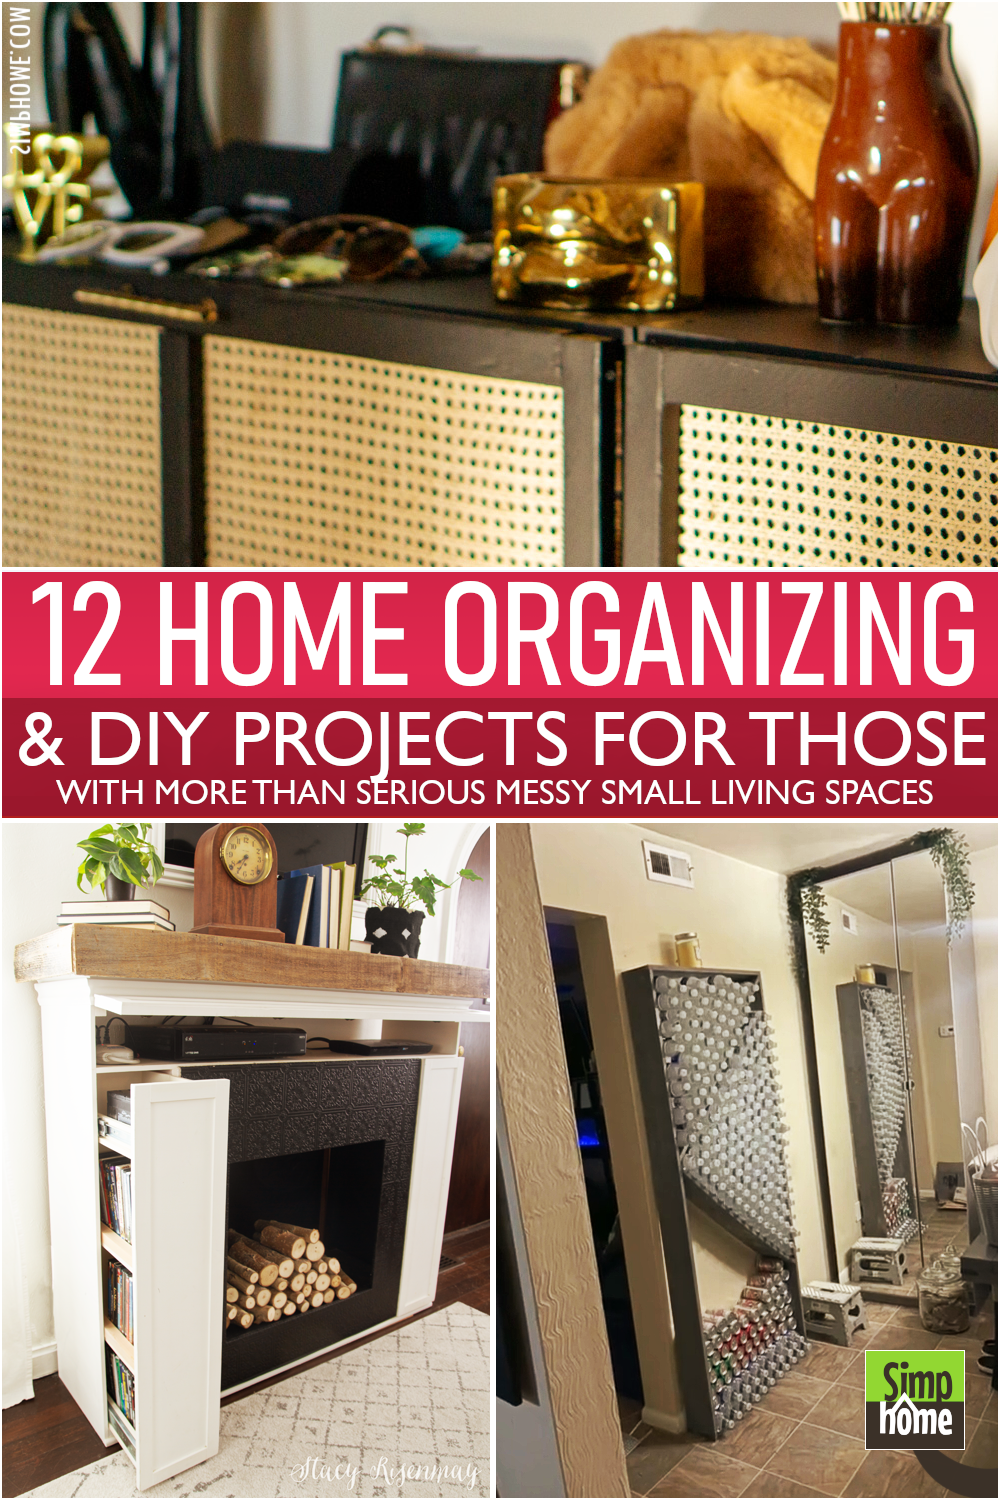
If that is your problem, don’t worry! You can rely on these 12 Home Organizing DIY Projects (Before and After) that will help you keep things tidy. So, grab your snacks, sit back, and get ready to be amazed by some brilliant solutions that we have compiled just for you. For more in-depth detail and information, follow the Simphome link inside the descriptions or reference area.
🔊12 Home Organizing DIY Projects (Before and After) Video:
List Entries:
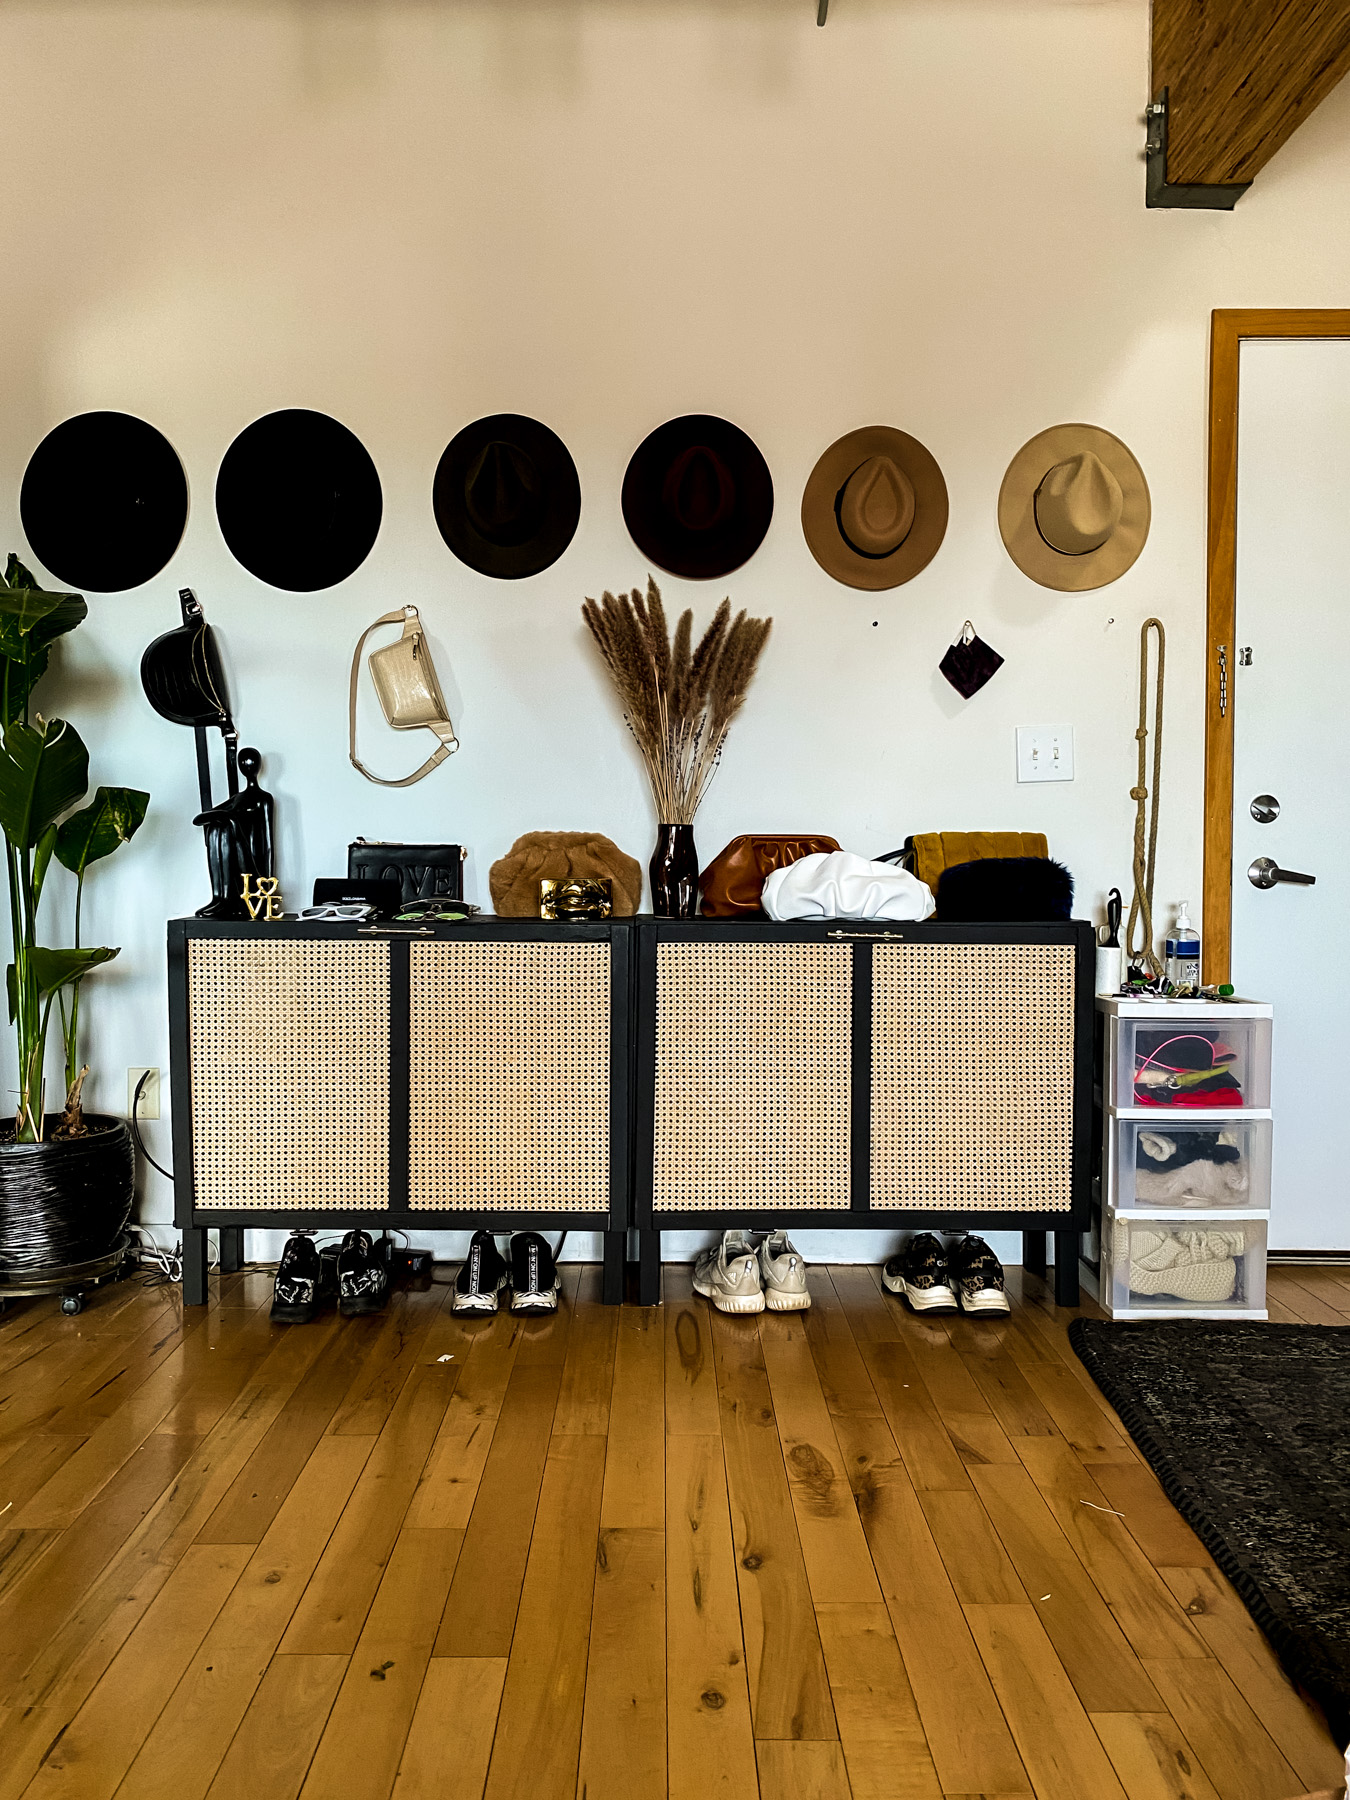
12 Alternative Clothes Storage Ideas
12 Bedroom Organization With No Closet Ideas
12 Minimalist Bedroom Organization Tips
12 DIY Bedroom Clothes Furniture and Garment Organization
12 Bedroom Dresser Organization Ideas
12 Bedroom Closet Organizations
12 Unique Organization For Small Bedroom Ideas
12. Treat your fireplace unlike any other person
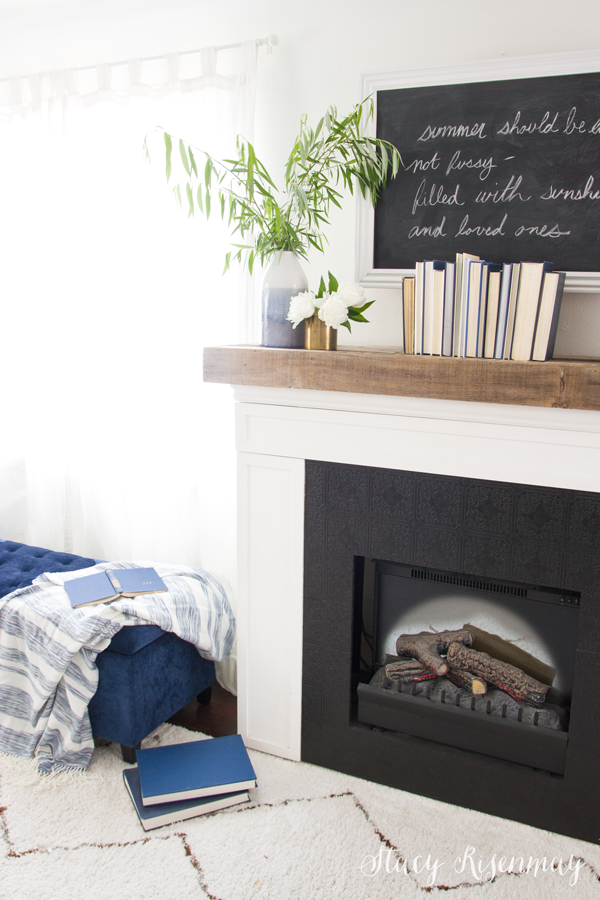
Adding more bookshelves to host your favorite books and CDs sounds like a good idea. They will help you organize things instantly. However, they will be a disaster instead if your living is already full of many things. If that is the case, the best solution to your problem is to make the existing furniture work harder.
This fireplace, for example, features two hidden drawers on both sides that you can use to stash away clutter. This idea is perfect for your minimalist living room.
The hidden drawers are not the only surprise you see here. You can also find a small cabinet that houses DVR and a Blu-Ray player right in the front panel.
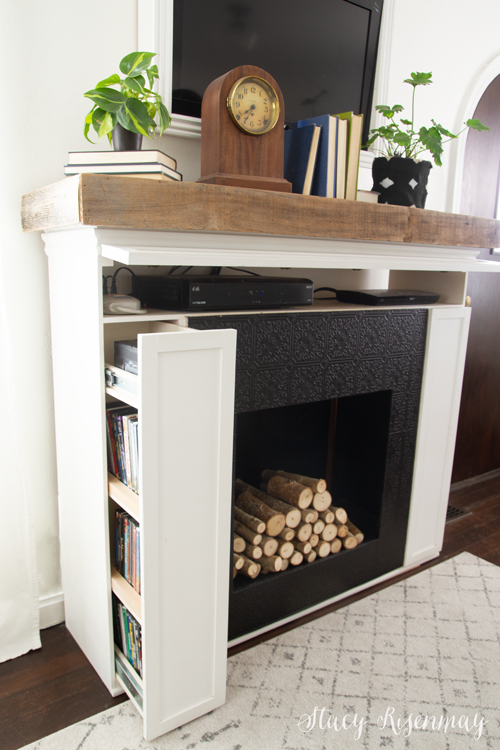
To enable the cabinet door to close and open nicely, you can try to install euro-style hinges. People also call them concealed hinges because you will install them on the inside, giving a clean and flush look from the outside.
To build the hidden drawers, additional information you need to know are:
- No 1. You need to start this project by cutting the plywood into the right size. In this case, you need to cut it with a ½” larger than the firebox itself on all four sides.
- No 2. Then, fit the two pieces of plywood together and secure them with screws. Since they will be on display, you can also use a contrasting color of paint for your drawers and doors.
- No 3. After your drawers are out, you can install the glides and secure them with screws. In this case, you need to make sure that the screws do not stick out because they will ruin the look of your fireplace.
- No 4. Now, it’s time to install the molding around the front opening of your fireplace. You need to cut a profile that matches this area precisely and then use a chisel to create a great fit. Cut a little bit off until you get a perfect fit both on the top and bottom corners of your fireplace.
- No 5. Then, secure it with finishing nails and fill nail holes with wood putty afterward.
11. Inspiring idea you can take to convert closet to mudroom
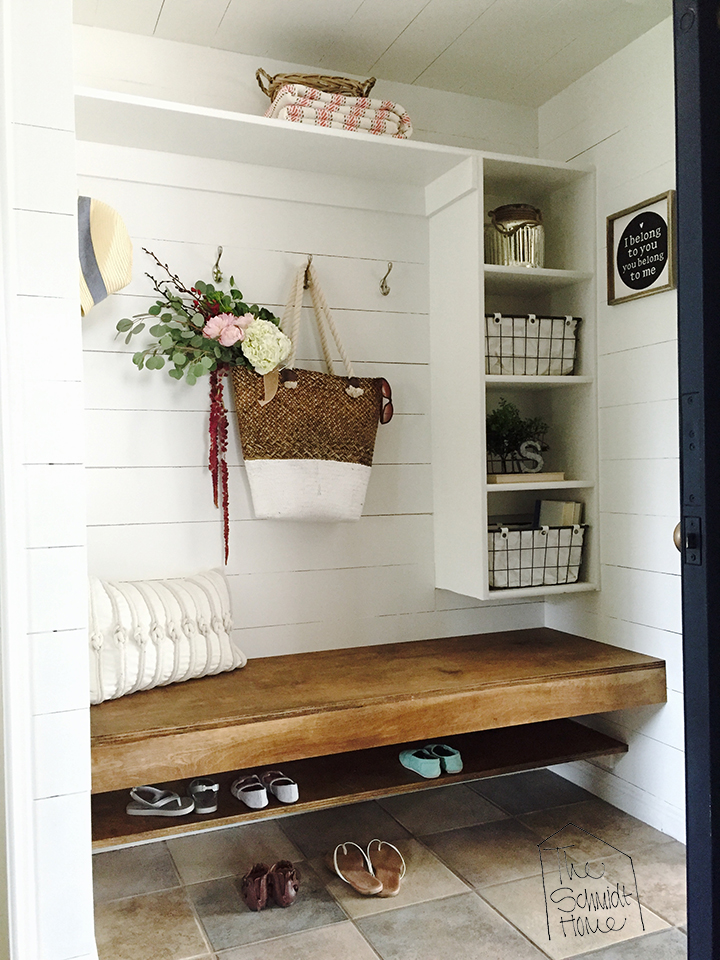 When it comes to dealing with limited space, you have to think out of the box. Sometimes, you have to make some rooms or furniture in your house go the extra mile, just like this closet.
Instead of being a mere closet, you can turn it into a functional mudroom. You just need to install shiplap walls if you are into farmhouse style. Then, build a floating bench with storage underneath and some shelves over it.
Do not forget to install hooks to hang purses, coats, and hats. Finally, add some wire or wicker baskets to host miscellaneous items.
To convert the closet to a new mudroom, additional information you need to know are:
- No 1. The distance you will need to place the closet.
- No 2. The size of the closet.
- No 3. The number of doorways in the room, though not all, includes the one you are converting into a mudroom.
- No 4. The materials you can choose for your mudroom materials that may include lumber, drywall, beadboard, paint, stains, an additional rail system, or even cedarwood for its natural scent and durability.
- No 5. The tools you need to make the mudroom as a professional include a saw, drills, hammers, screwdrivers, paint brushes, and other necessary elements.
- No 6. The budget for this DIY project is because you will never know how much it will cost you.
- No 7. The time frame needed to complete your mudroom project.
- No 8. The style of your mudroom, whether it is old school or country style or farmhouse.
10. A plate rack idea to optimize your awkward corner space
The kitchen is usually prone to clutter. Although you have tried to organize it thousands of times, it will always look messy.
Do not worry! You can end this mess now. Just roll up your sleeves, grab your tools, and take your coffee because you will make an additional storage solution.
This kitchen features an awkward corner located between the cabinet and door. Instead of letting that spot remain untouched, why don’t you just tap into it?
- First, cut the paneling and secure it to the wall in the corner.
- Then, install the frame and the shelves. Do not forget to make sure that each of the shelves is level.
- After that, grab some metal bars and cut them to length. These bars will help you hold plates and cutting boards in place.
- Then, drill holes in each end. You can prime and paint them if necessary.
- Finally, install them on the front frame.
SECOND IDEA
Or, you can use a broader wall to create larger shelves like this one. The steps will be exactly the same. However, you can use wooden dowels instead of metal bars if necessary. The wooden dowel is more sanitary and inexpensive, though.
To maintain the storage solution, all you need to do is just wipe the dust off, and then, you can put some fresh plates and cutting boards on it.
The additional information you need to know:
- No 1. The distance you will need to make the shelves.
- No 2. The size of the shelves needed.
- No 3. The tools you will use
- No 4. The materials you need
- No 5. The budget of the project
- No 6. The time frame needed to complete this DIY project.
- No 7. The style you want, if necessary.
- And the Traffic flow.
10 Bedroom Organization DIY for People with Limited Floor Space
10 Bedroom Organization Ideas to Boost Your Mood
10 Unique and Adorable Organizations for a Tidier Bedroom
10 Bedroom Linen and Sheet Organization Ideas
10 Minimalist Bedroom, Storage, Décor, and also Organization ideas
9. A Clever yet Simple idea to organize your water bottles from @ Jennifer Alexander
Is your fridge so full of fruits and vegetables that you do not have any more space for water bottles and your favorite beverages? Do not worry! We have got your back.
To organize your water bottles, you can make this simple organizer. Basically, it is just a frame with two boards installed diagonally.
You have to lean it against the wall so that the bottles will not fall.
And here comes the problem. Leaning the frame against the wall will be dangerous. Somebody could bump into it and get injured. Thus, you need to install a bracket on top to secure the shelves in place.
To copy and finish the project, your instructions are:
- Find two wooden boards in the length of 20-22 inches.
- Cut the boards to the size you need. For mine, I cut it to 19 inches.
- Sand your wood boards before you glue them on the frame.
- Apply glue to the front board of your project and place it on one side of your frame. Opposite to where you are leaning against the wall.
- Then, sand off any excess around where you are applying glue so that you will not get any sand scratches when you insert screws into it later on; otherwise, they might make your shelves crooked.
- Place the second board on the other side of your frame. Place it where you apply glue so that it will be leaning against the first board.
- Sand around where you are applying glue so that your board will not have any scratches when you insert screws into it later on; otherwise, they might make your shelves crooked.
- Use screws to hold your boards in place once they are stuck on both sides of your frame with adhesive tape. Then, remove the tape and fill all gaps between boards with wood filler.
- The finished product should be similar to the one in the picture.
- After you finish, you can fill in your bottles and pack your favorite beverages in them!
Installing screws into the wooden board to hold it up
8. Another idea to use plywood to exploit your awkward space from TheBword decor
Do you spot a blank wall in your kitchen? Try to build this pantry to add more storage.
Begin with building the frame using 2×3 boards. Then, add drywall and mud for a more finished look.
After that, use 1×2 boards to create shelves and brackets along with the pantry. Next, install the plywood doors using soft hinges. Finally, paint it the same color as the wall so that they look united and add the hardware.
Additional detail and instructions you need to know are:
- Build 2×3 frame
- Add drywall and mud to finish the look
- Install soft hinges to open and close it
- Paint a similar color in the pantry to create a unified look
- Install hardware to make it more sturdy and secure
- But if you want a less bulky look, you can create movable doors with hinges instead of wood doors that will need to be installed permanently
- The final product would be perfect for small spaces where the things you need are not too much but still require storage space
7. 3 Advance kitchen makeovers Ideas
That you can keep in your fantasy world or real world. It is up to you
- ONE,
The small Appliance Idea from Valerie House:
Every inch is precious when it comes to small space. Thus, you can use this brilliant trick to maximize the room.
You can try installing drawer slides inside the cabinet so that you can push the doors and free up more space. Try installing drawer slides under the shelf so that you can pull it out, which makes it easier for you to prepare your breakfast.
- TWO,
A Superior Cabinet Makeover Idea:
The cabinets are not always accessible from all sides in the kitchen, which makes it difficult for you to organize your stuff inside them perfectly. With a narrow unit, you can easily access your storable items from every side and corner of the room. Just be careful when you’re installing it, as it should be appropriately aligned with other cabinets in your kitchen to ensure that everything fits seamlessly into place!
This hydraulic mechanism does wonder. You do not have to break a sweat to store the mixer. As a bonus, it provides more counter space so that you can use the existing countertop to prepare the ingredients.
- THREE,
The Lift-up Superior Kitchen cabinet Idea:
This kitchen cabinet comes with a solution to your common kitchen messy problem. Instead of swinging out, this cabinet door goes up so that you can free up more space. The mechanism allows you to easily access your items inside the cabinet without traditionally opening the door.
The self-leveling drawer glides make this perfect for storing your secret ingredient or spice bottles.
With just some screws prepared, you can install the lever mechanism securely. You can use it to store all sorts of items that are commonly or uncommonly utensils stored in every kitchen. It is just like magic!
6. A bathroom storage hack by the Hometalk
Tiny space is not an excuse for you to let clutter take over your small bathroom. Try this Ikea storage hack.
- First, place an Ikea Vesken shelf next to the toilet and some measurements because you will create more shelves.
- Then, grab some boards and cut them to length. Sand, stain and seal them thoroughly.
- After that, place the longboard on top of Ikea Vesken and the other end to the wall using L brackets.
- Next, attach the small board to the longer one using wood glue, a plate, and screws.
Additional information and instructions you need to know are:
- No 1. Drill pilot holes to prevent the wood from cracking
- No 2. Cut the boards to length, sand, stain, and seal them thoroughly
- No 3. Attach longer board using wood glue, a plate, and screws
- No 4. Secure shorter board with screws in the back
Usage:
Use it for toiletries, make-up brushes, hairdryers, bathroom cleaning items, or anything you can think of!
5. The Hydryer storage solution and DIY from the “Sorrygirls”
Storing a hairdryer and other hair styling tools in the vanity might help you conceal clutter. However, it is not the best solution because you will have to detangle the cords before using them.
You can make this extra storage instead.
- First, measure the space you have under the vanity so that you can create the box.
- Add dividers inside the box to organize things better.
- After that, install a drawer pull and castors for easier access.
Additional information and instructions you need to know are:
- No 1. Measure the space under the vanity.
- No 2. Make the box using plywood size 30 x 30 x 4cm (48 x 48 x 12 inches) or other strong wood with a similar measurement
- No 3. Measure and cut a hole in the bottom so that you can access the power cord without much trouble.
- No 4. Attach a regular drawer pull to the front of the box. Attach castors as well for easier mobility and accessibility. Drill holes on the bottom, near the drawer, pull to allow it to move as you open and close it freely.
Other details:
- Make sure to paint with latex paint so that you can wipe it clean.
- Use a drawer pull with castors to make it easy to move around
- Add a drawer to store hair styling tools
- Use a cabinet organizer with storage baskets to keep things organized
- You can use foam board for the box too if you want
4. A New bedroom optimized for storage from 3 IKEA Kallaxs and 4 box units @theofficialikea
If you are not into building your bed frame from scratch, you can use 3 IKEA Kallax units. First, place one of them against the wall. Then, put the rest perpendicularly from the first unit so that you form a frame.
Top the frame with a board and secure it in place. Then, place a mattress on it. You can use heavy-duty Velcro to hold the bed in place.
Additional information and instructions you need to know are:
- No 1. You can make a bed frame like this, but you need to make sure that the bed is low enough on the wall for you to screw the Kallax onto it. If it is too high, your head will hit the headboard when you get up.
- No 2. The total cost of this idea, including IKEA Kallaxs and box units
- No 3. You can also use wooden units instead of IKEA.
- No 4. Once you have placed the bed frame, you can screw it and secure it to the wall.
- No 5. The dimensions of the bed are 120 by 200 cm. There is no need for a box spring or any other type of support underneath it if your mattress is firm enough.
- No 6. You may place drawers below the frame for extra storage space, but if you are planning on placing other boxes there, make sure that they are not too heavy because they might break through the frame over time if you do not reinforce it
- No 7. This item here is not a framed bedroom with a mattress, but if you choose to use it like that, make sure that your head does not hit the ceiling, and you can sleep comfortably and safely on this bunk bed idea without sliding down it.
- No 8. You can make use of this idea for any type of furniture – hammock, futon – whatever you like – because all you need are IKEA Kallaxs or wooden units tacked to the wall with heavy-duty Velcro strips.
The main idea of this organization is to store the bedsheets and the pillows under them to save space. This way, you can also save space in your wardrobe.
10 IKEA Storage Transformations for Small Rooms
10 DIY Ikea Furniture Project for Bedroom (Small or Regular Size)
10 Ideas How to Get the Best out of IKEA BESTÅ Unit
40 Smart IKEA Organization Ideas To Ease Your Life
62 IKEA Furniture and Storage Creative Makeovers
3. A new way to organize your shoe collections. From exposed to concealed
This picture is the storage before improvement.

And this is after the improvement.
When you install the door, you might have to adjust your door placement as needed. You can also adjust the height of your legs depending on the length of the door you placed.
One thing, Make sure the width and depth of the unit compensate for the size of your collections.
To improve it a little further, you can
- Add a wheeled stand with compartments in them so that you can keep your shoes organized in the compartments.
- On top of it, install a curtain rod above the Kallaxs with a lovely curtain to give it a complete look.
10 DIY Shoe Rack Project and Storage Ideas
10 Efficient Shoe Bench Storage Ideas to Untie the Mess
10 DIY Shoe Bench Project Ideas
10 Creative DIY projects that will Revamp your Shoe Storage
2. A Closet organization Using the IKEA Trofast cabinets and Hobby Lobby totes! From Hayden Scharrer @twopawsfarmhouse
Do you have a messy closet? It is time to make it more organized by installing shelves and rods, just like this one.
The upper shelves feature built-in drawers that you can use to house small items like socks, underwear, or jewelry. You can also find a wall-mounted shelf with a rod attached to it to optimize the storage space.
Additional information and instructions you need to know are:
- No 1. Take the time, and measure the closet space: Measure your closet’s overall length and width and then determine where your wall studs will be. You’ll need (2) 5-inch wood screws to attach the shelf supports to your inner wall studs.
- No 2. Set up each shelf: Gather all materials you will need before you get started. Attach the support board to the back of each floor-level shelf (two for each), plus (2) -48 inch wood screws to attach them securely to your wall studs. Once secured, use a pencil to mark where you want both sides of each shelf attached; do this in a place that won’t be hard to cover up once the installation is complete.
- No 3. Attach the shelf supports: Place the shelf support over your yardstick and pair them with the correct distance apart. Make sure you use (2) -48 inch wood screws and (2) 5-inch wood screws to attach them to your wall studs.
- No 4. Add your shelves: Attach each shelf using (2) -48 inch wood screws into each support, then place it onto your closet floor-level (inserting into the holes you made previously). Once they’re in place, use a pencil to mark where you will want to attach the rod; do this in a place that won’t be hard to cover up once the installation is complete.
- No 5. Attach the rod: Use (2) -48 inch wood screws to firmly attach the 3-foot rod to the inside of each upper shelf.
- No 6. Fit in all your clothes: So, now you have a neat and organized closet, so it’s time to get everything placed in it! Add your favorite outfits, shoes, jeans, or whatever you need for styling. You also have some options for organizing your closet; you can either use more dividers or invest in an extra shelf explicitly made for storing clothing.
- No 7. Hang everything: When hanging, place your rod through the holes you created, then attach it to the back of your closet door. If you want to achieve a more finished look, then look into getting some closet organizers.
- No 8. Please give it a trial run: Over time, you’ll notice that your room feels much more tidy and organized. You can also use shoe hangers to hang up your shoes instead of using the closet rods; this way, you will organize both shoes simultaneously!
Simple idea How to Hack Ikea Vittsjo Laptop Stand with a Butcher Block
How to Turn Plain IKEA Curtains Into White Columns of Gorgeousness
How to Build A Window Seat Made FROM IKEA STOLMEN
Lastly, Number 1. Rebuild your own bedroom by Fabienne Oonk | A perfect idea for a NOT spacious bedroom space
If your bedroom is extremely small, consider raising the bed a few inches off the floor. That way, you have plenty of storage space underneath. Even better, you can make the bed frame yourself to meet your needs.
You do not have to build it from scratch, though. You can use some ready-made shelves and arrange them as you please. Top them with bed slats, and that’s it!
Instructions:
- Take a look at your bed. Sketch to see where you want to place the shelves, and then draw it on the wall, using a pencil.
- Cut all the necessary pieces from 1″ x 2″. Place them on the wall as you first drew it on paper, and then glue them all together.
- Before screwing everything together, attach the shelf brackets to secure everything in place.
- Screw everything securely and carefully so that your shelf bracket doesn’t fall off once installed properly
- To remove or keep things off of your bed, or even put small items inside it, simply unscrew the bracket and slide whatever item around where you want it to go!
- If you want to add a decorative touch to your new bedroom storage ideas, place a bedside table on the wall and place a vase on it. It looks great and is very convenient!
For the shelves,
Your Instructions are:
- Measure how wide and tall your bed is and then determine the number of shelves you need. You can cover them with decorative window panels or unique coverings.
- Take the remaining wood pieces and cut them to fit the measurements of your shelves, making sure that there are at least 4 inches between each shelf panel.
- Next, divide the rest of the wood into two equal “pieces” (you can make them even if they’re not).
- Measure where you want your new shelf panel to be, and then mark it on both pieces of wood (these will become two sides of your shelf)
- Roughly cut these pieces using an electric circular saw or table saw. It’s best to cut one side twice as thick as the other since they will eventually meet each other.
- Cut the shelves now, making sure that there are at least 4 inches between each piece (the same distance as above)
- Slide them into place by lining up the grooves on both sides and then screwing them together with screws that are at least 1 inch long
- Lay the panels on the floor, make sure they are lined up properly, and then use wood glue to seal any gaps.
- Now, measure out how big you want your shelves to be by placing an existing shelf panel onto it. Line it up with the sides of your panel, and then mark where you need to cut.
- Cut each side of your shelf – first one side, and then flip it over to finish the other side so that the cuts line up with one another
- Take one piece of your two-sided shelf and screw it to the side of your mattress frame.
- Cut out additional pieces for each side, if needed
- Screw these last pieces into place
- Glue all of your shelves onto the top of the bed itself (so that they cannot come off)
- Your new bedroom storage ideas are now complete!
- To keep extra items on hand within easy reach, you can use the shelf panels as storage containers for smaller items like jewelry, etc. You can also use them as end tables or even place small plants on them to create a rustic look!
Additional items you can add to your space:
No 1. A Nightstand
Collect some old books and turn them into a pretty nightstand. All you have to do is cut the pages out in irregular shapes, glue them together, and then paint. You can also use it to hold your alarm clock or any other little trinkets.
No 2. A Shoe storage
If you don’t have enough space for all your shoes, construct a rack out of pallets. You can divide the length vertically or horizontally with the slats so that you can fit more pairs of shoes on top of one another without leaving any gaps in between them. This shoe storage is very cheap and easy to make! And it looks nice, too!
No 3. A wardrobe without a door
If you don’t use a closet and want to save some space, you can quickly and cheaply build yourself a wardrobe without a door. All you have to do is find an old dresser and then turn it around so that the drawers become your clothes storage. It will help you organize all your things!
Dealing with the clutter that has been reigning your house for a long time is not that hard, right? Try to implement some of these 12 home organizing ideas before and after, and you will see that cleaning up and tidying up do not have to give you a lot of hassle.
References:
12. Notjustahousewife.net
11. Theschmidthome.net
10. Tiktok.com/@caranewhart, Tiktok.com/@yourlifeiswhatyoumakeit
9. Tiktok.com/@hhotmama42
8. Tiktok.com/@thebword_decor
7. Tiktok.com/@valerie_hhouse, Tiktok.com/@superiorcabinets, Tiktok.com/@superiorcabinets
6. Tiktok.com/@hometalk
5. Tiktok.com/@thesorrygirls
4. Tiktok.com/@property_genie_plymouth
3. Pinterest.co.uk, Lilmissjbstyle.com
2. Tiktok.com/@twopawsfarmhouse
1. Tiktok.com/@fabienneoonk, Tiktok.com/@fabienneoonk