Many try their best to decorate their living rooms and spend some considerable amount of money for that, but that’s normal. It happens because satisfaction is hard to get, but that’s not impossible.
You can find many ways to decorate your home. One of which is by embellishing the wall area and the storage.
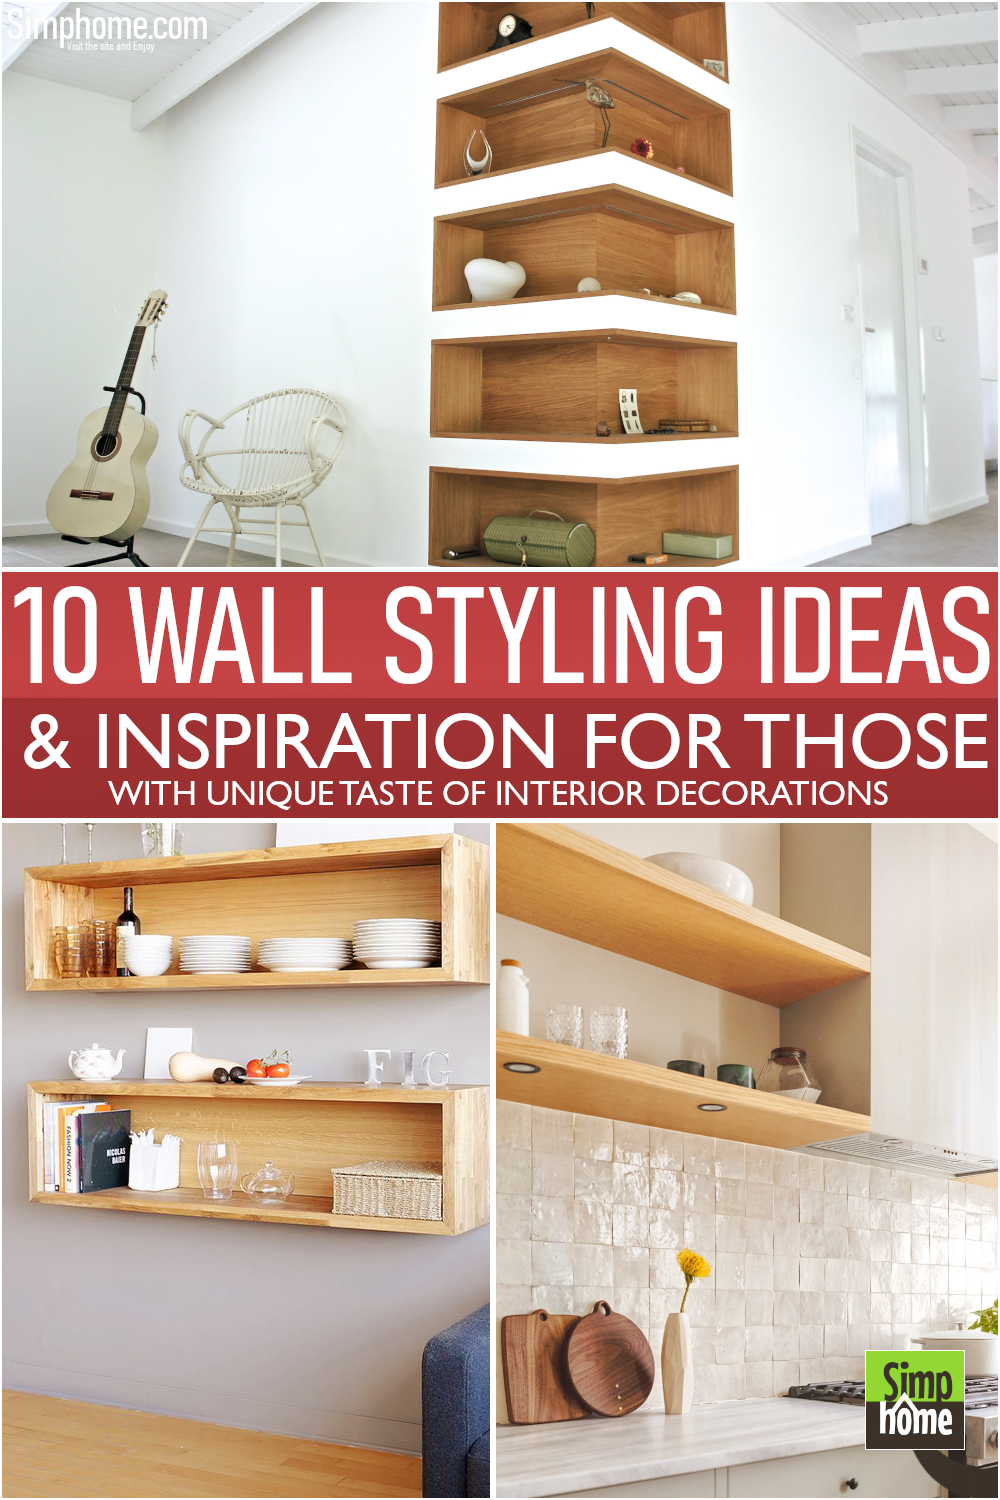
Here are 10 wall-shelf styling living room ideas that will help you adorn your interior while keeping the clutter at bay. For more clever organization ideas you can take to upgrade your challenging spaces, follow the Simphome link inside the reference.
🔊10 Wall shelf styling living room Video:
List Entries:
10 Transitional Living Room Seating ideas
10 Small Living Room and Rental Transformations
10 Long and Narrow Living Room Transformations
10 Minimalist Living Room Furniture and Storage Improvements
10 Cozy Open Plan Living Room Ideas
10 Cozy Sectional Living Room Ideas
10. Get the Stunning Shelf to sweeten your interior
 This shelf can draw people’s attention in an instant with its simple yet stylish appearance. It may look like something you can just attach one by one, but it is not. It needs careful thought to build it.
The upper shelf works as a roof, and it covers the pictures below it. However, you can still put some books on it.
With such a beautiful design, it becomes a display that turns the wall into a form of art. The combination of colors gives a soft impression that soothes the mind. It takes patience to combine all parts of the pieces to build an elaborate form like this.
To replicate the idea, all you have to do are basically:
- No 1. Make an area for the upper shelf.
- No 2. Put the picture on the shelf; hang it; now attach it to the upper shelf with nails; now put another piece of wood on top of it.
- No 3. Cut some wood and attach them with nails until you find a balanced position and turn it to look stable.
- No 4. Attach the lower shelf and the rest.
- No 5. Cut the last piece and attach it to the rest.
9. Visualize It with More simple hanging rectangular Shelves
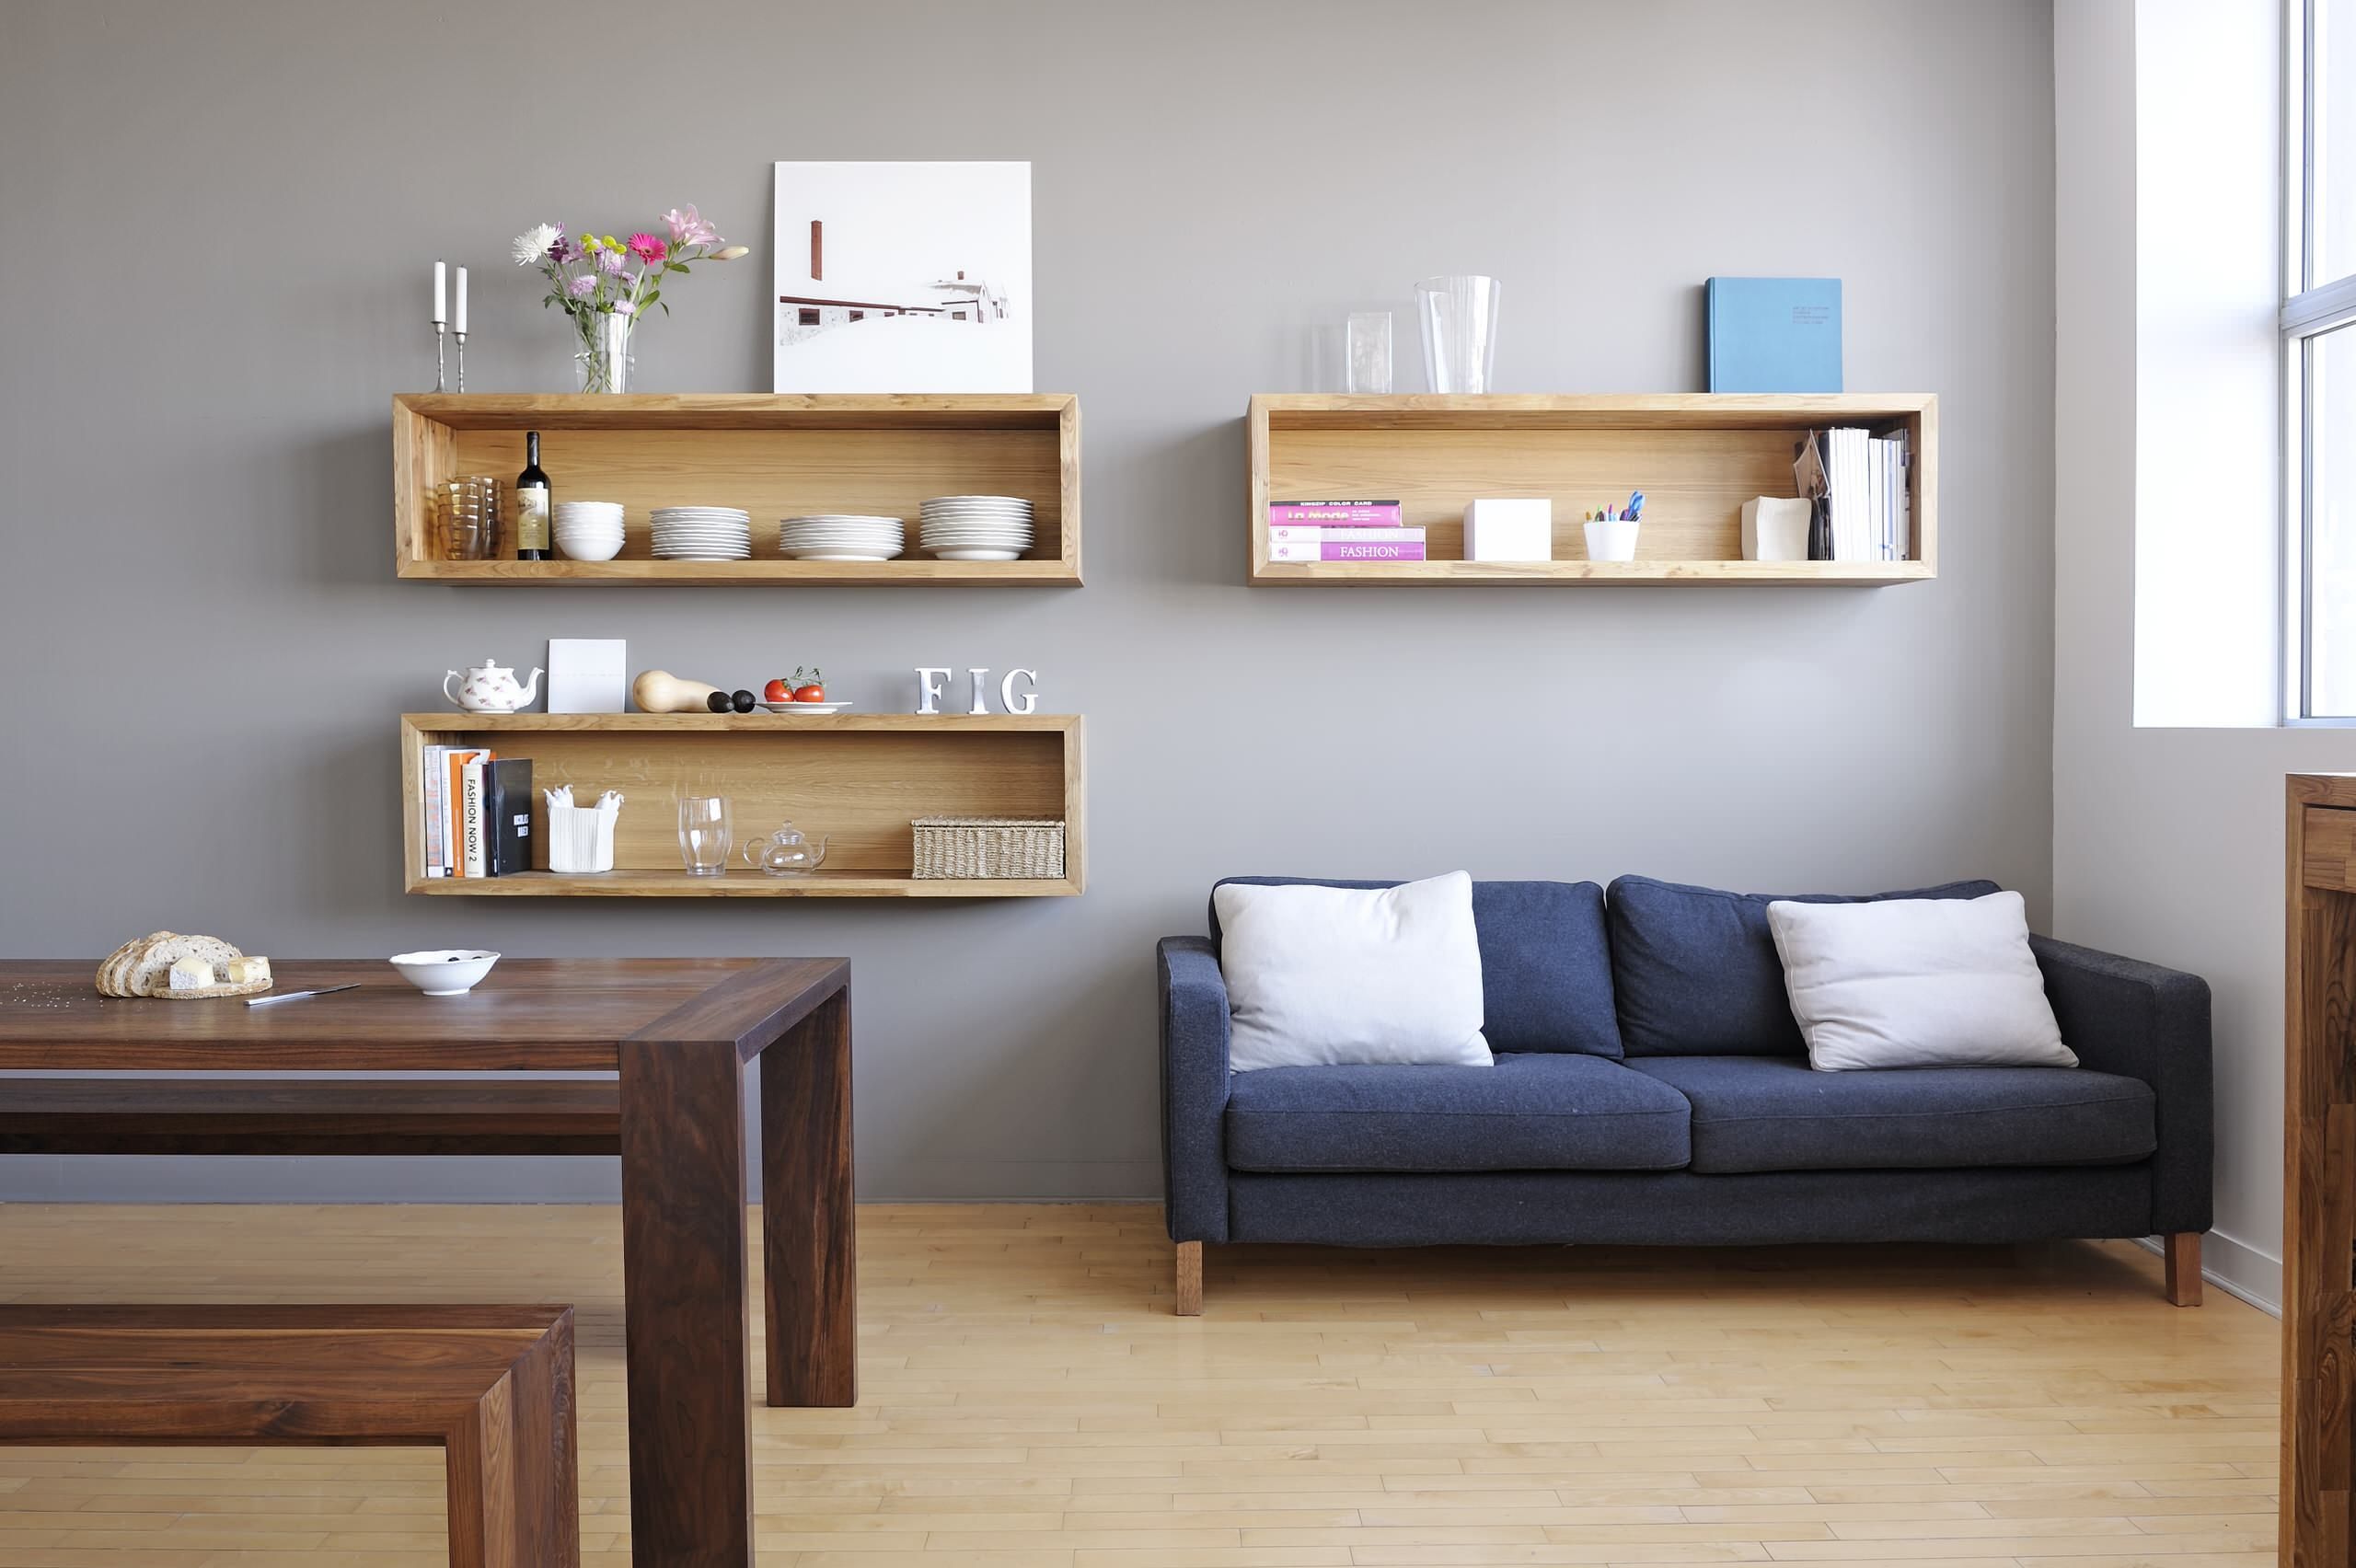 For a much simpler shelf, this rectangular shelf suits for saving small and round objects. It creates a minimalist nuance due to its size. The thickness of wood would shape a good look for a shelf.
It would also offer you more room to attach each part with screws or nails. A thin shelf wouldn’t work that well, and it wouldn’t cost some problem when you’re working on it.
You can create more than one rectangular shelf to get a better visual or for more storage options.
Detailed Instruction (Simplify):
- No 1. Simply hang the shelf on your wall
– A thin horizontal beam is enough to hold the shelf.
– Fold the 2 parts of the beam, and make sure that they are centered.
– Make it thicker laterally if needed.
– Place a screw below the beam on the wall, and make it firm.
– You can also put nails on both sides of each part if you want.
– Next, place it on your floor to check its balance before you nail it down to your wall.
– After that, attach another one horizontally at the same junction of your beam.
– Now you have two shelves fixed with screws or nails at different angles on each other for more storage options or visual effects. - No 2. Try different heights to get a different look
You can also play with height, which means you can make your shelf on the wall at different heights. This trick will help you get a different look, and you can choose where to put it on. For example, you make four shelves by repeating the process of No.1 on the wall. Each of them is placed 5 inches apart from the other.
– You can easily attach them to your wall without any problem. To do this, place one screw or nail on each beam that you connected vertically or horizontally for more support while hanging the shelves on your wall. If needed, use an electric drill to create holes in concrete walls if it’s too hard to do manually.
8. The Simple floating shelf with stunning Glossy Surface
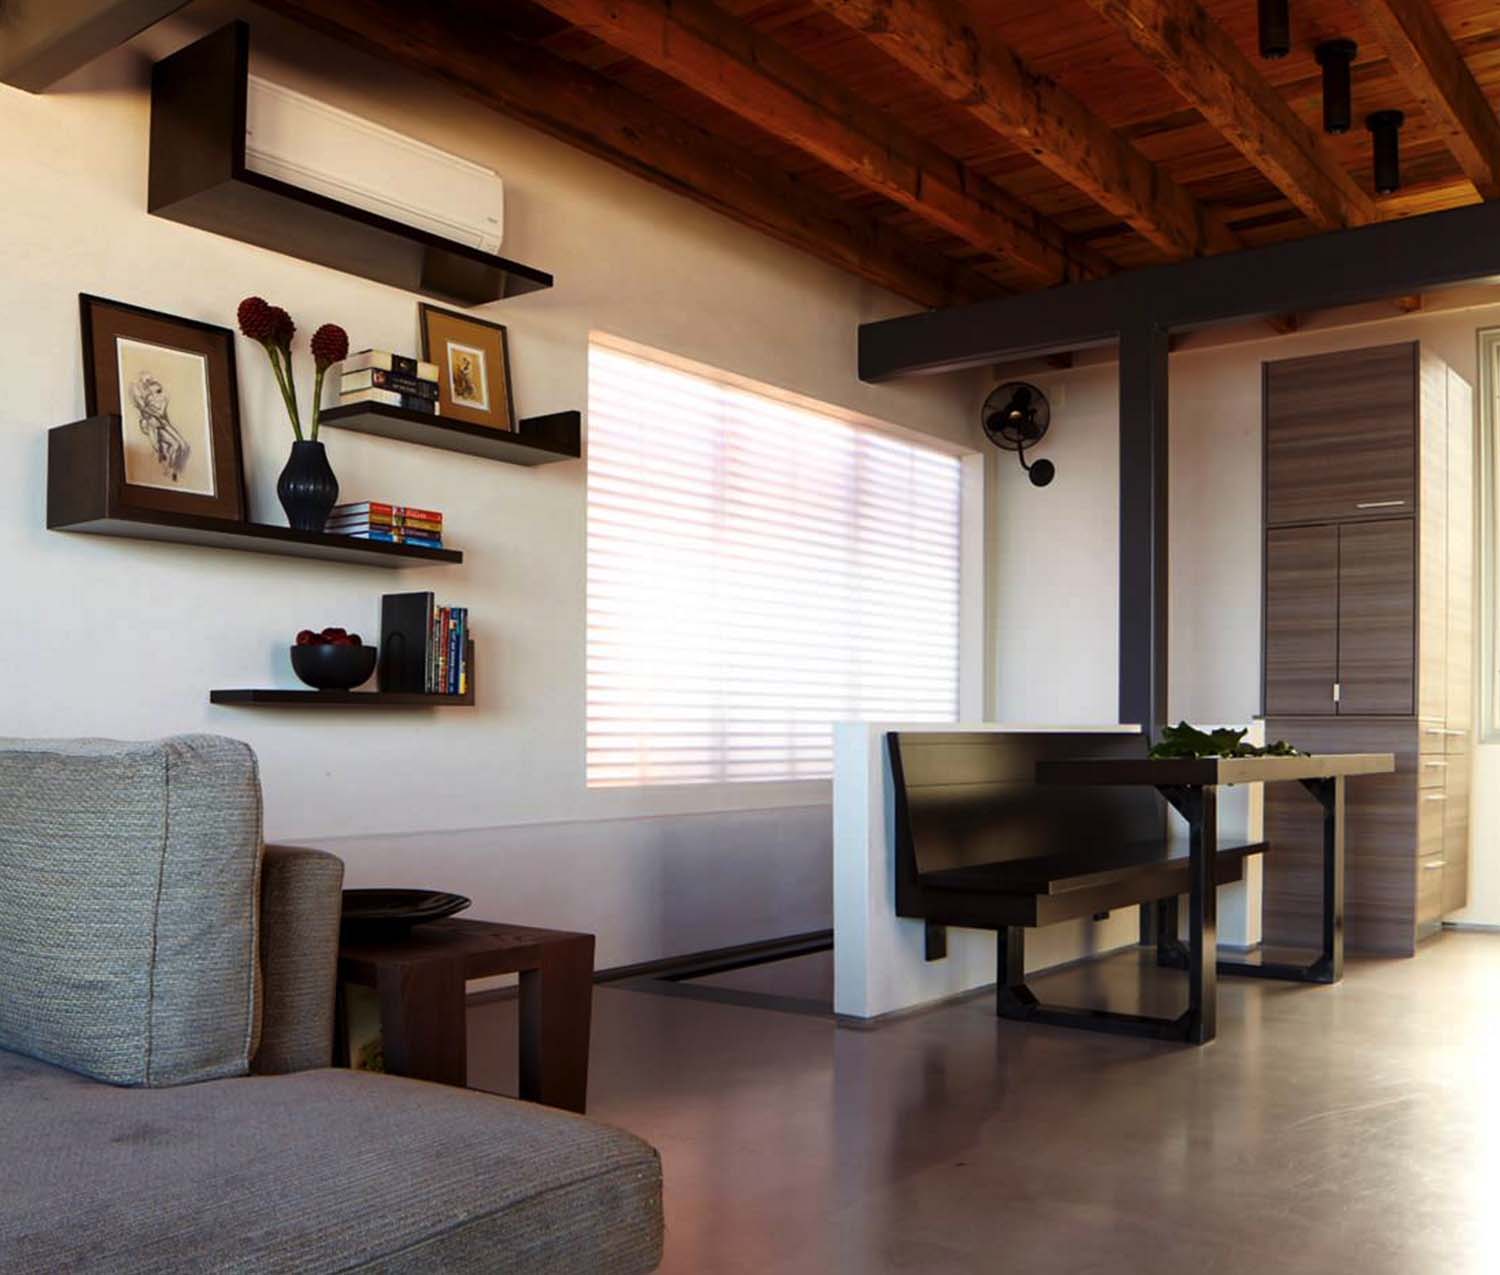 As a shelf can come from many different materials and shapes, you have more choices to stack or arrange them in any way you like. Look at how the homeowner organizes these shelves. They will remind you of a Tetris game.
The primary purpose of these shelves is to fill space on the wall, hence the lack of storage. These tiny shelves have clean lines and glossy surfaces that spark classy touch. Some flowers with bright colors would make them look colorful in contrast.
Detailed Instructions:
- Step 1. The floating shelves
The first thing you need to do is to measure the length and width of your shelf.
Next, trace the black line with a pencil onto the wood underneath.
Make sure you can see it through both sides of your shelf surface.
Now cut it out with a jigsaw or band saw. Please make sure you don’t cut it too far. Otherwise, this will cause some problems later on. - Step 2. Laying a black bottom for a perfect finish
Now, cut a piece of black MDF board to fit on the shelf.
If you have cut it prematurely, put the shelf in the same place and see if it fits the wall or not.
Then add some nails into that bottom piece to fix your shelf.
To prevent any damage that might be caused by water or humidity, use spray varnish to seal it from below when you’re done with this step. It’s vital when dealing with MDF boards because they tend to get rotten faster than wood. Therefore, make sure to coat all surfaces, including bottom and inside holes. - Step 3. How to install the floating shelf
The final step is to place it on the wall.
Hang it on a nail and check if it’s level before you permanently keep the shelf onto the wall. These shelves could be your best choice because you can move them up and down to get a better angle for visual and storage purposes.
7. Follow the Curve
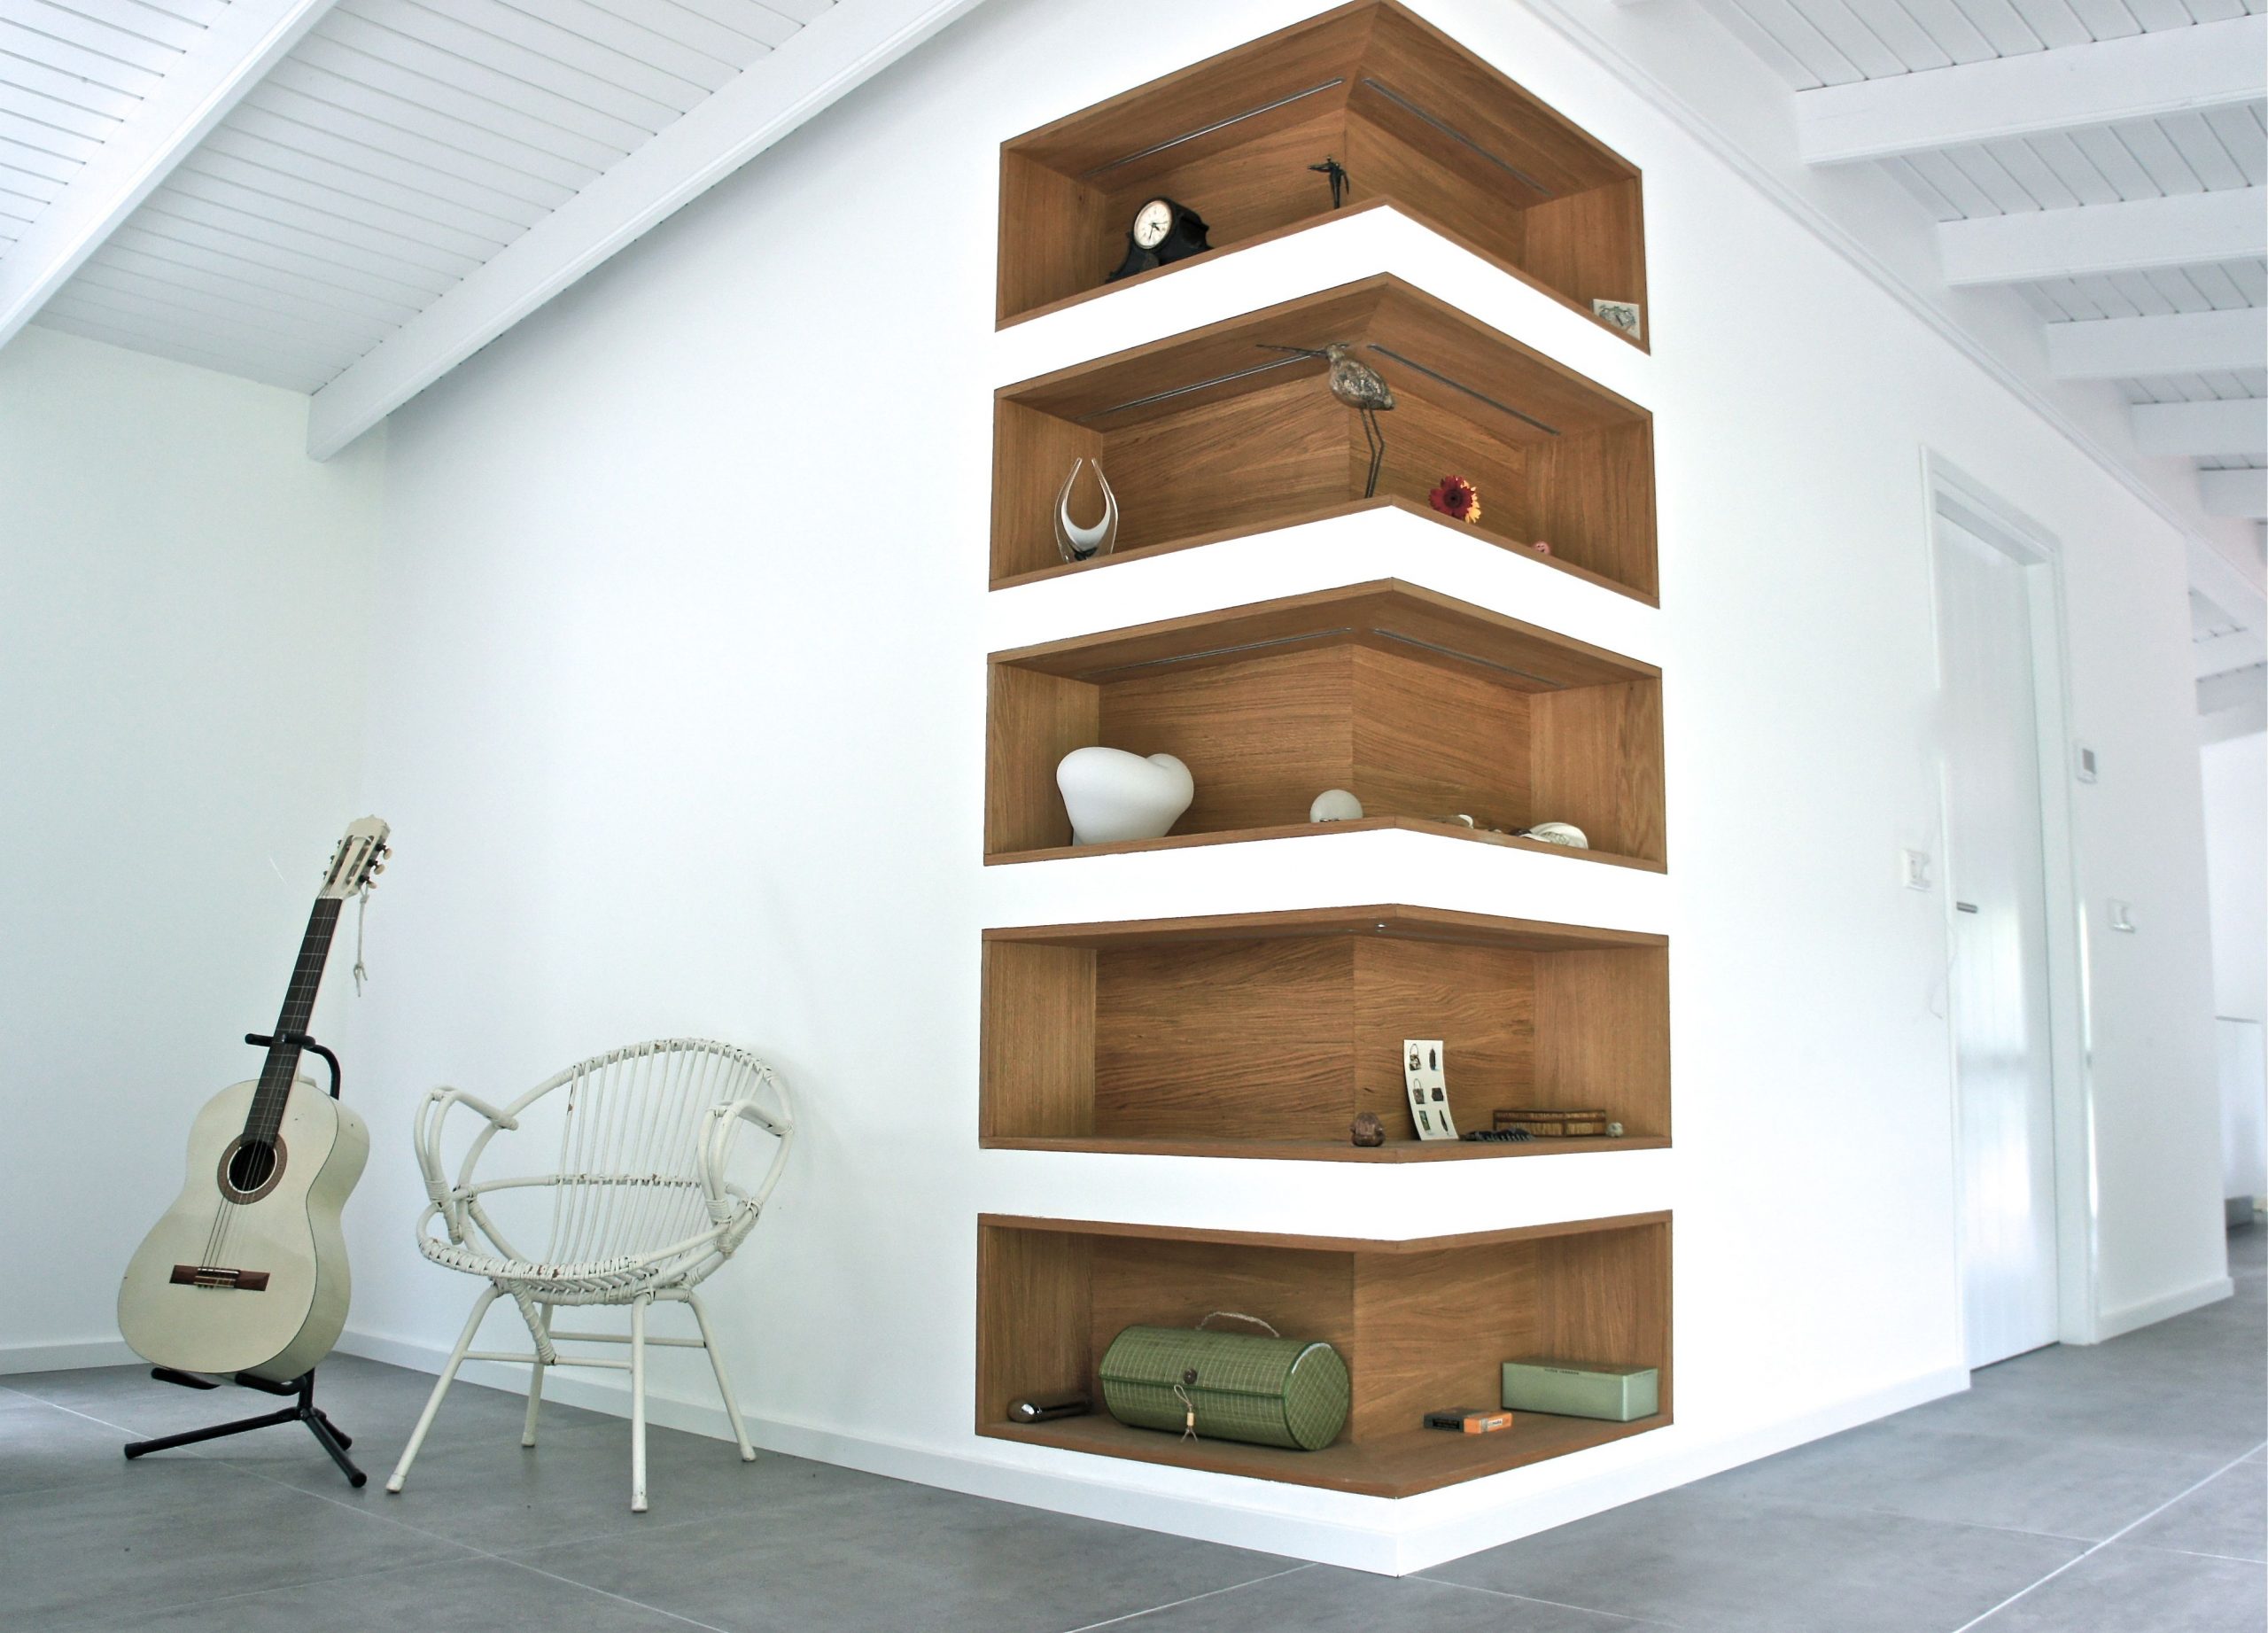 The corner is an exciting part of a living room that makes it a fun place to decorate. This shelf is excellent at using its peculiar spot, and it looks astonishingly unique for storage.
There are five shelves of the same size and design that fit the corner, and the space between the shelves makes them look floating. The tricky part when making the shelf would be joining the points on the corner.
You need to be careful when joining them and make sure to sand them well to have a nice look.
Additional instructions:
- Step 1. Cut 5 shelves of the same size and material
- Step 2. Attach them to the wall
– You need to trace the outlines of the tops of the doors on a piece of paper.
Then, use a pencil to draw a square with a line going through it. You will use this square to connect all the corners.
– Next, make a separate square only on the wood boards by cutting a piece and another square from another board.
– You must cut this square cleanly, and you must make sure that both can fit into each other appropriately. - Step 3. Attach each shelf to the wall
Now you have all five shelves for storing your things. - Step 4. Fill it up with whatever you want
This corner shelf will be the perfect place to put your decorative items, including vases or any items that are hard to fit in a conventional space. You can also play with your placement because it’s not fixed, and you can move it up and down for more storage options.
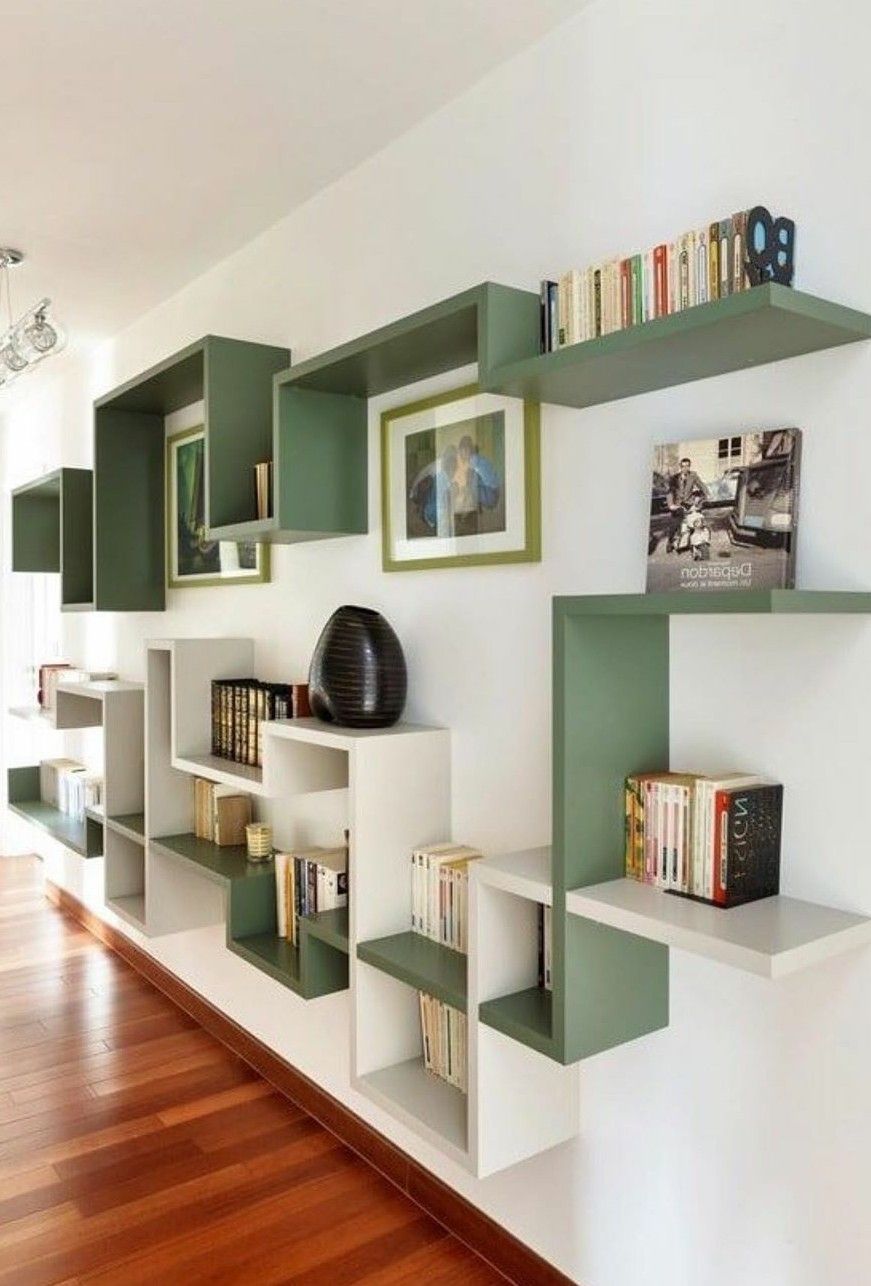
6. Give your shelf new artistic means of Arrangement
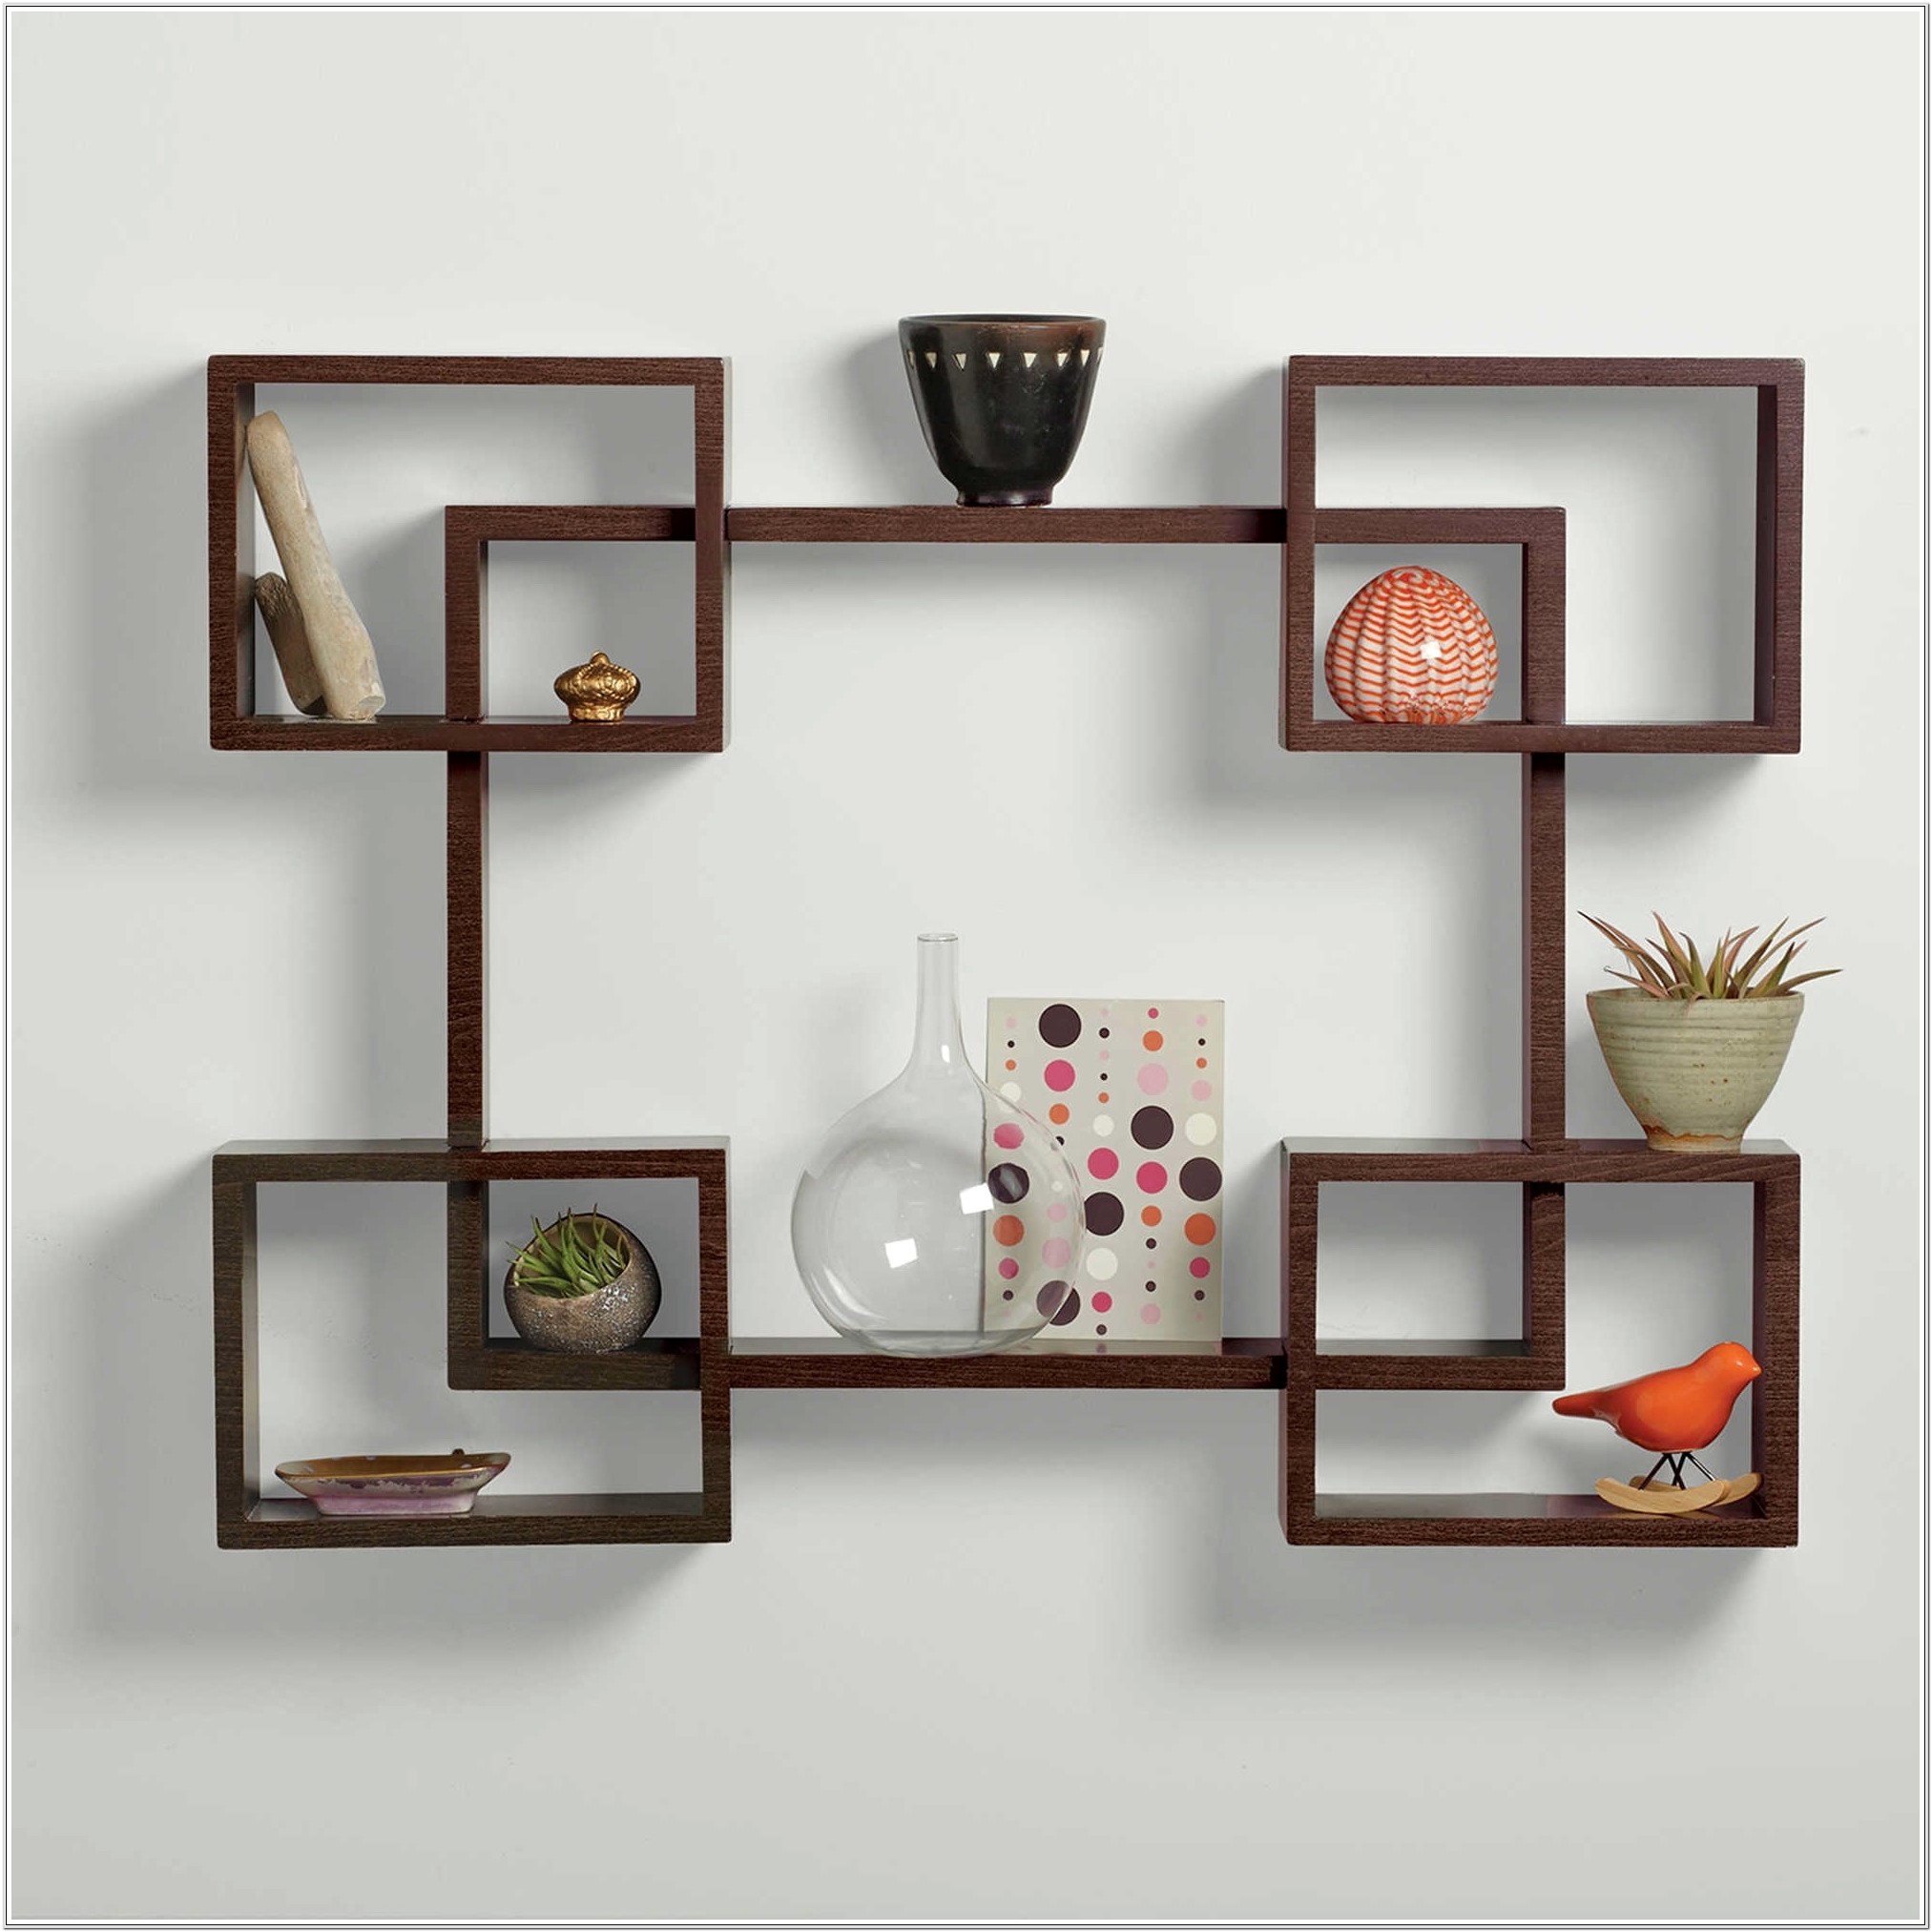
But this way, it drives you to stare at it longer, although it doesn’t provide much storage. It doesn’t seem to be hard to make and put there. But the deep of a shelf is always crucial as you may want to keep some random medium-sized objects.
Before replicating the idea, you need to pay attention to instructions:
- No 1. Measure the size of the shelf
- No 2. Make a pattern for the shape of the shelf
– To have a decent storage space, you have to determine how many objects you would like to put there and where you would like them to be placed.
– You can cut out the pattern and draw it on paper and then glue that onto wood boards.
– To get a better shape, use a low-voltage drill into your wall and smooth it with sandpaper. - No 3. Cut out your pattern
The final step is deciding whether to make one shelf or two.
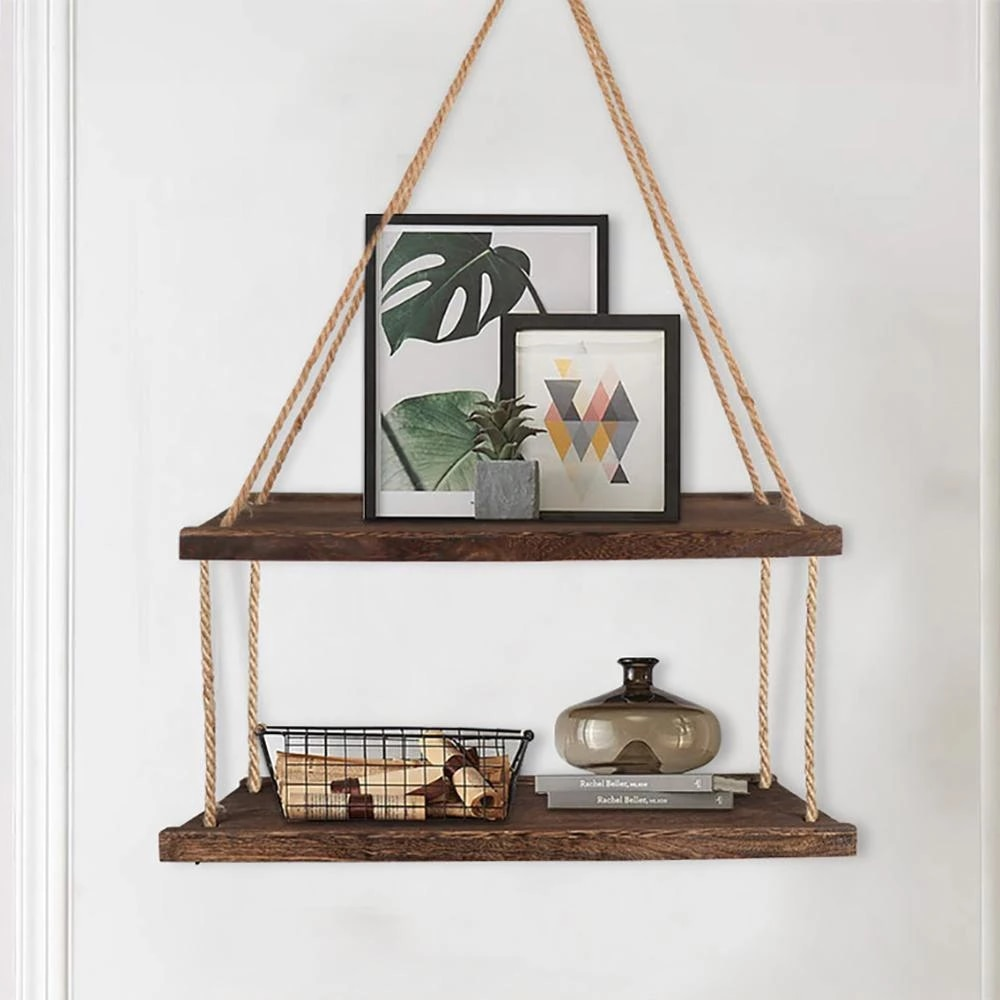
5. Simple Hanging Shelf with Rope
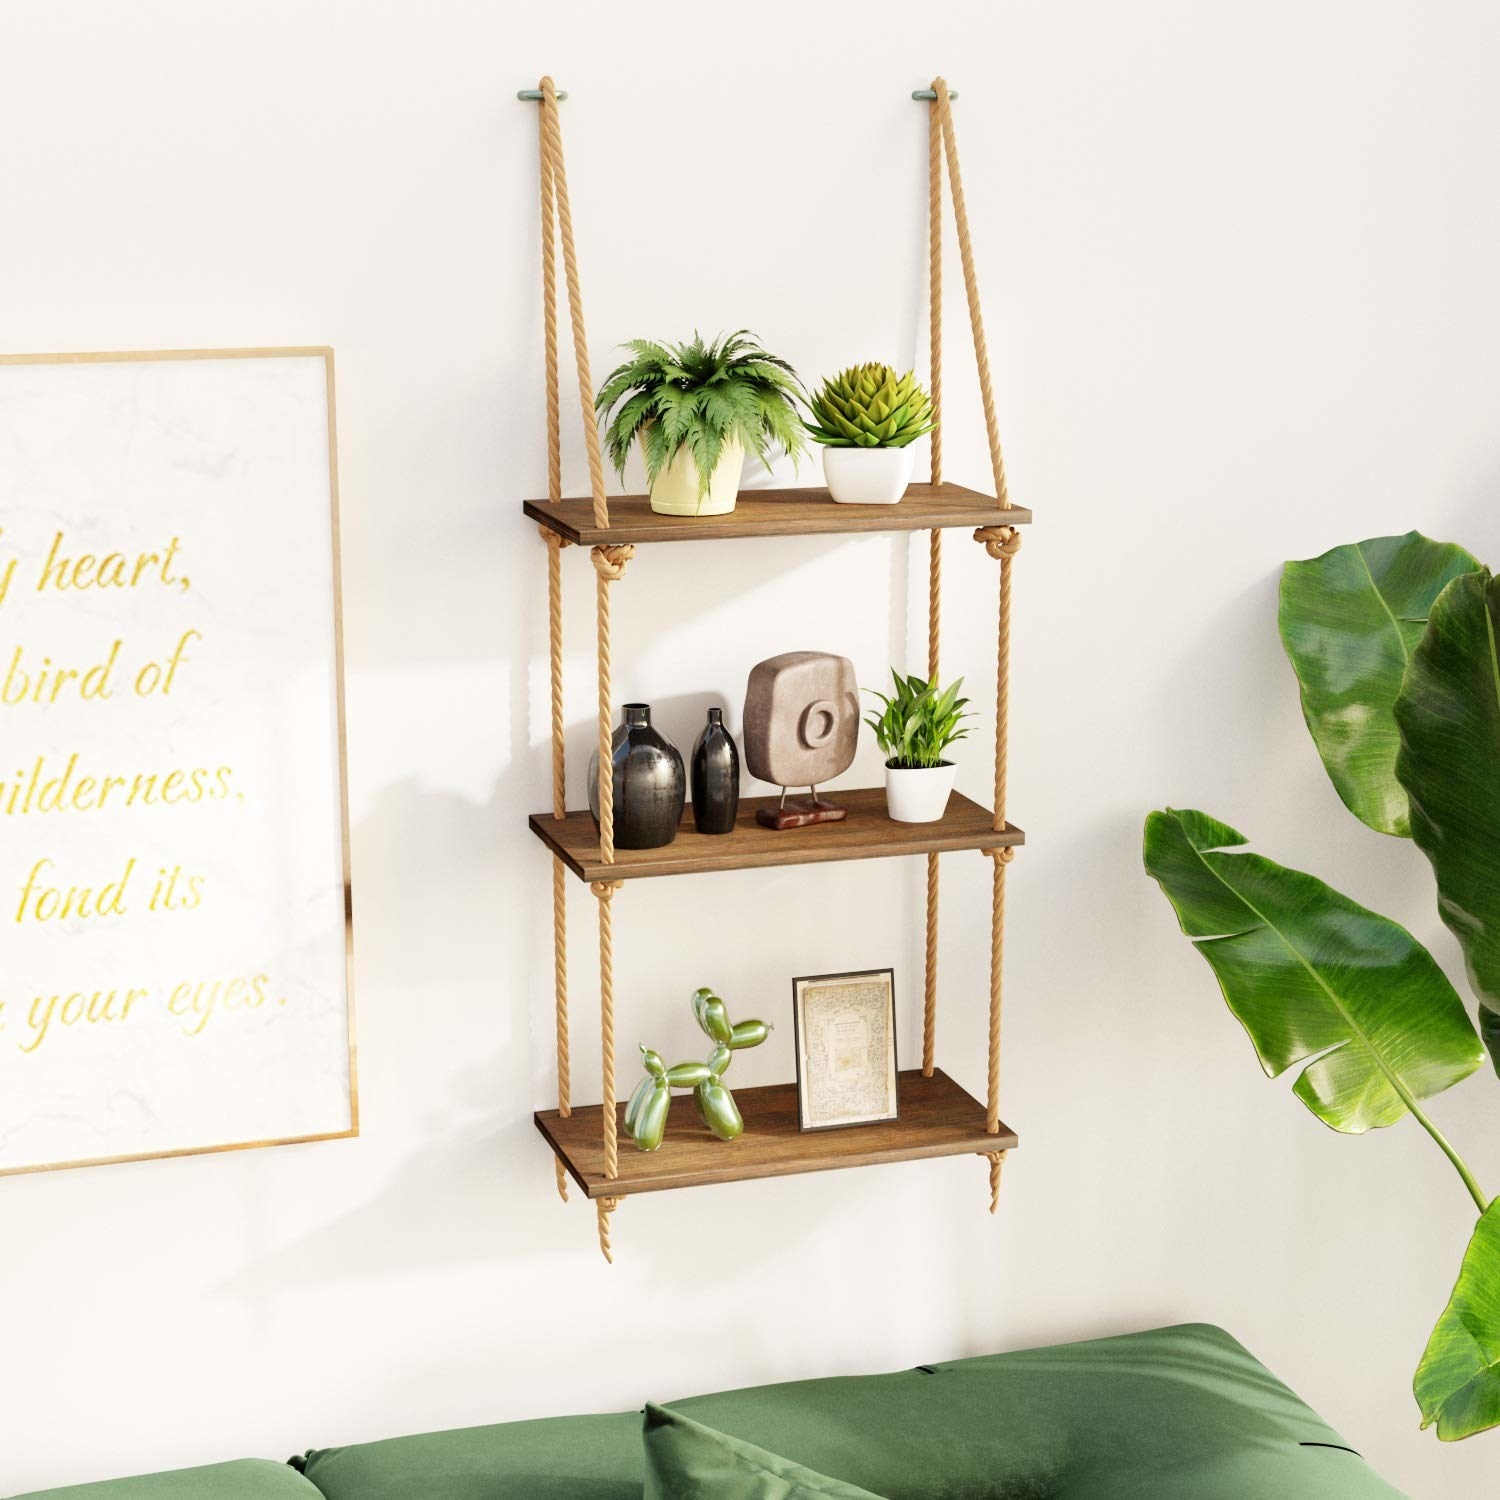 With ropes, you can also have a stunning hanging shelf. Depending on how good you are and how many shelves you would like to have, it may take one hour or so to make.
This one is optional when a wall shelf idea comes to have many similarities in so many ways, such as the materials, design, and size. Put heavy objects to press the knot so that it can make the shelves sit evenly.
As it hangs on the wall, installing it in a place with less traffic would be great. Kids could also be a threat when they like to play around the shelf.
Simple instructions that you can follow are:
- No 1. Cut a piece of wood board to the desired size
– You can either try to measure the size by using a tape measure.
– Next, cut it out with a jigsaw or band saw according to your measurements. - No 2. Attach rope onto the shelf
– First, you need to measure how much length or width you would like to have on your shelf and then cut a piece of thick rope that’s not too short and not too long for this measurement.
– Then, you need to make a knot at both ends for hanging purposes. You should tighten the top part as much as possible to hold the weight of heavier objects on it. - No 3. Hang the shelf
– After you finish all of the above steps, it’s a good idea to hang your shelves in a place where people won’t bump into them.
– This idea will help you save yourself from any accidents too.
4. Simple Triangle-Shaped Shelf
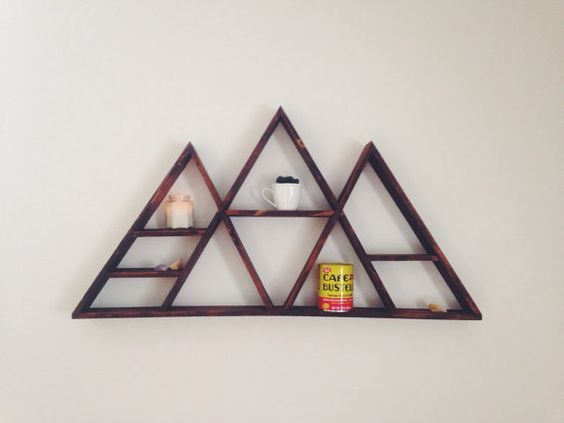 Yes, it is adorable and simple. The triangle-shaped shelf isn’t very common since many ask for usage rather than look for storage regardless of the room.
The drawback of the shelf would be a lack of space. If you are looking for massive storage, this one wouldn’t be for you because a tapered area consumes space and only offers a tiny place.
When making this type of shelf, you should watch for the tips. Make sure they are even or equal so that you can have a nice pointed corner.
Simple instructions that you can follow are:
- No 1. Cut out wooden boards to the desired size
– If you want multiple shelves, you can do that by cutting separate triangle-shaped pieces of wood boards.
– The downside here is that you should make sure that they are perfectly cut for a better result.
– Afterward, you need to sand them until all of them are even and smooth. - No 2. Arrange them on the wall
– You should use a drill machine to attach the boards to the wall correctly.
– Then, make sure that they are level before nailing them down with nails or screws because if not, your shelf won’t be level after it’s done for hanging purposes. - No 3. Decorate the shelf
– You can do that with a paintbrush, a sponge, or anything you know. However, it’s recommended to use paint for decorative purposes because it makes it look more stylish and makes it durable.
3. Make use of Leftover
 This easy-to-make shelf would be a good way for you to start making your DIY shelf. You can make use of second-hand or unused wood and rope to create one.
There’s nothing for you to worry about as it’s pretty straightforward. It’s cheap, creative, and functional at the same time. Firstly, make four holes for each shelf. Then, insert and knot the rope with the same length. Lastly, adjust and set them right.
A big rope makes a nice appearance, and it can prevent the shelf from shaking uncontrollably when it gets bumped. You can spray-paint the shelf with a dark color to make the rope stand out.
You can also acquire the Bamfox hanging/floating shelf here
Additional Instructions:
- 1. Cut off a piece of wood that is suitable for your shelf
The length should depend on how many holes you would like to have. Make sure that it’s not too short and not too long. - 2. Decorate the shelf
If you want to make the shelf stand out, decorate it by making some patterns or designs of your own on them with paint or an ordinary marker. - 3. Drill the holes and cut the rope into equal pieces
After you finish making a pattern for one side of your shelf, you need to drill some holes and cut some pieces of rope (around 30 cm) into equal lengths.
You can also use a hot glue gun for added support and stability if necessary.
2. Adorable square floating shelves with Shiny Finish
 Instead of having one enormous shelf, you can separate it into three or more parts and order them in a certain pattern you like. You can purchase these shelves at stores, but when you think you have a better idea, why do you have to spend money on something you can make yourself?
What is interesting about these shelves is that they have a shiny finish. It makes them look attractive and worth displaying on the wall.
Additional Instructions:
- 1. Cut the wood
Before you start with anything else, you need to cut some pieces of plywood or MDF. You can use a miter saw or jigsaw to do that. - 2. Attach the wooden boards onto the wall
After that, you need to finish cutting any pieces of board left and then attach them onto the wall with the help of a drill machine and screws. - 3. Paint the boards white for insulation purposes
After they are correctly attached, it’s your turn to paint all of them with white paint to give insulation if you want to place heavy objects on them later on for decorative purposes. - 4. Install the shelf
After that, you can install the shelf by using a drill machine or screws depending on your choice. - 5. Hang your shelves
Put your shelves wherever you want them to be. Make sure that they are level for a great outcome in the end. - 6. Optional: Sand down the edges for easy cleaning
If you would like to make it easier to clean, sand down the edges of your small shelves to make them easier for you when it comes to cleaning purposes. - 7. Optional: Add finishing touches
If you want to make it look more stylish, simply spray-paint the shelves with a shiny finish like gold or silver to make them stand out.
Lastly, Number 1. Try Long Shelf
 A long shelf has its own charm, and when you add some greenery or pot flowers, it gives you more than just a wooden shelf. It turns a mundane room into one that has a lively vibe.
It would also make a good decoration for other rooms. This wall-to-wall shelf is a typical shelf. The unique thing about it is the way it is displayed. Yeah, many would just cut them into two so that they can have some more shelves, but this one looks much better.
Additional Instructions:
- No 1. Cut the wood
Take a piece of MDF or plywood and cut it to the desired size. - No 2. Plastic board
Take a plastic board and place it on the bottom of the shelf so that it will hold your shelf from moving too much. - No 3. Decorate the board with greenery, pot flowers, or anything you would like to do on a shelf.
Just make sure that these added items won’t move around since they will be supporting your shelf from moving around, and therefore adding more weight on top of them would make them fall. - No 4. Hang your shelf
Once all of the pieces are in place, you need to hang the shelf onto the wall. - No 5. Decorate with plants when necessary
What do you think of our 10 wall-shelf styling living room ideas? We hope they can be an inspiration for you to level up the interior design of your home.
Bonus:
Bonus Idea No 1. A Double-Sided Corner Shelf Idea
A corner shelf is one of the most creative ways to use your space efficiently, and they can fit many corners in your room with no issues at all, especially if they’re tall enough.
They’re great for storing tall items like plants or tall decor kinds of stuff, and you can hang them on the same wall as that corner shelf.
Additional Instructions:
- No 1. Cut the wood
Cut a piece of wood to the desired size and shape. - No 2. Make two holes and string the rope through one hole and the other
Using a drill machine and screw, make two holes on either side of your board, and then string your rope through them using flags or bungee cords to make sure that you can adjust the length as needed. - No 3. Paint your shelf with white paint for insulation purposes
After it’s all set, spray-paint it white to give it some insulation if you need to place heavy objects onto this wall shelf later. - No 4. Place your shelf on the wall
After you’re done, just hang it on the wall where you want it to go. - No 5. Decorate it with plants or ornaments when necessary
If you don’t use it for decoration purposes, just use plants instead. And if you feel like decorating your shelf with an ornament, then go ahead and do so. It’d look nice anyway.
Bonus No 2. The Mirror Shelf for the Living room
Mirror shelves are trendy as they give that illusion of dimension and the illusion of their items being bigger than they are. If you’re looking for an option that offers lots of storage space and looks good but isn’t as heavy as other types of decorative pieces, this is undoubtedly an option to consider.
Additional Instructions:
- No 1. Cut the wood using a miter saw
First, you need to cut all of your pieces of plywood or MDF to the desired size and shape. - No 2. Screw all of the pieces together
Once you’re done with that, it’s time for you to start attaching one piece of wood onto another using screw. Do not skip this step, as this will hold everything in place properly. - No 3. Measure the size of your shelf according to the size of your wall. And then mark where you want your shelf to go on that wall.
After that, drill holes on those marks to make it easier for you to hang it up later on. - No 4. Attach the metal rod to the top of your shelf
After that, you need to drill some holes on the top of your shelves so that you can attach a metal rod to them. - No 5. Attach the mirror onto the wall
After attaching the metal rod, you’re ready to hang up your shelf. Hold it vertically on either side of where you want your mirror to be, and then drill it in with a drill machine or screw it into place with screws. - No 6. Hang up your shelf
At this point, you can hang up your shelf on the wall wherever you want it to go.
References:
10. Decorpuzzle.com
9. Homedit.com
8. Sebringdesignbuild.com
7. Rockindeco.com
6. Decorpuzzle.com
5. Walmart.com
4. Pinterest.com
3. Aliexpress.com
2. Indiamart.com
1. Housebeautiful.com