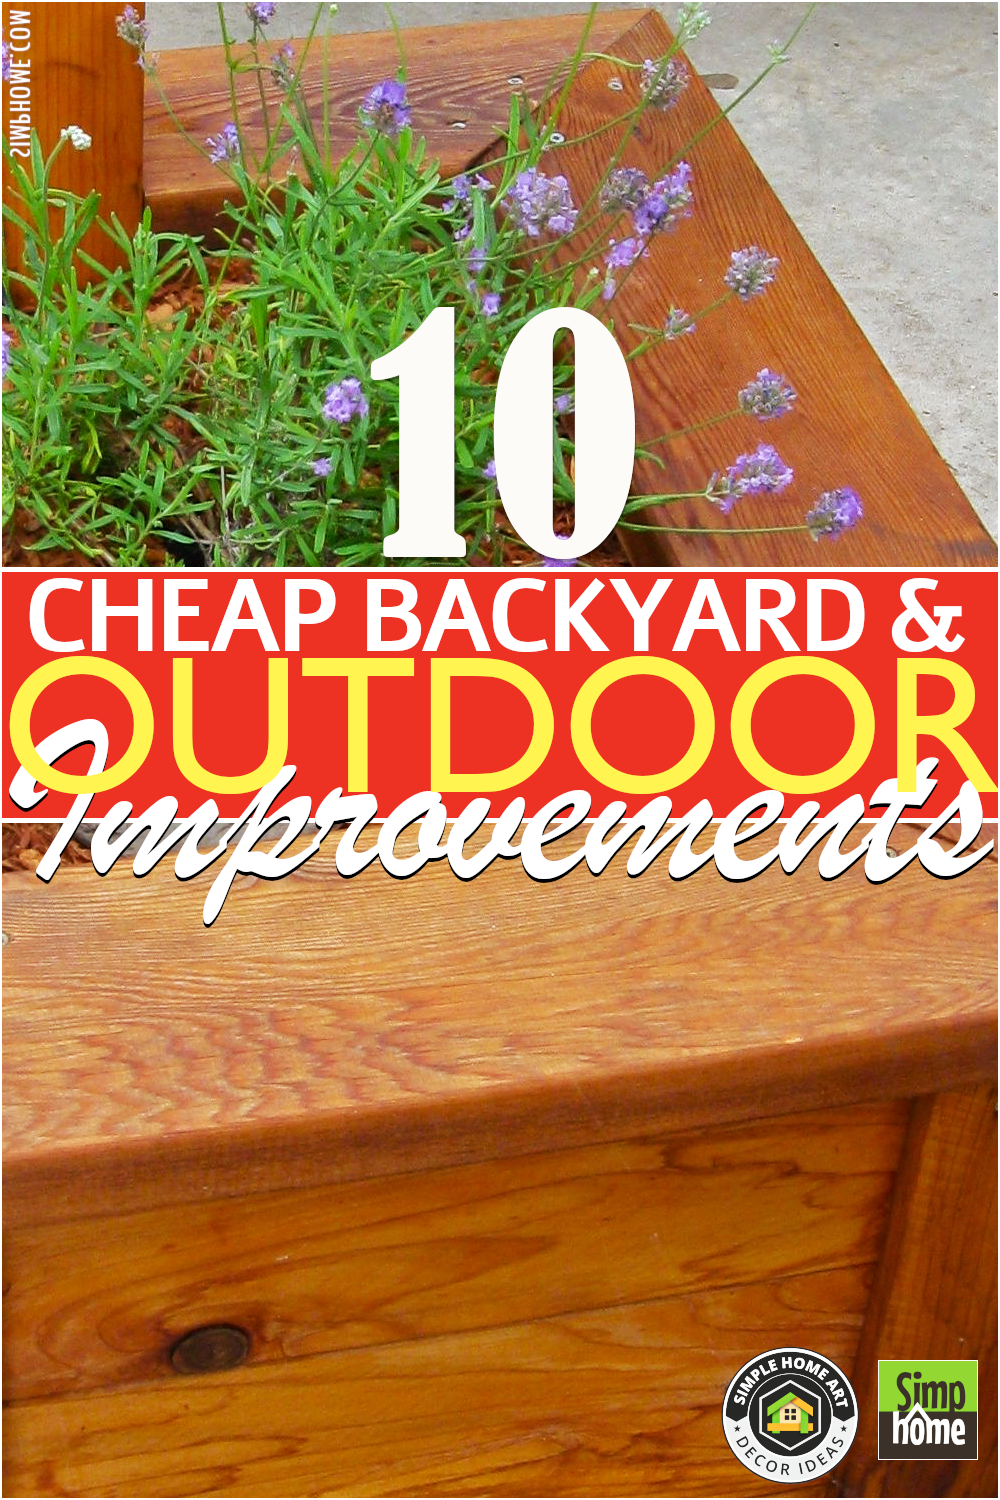
That’s right; you get the best of both worlds. Bring ready for al fresco happiness with these ten backyard ideas to get yours in shape for the warmer months ahead, ranging from a tiered garden effort to a colorful gazebo and Bahama shutters. In addition, save your preferred examples so you can recreate them in your environment.
Following a long day at the office or home, unwinding in the backyard is a fantastic plan. This means you’ll want some covered outdoor space, like a patio or pergola, to spend time in the great outdoors style.
Creating a relaxing outdoor area can be costly. That’s why we’ve come up with these ten cheap backyard outdoor area ideas to help you acquire a nicer curb appeal, patio, gazebo, or pergola without breaking the bank. As always, Simphome presents you with the green list.
10 Affordable Backyard Outdoor Space Video
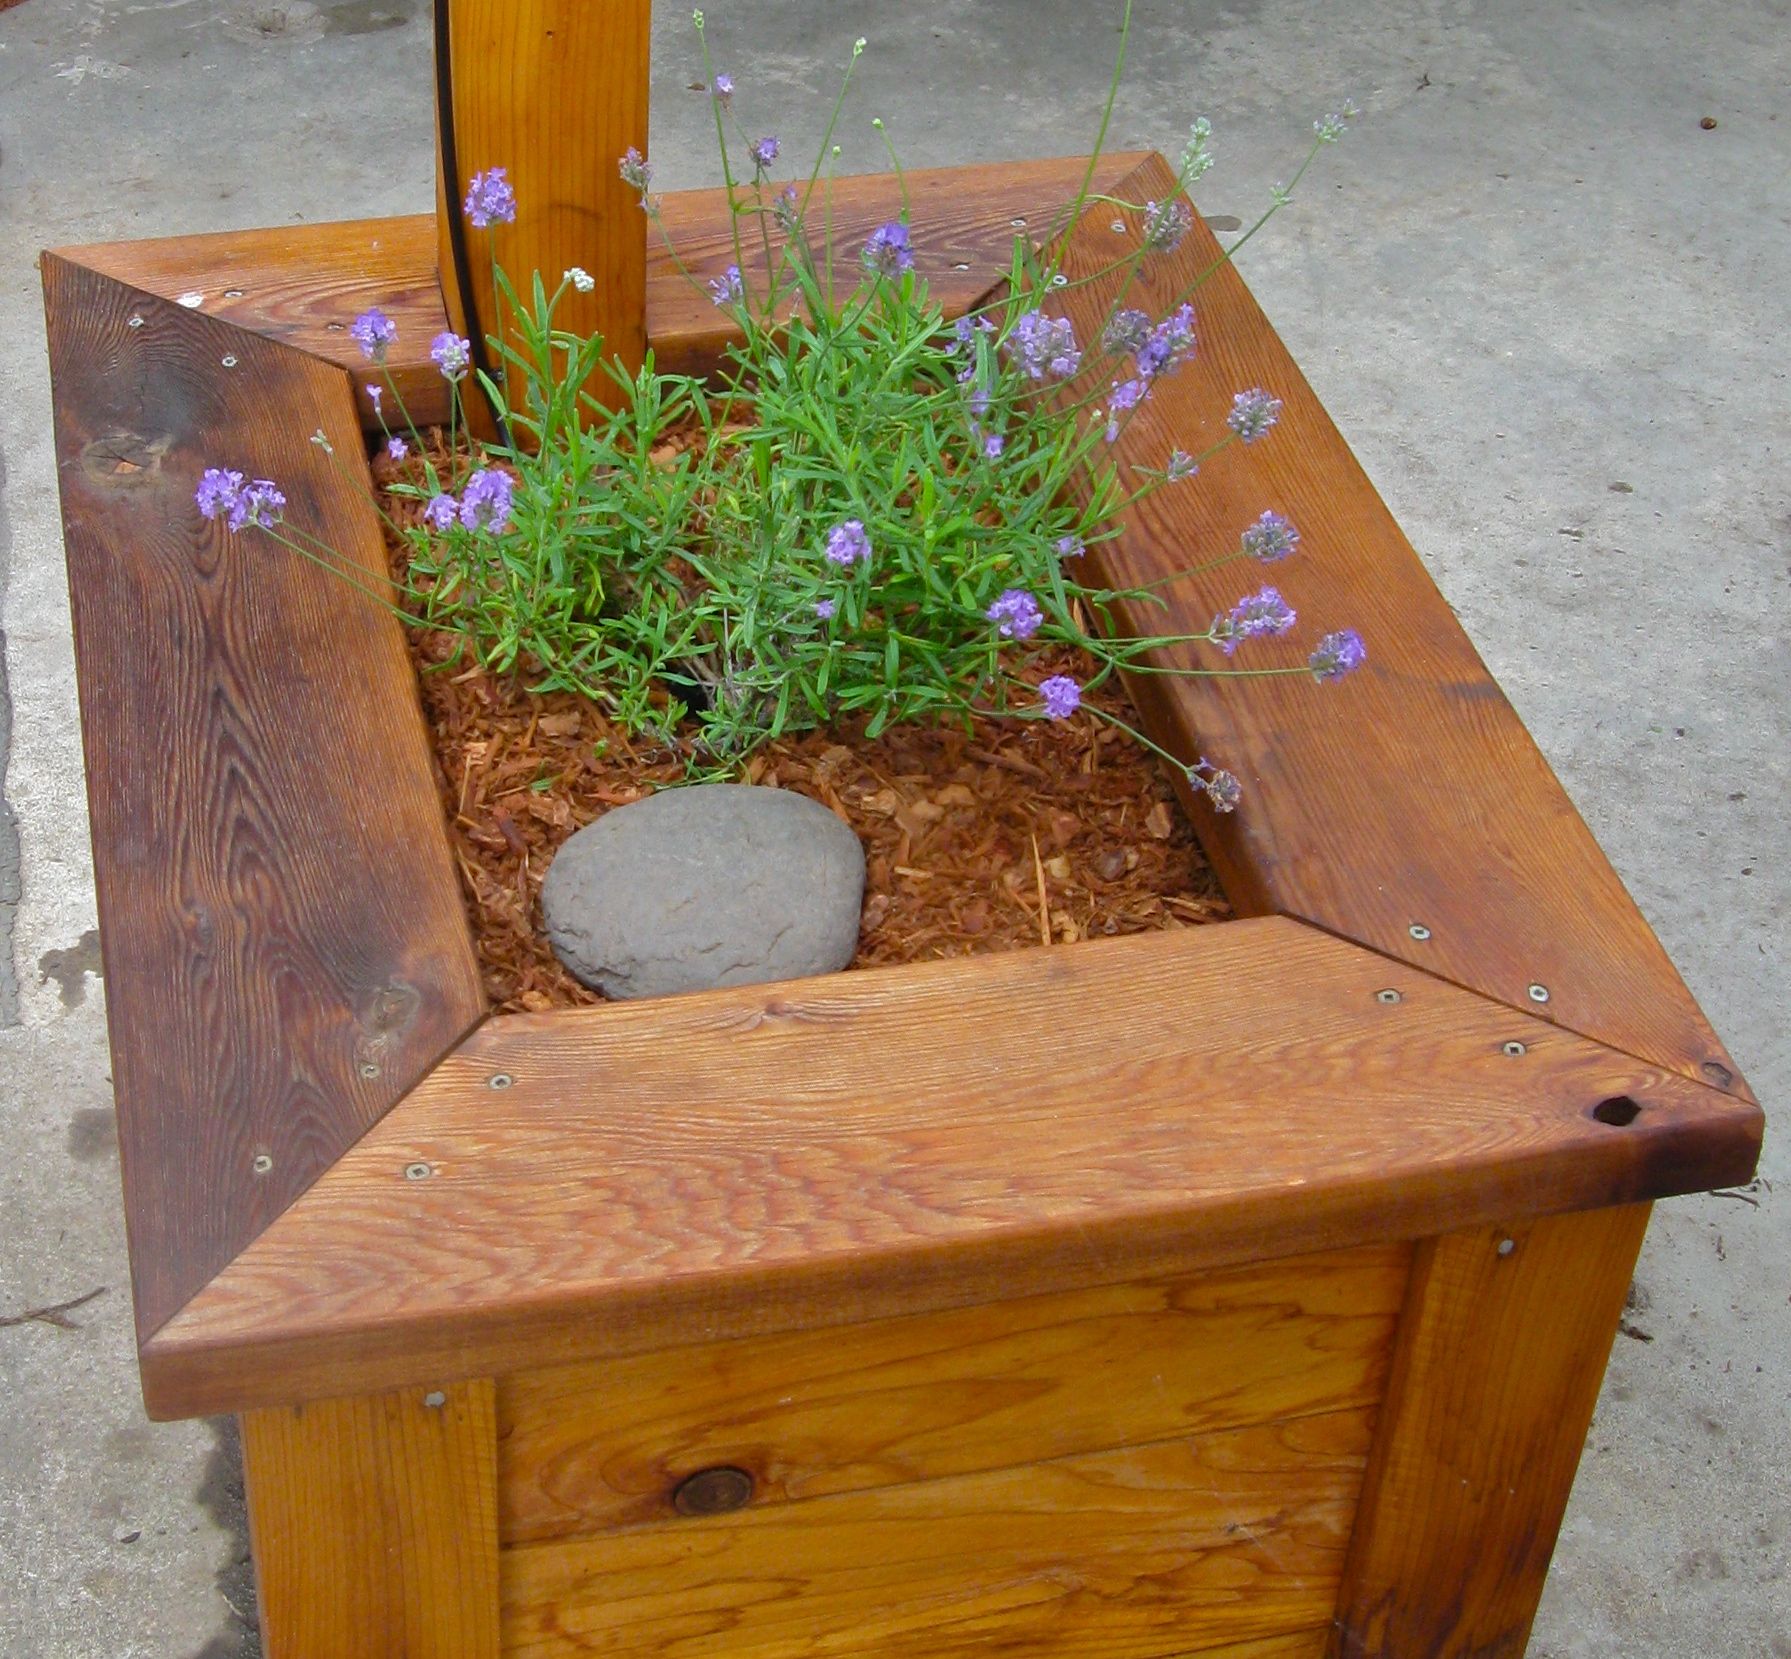
10. A tiered herb garden planter idea for your backyard
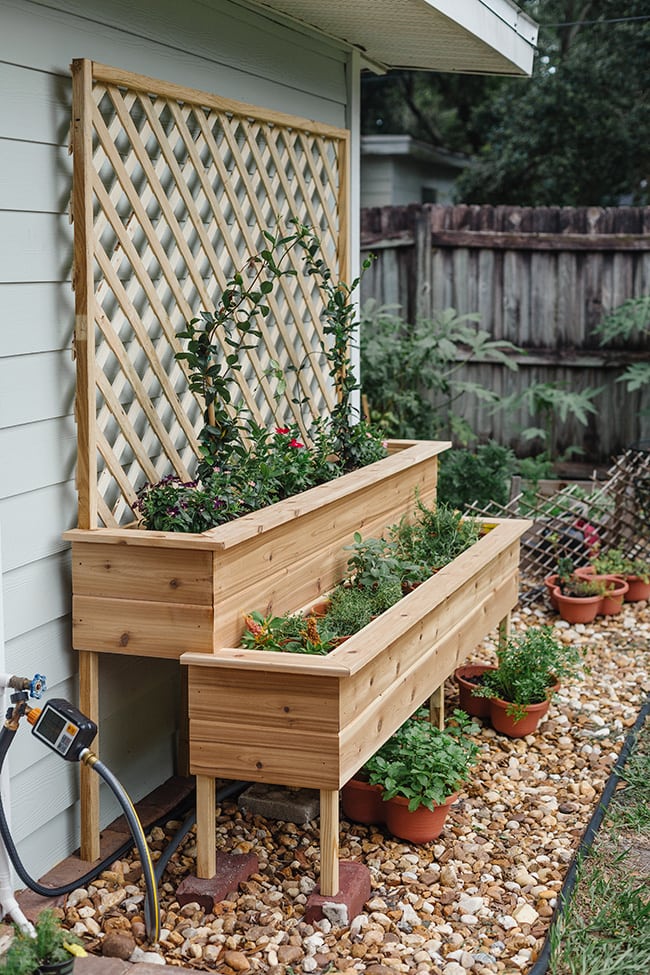 The idea is a tiered herb garden with two rows and a tall lattice panel to fill the height visually.
After the materials are prepared, Cut and assemble 2×2’s for the frame
Make your planter six feet wide by six feet high, with each planter bed approximately 13″ deep (front to back). The frame would be constructed in three sections—front, middle, and back—connected by 2×2″ supports.
Make the front tier sit 10″ off the ground, then cut a template piece at 10″ and use it as a guide to building the front and middle legs. Using our 3″ screws, pre-drill the holes first to avoid wood splitting. Use a speed square on the opposite side to ensure a 90° angle. Use one screw per joint, and make sure to drill off-center, so there’s room for a second screw for the supports in the next step.
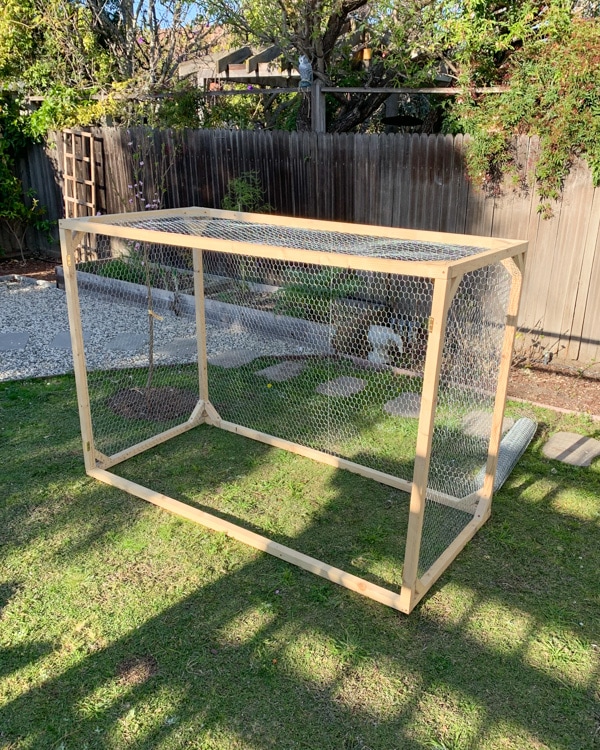
9. A curb appeal improvement with A DIY RAISED GARDEN BED COVER
 When planting a vegetable garden for the first time, it’s easy to miss that pests devoured many of your seedlings and vegetables.
Those pesky squirrels had their fill in our author veggie garden, too. However, she solved the challenge with a garden bed cover roughly 6 feet wide, 4 feet tall, and somewhat less than 3 feet deep (the size, of course, adjustable).
For large plants and vines like artichokes, peas, and cucumbers, you’ll want a protective cover at least 4 feet tall, so keep that in mind when selecting the height of this garden bed cover and doors.
The cover doors are hinged to the cover frame, while the cover itself is made up of a pair of panels. There are also two barrel bolts on the top frame for added safety. The chicken wire acts as the raised garden bed’s main layer of protection, and you can use acrylic to turn the structure into a cold frame if you’d like.
8. A Colorful Gazebo to Welcome Summer
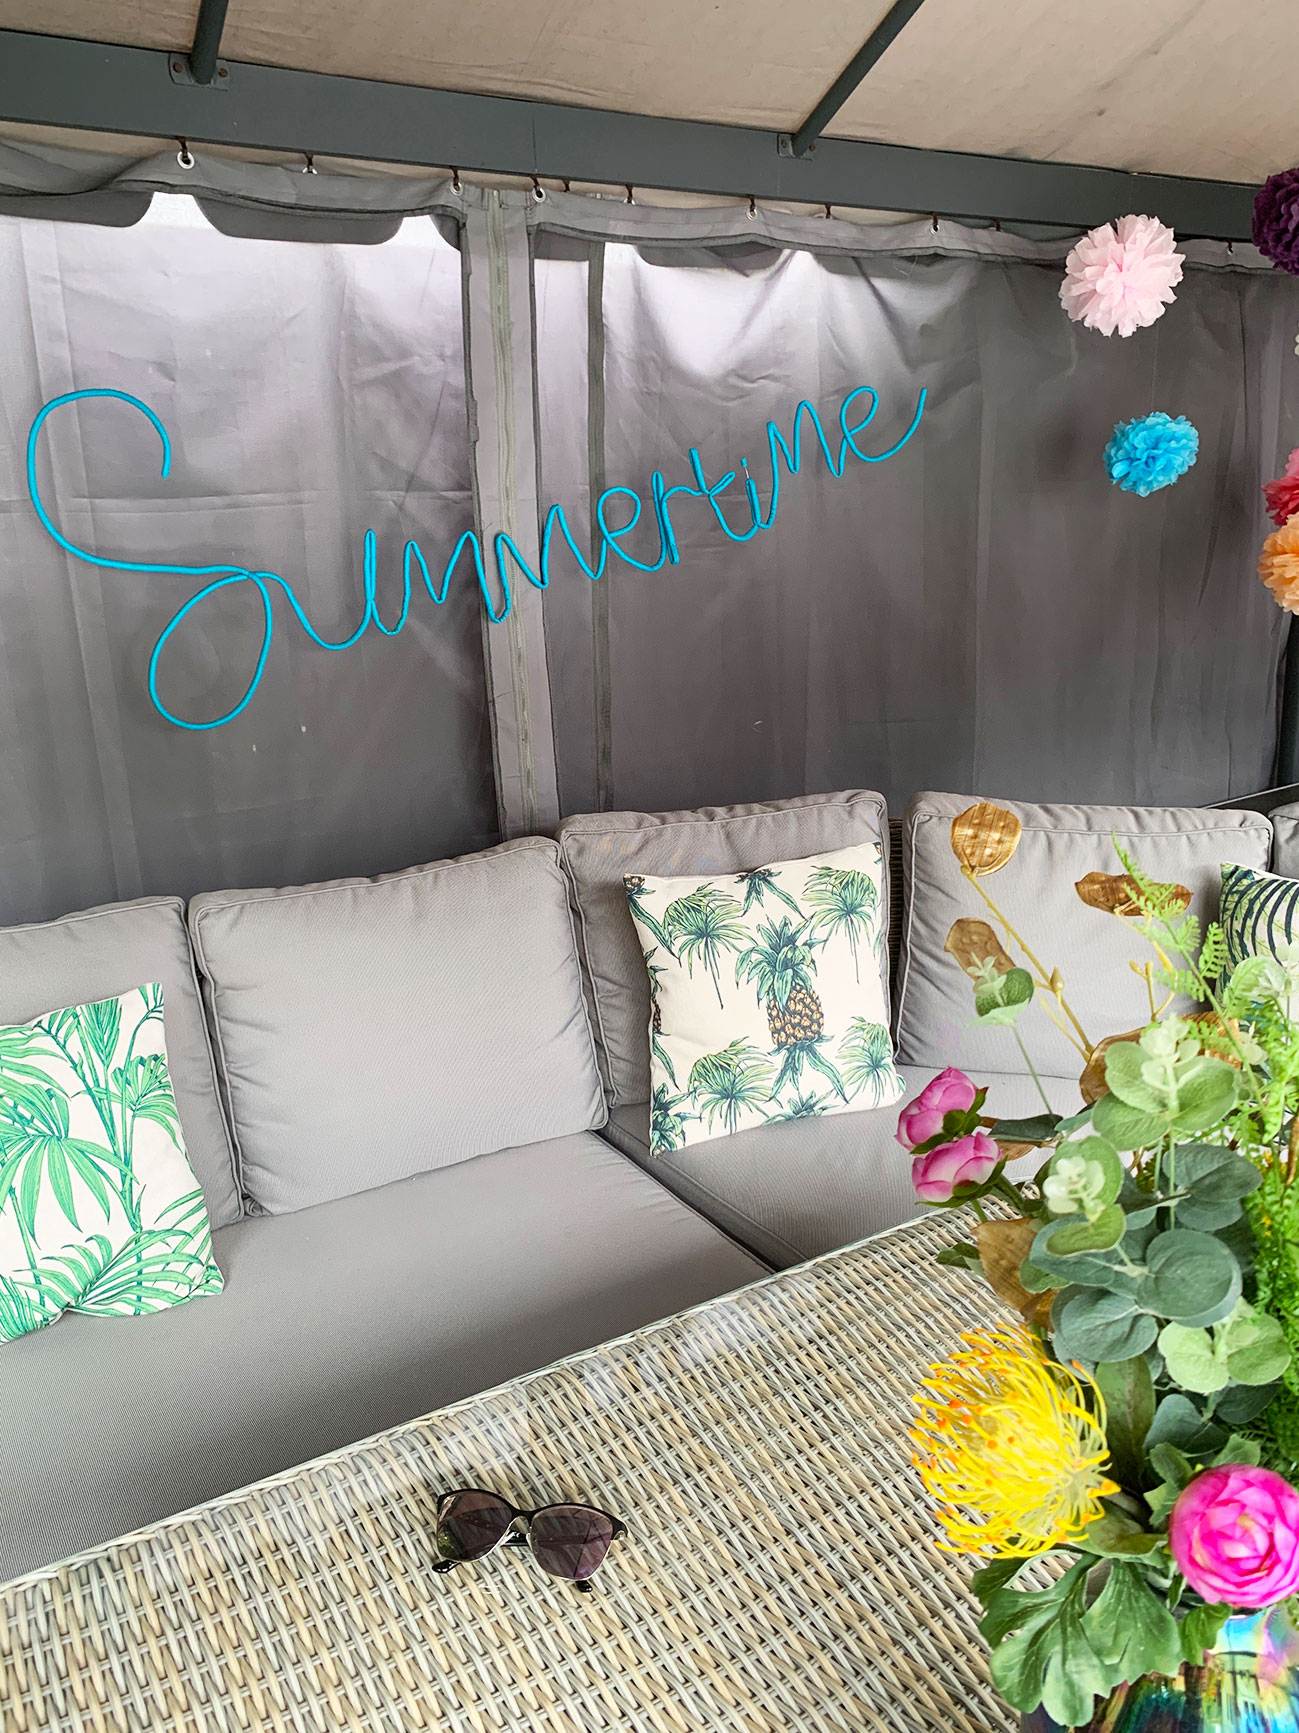 Summer may not be coming soon. In any case, it’s best to get ready for it ahead of time, including decorating the patio.
Do not worry if you do not have a specific outdoor area to entertain guests. Alternatively, you can assemble an inexpensive fabric patio kit in almost no time. Once the fabric gazebo is ready, try hanging light bulbs or string lights because illumination is crucial. They will serve to illuminate the area and add a decorative touch to the area as well.
Consider placing some colorful tropical pillows on the sofa to spice things up. Your gazebo’s aesthetic value will increase if you decorate it with flowers or artificial plants.
7. An ideal pergola for your outdoor
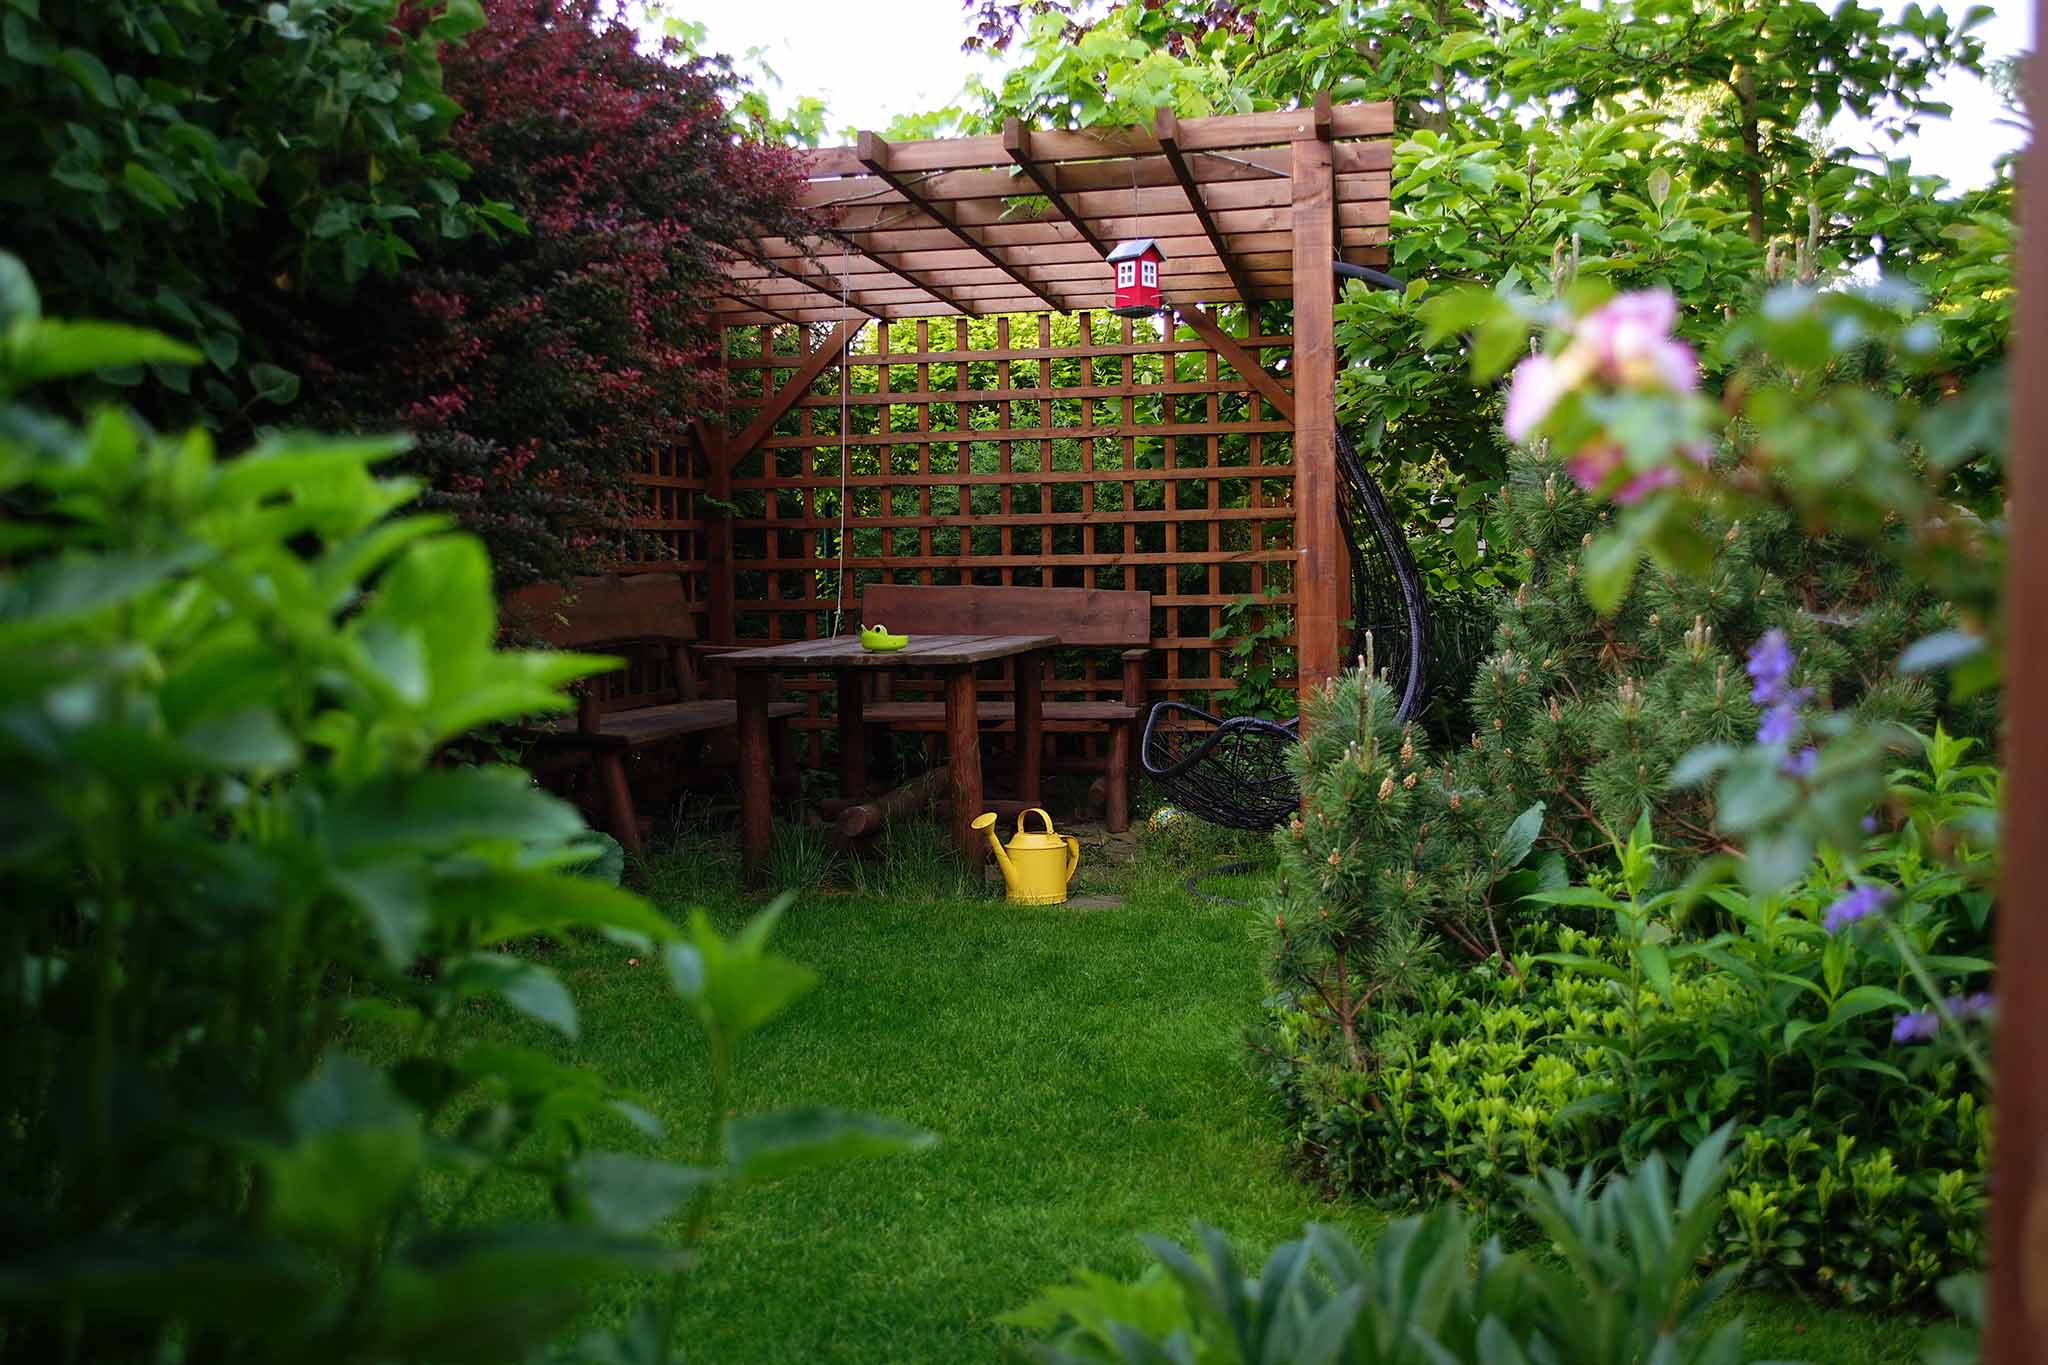
You can try this pergola if you want a secluded hideaway to unwind.
This pergola is easy to build. You only need to erect four posts as the supports. Then, use a trellis to create the roof and back. You can also shove two wooden benches and a wooden table to create an outdoor dining area. Check out outdoor furniture Alexandria or other trusted online furniture stores for more design options.
Ensure the furniture is comfortable with water-resistant cushions. Measure your space, coordinate with your home’s style, and factor in storage options. Prioritize quality construction within your budget, and test comfort before purchasing. Research reviews and recommendations to make an informed decision that aligns with your preferences and the specific needs of your outdoor space.
Consider using pine when making your pergola from scratch because it is relatively inexpensive.
Pine is a material you can use to construct a pergola, and if you decide to stain it yourself, you can save even more money on the project. Pine is more susceptible to warping and damage from the elements than cedar and redwood, although pine treated with pressure is a rather hardy material. Then there is teak, fir, and acacia; the only true restriction is your imagination: You may include repurposed barn wood, salvaged beams, or even a tree from your backyard into the design of a pergola.
6. Embrace Tropical Vibes with a Thatched Roof

This patio is quite straightforward. Nothing is high-brow or sophisticated in the project. Only four logs are available for use as beams and rafters.
The thatched roof is the focal point of this pergola’s aesthetic. It’s installed directly on top of the ceiling rafters to give users even more protection from the sun.
Extra: Invest in woven seats and a stone coffee table to bring out your pergola’s tropical feel.
5. Gazebo with Extra Anchor Planters, Why Not?
 What other options for securing a gazebo without drilling into concrete or pavers?
Start by anchoring the gazebo to the wooden platform. Each gazebo leg is anchored with a Home Depot paver that costs just $3.19. Two more pavers are placed above the initial set. This trick is obviously an ugly hack; therefore, the straightforward planters to conceal the pavers come into action.
Put at least one pocket hole on each side after you cut the wood. Two pocket holes are enough; join your four planks by screwing them into a 2×2. Glue the wood together.
Bring together the three sides, and the pocket holes should be on the middle side, facing out.
Wrap the leg of your gazebo with your three-sided planter, and then join the fourth side.
Be sure to fix the top of your planter.
The finishing touch is the addition of trim.
Connect the frame to the pots with a nail gun.
4. Extra Swings for extra backyard fun
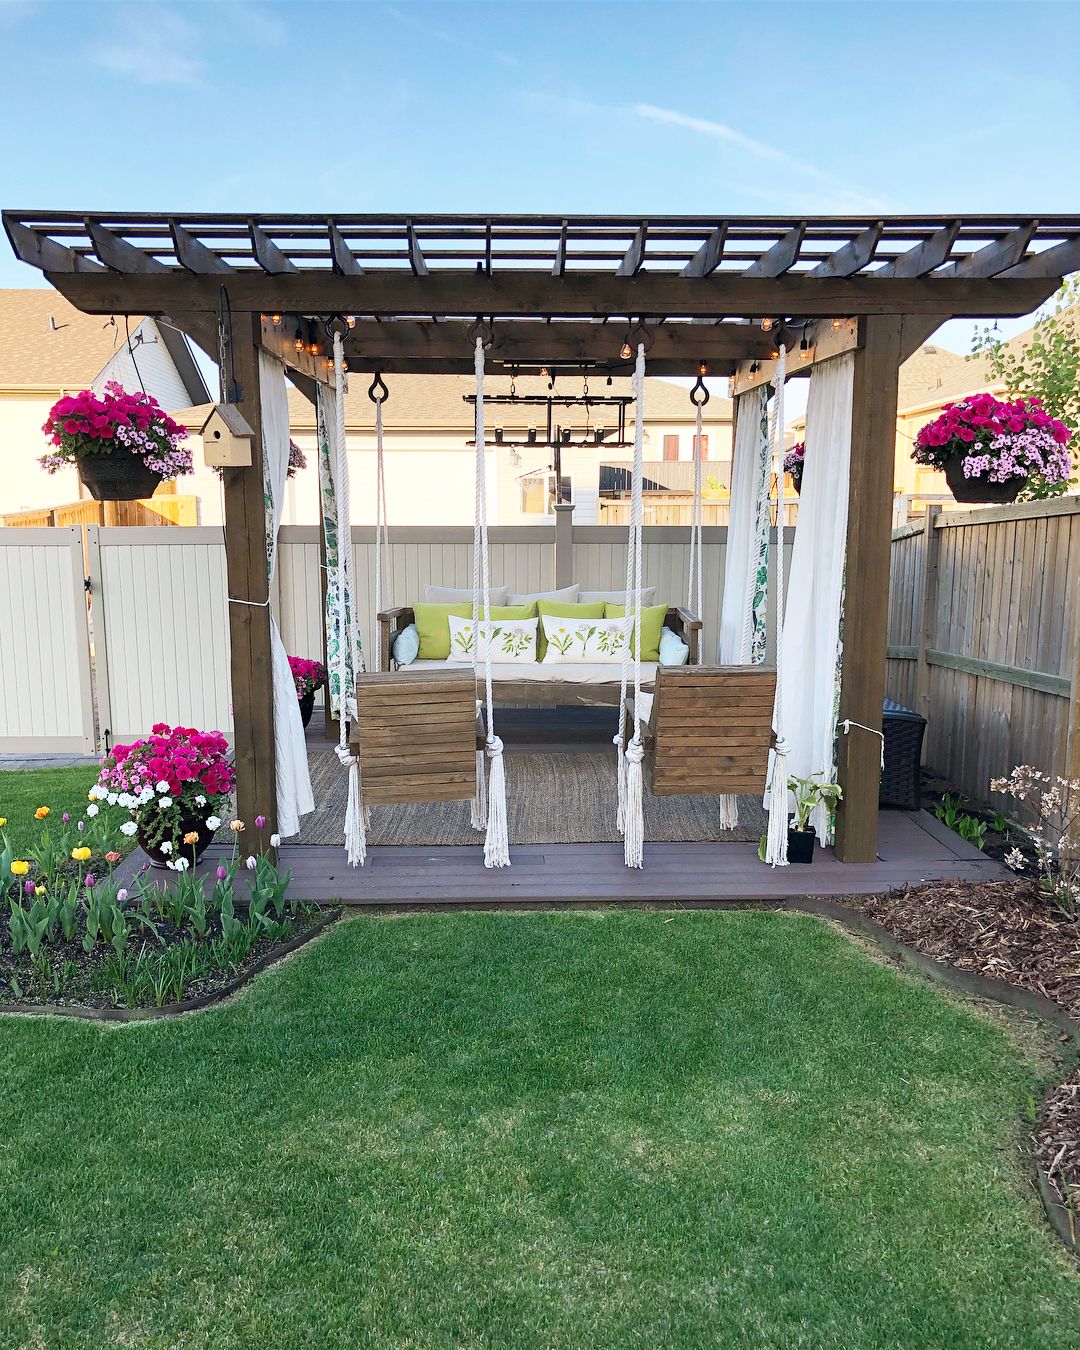 Put your pergola over the top with a swing chair for extra fun. There is a chance that this plan will be too expensive. The best option, then, is to make it yourself.
In this pergola, for instance, you can find a hanging bench and two armchairs dangling from the rafters. You will need to use twist-lock carabiners and heavy-duty eye bolts to get this look.
You can use hemp rope from twisted jute thread to secure the seats. Chains are your option if you need something more robust.
The pergola in the image is located on a second ground-level deck and features a bed swing, two chair swings, and a self-watering sprinkler system for the planter baskets.
3. The Bahama Shutters for the Gazeebo
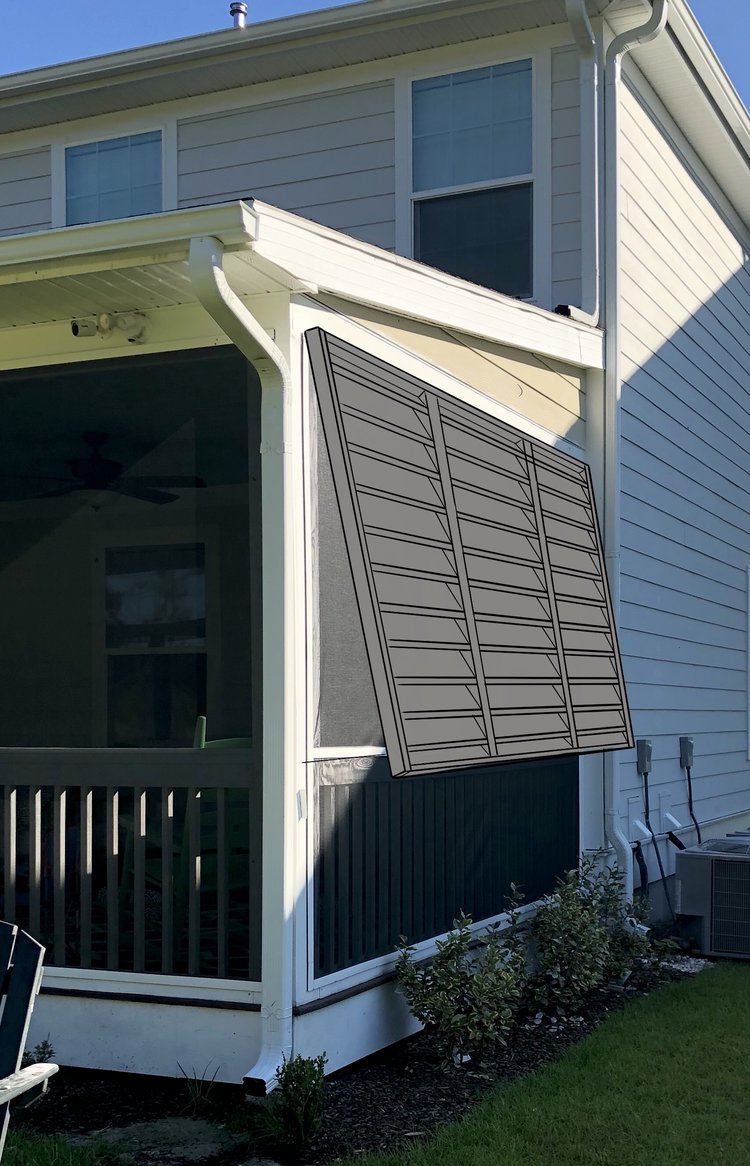 How much do Bahama shutters typically cost? Our author porches required shutters that were a staggering $5,912 to cover since they had to be a huge 70 inches tall and span a gap of 141 inches wide.
Start with your drawing board for a better and cheaper alternative.
Create a jig to manufacture the shutter’s constituent elements first. A trip to Lowe’s to pick up some pine boards and a tested router jig. For the framework, use treated 2x4s; for the slats, use treated 1x6s.
For the finishing touches, stays in Lowe’s and pick up some Valspar Duramax exterior paint+primer and a heavy-duty drive gate hardware top mounting hinge. Considering the weight of the grossly overbuilt shutter and the low cost of the hardware, paint, material, and jig combined, it is in your best interest to secure your outdoor recreation area against any hurricanes that may be on the horizon, saving you an estimated $5,300.
2. A Boho-Inspired Outdoor Space
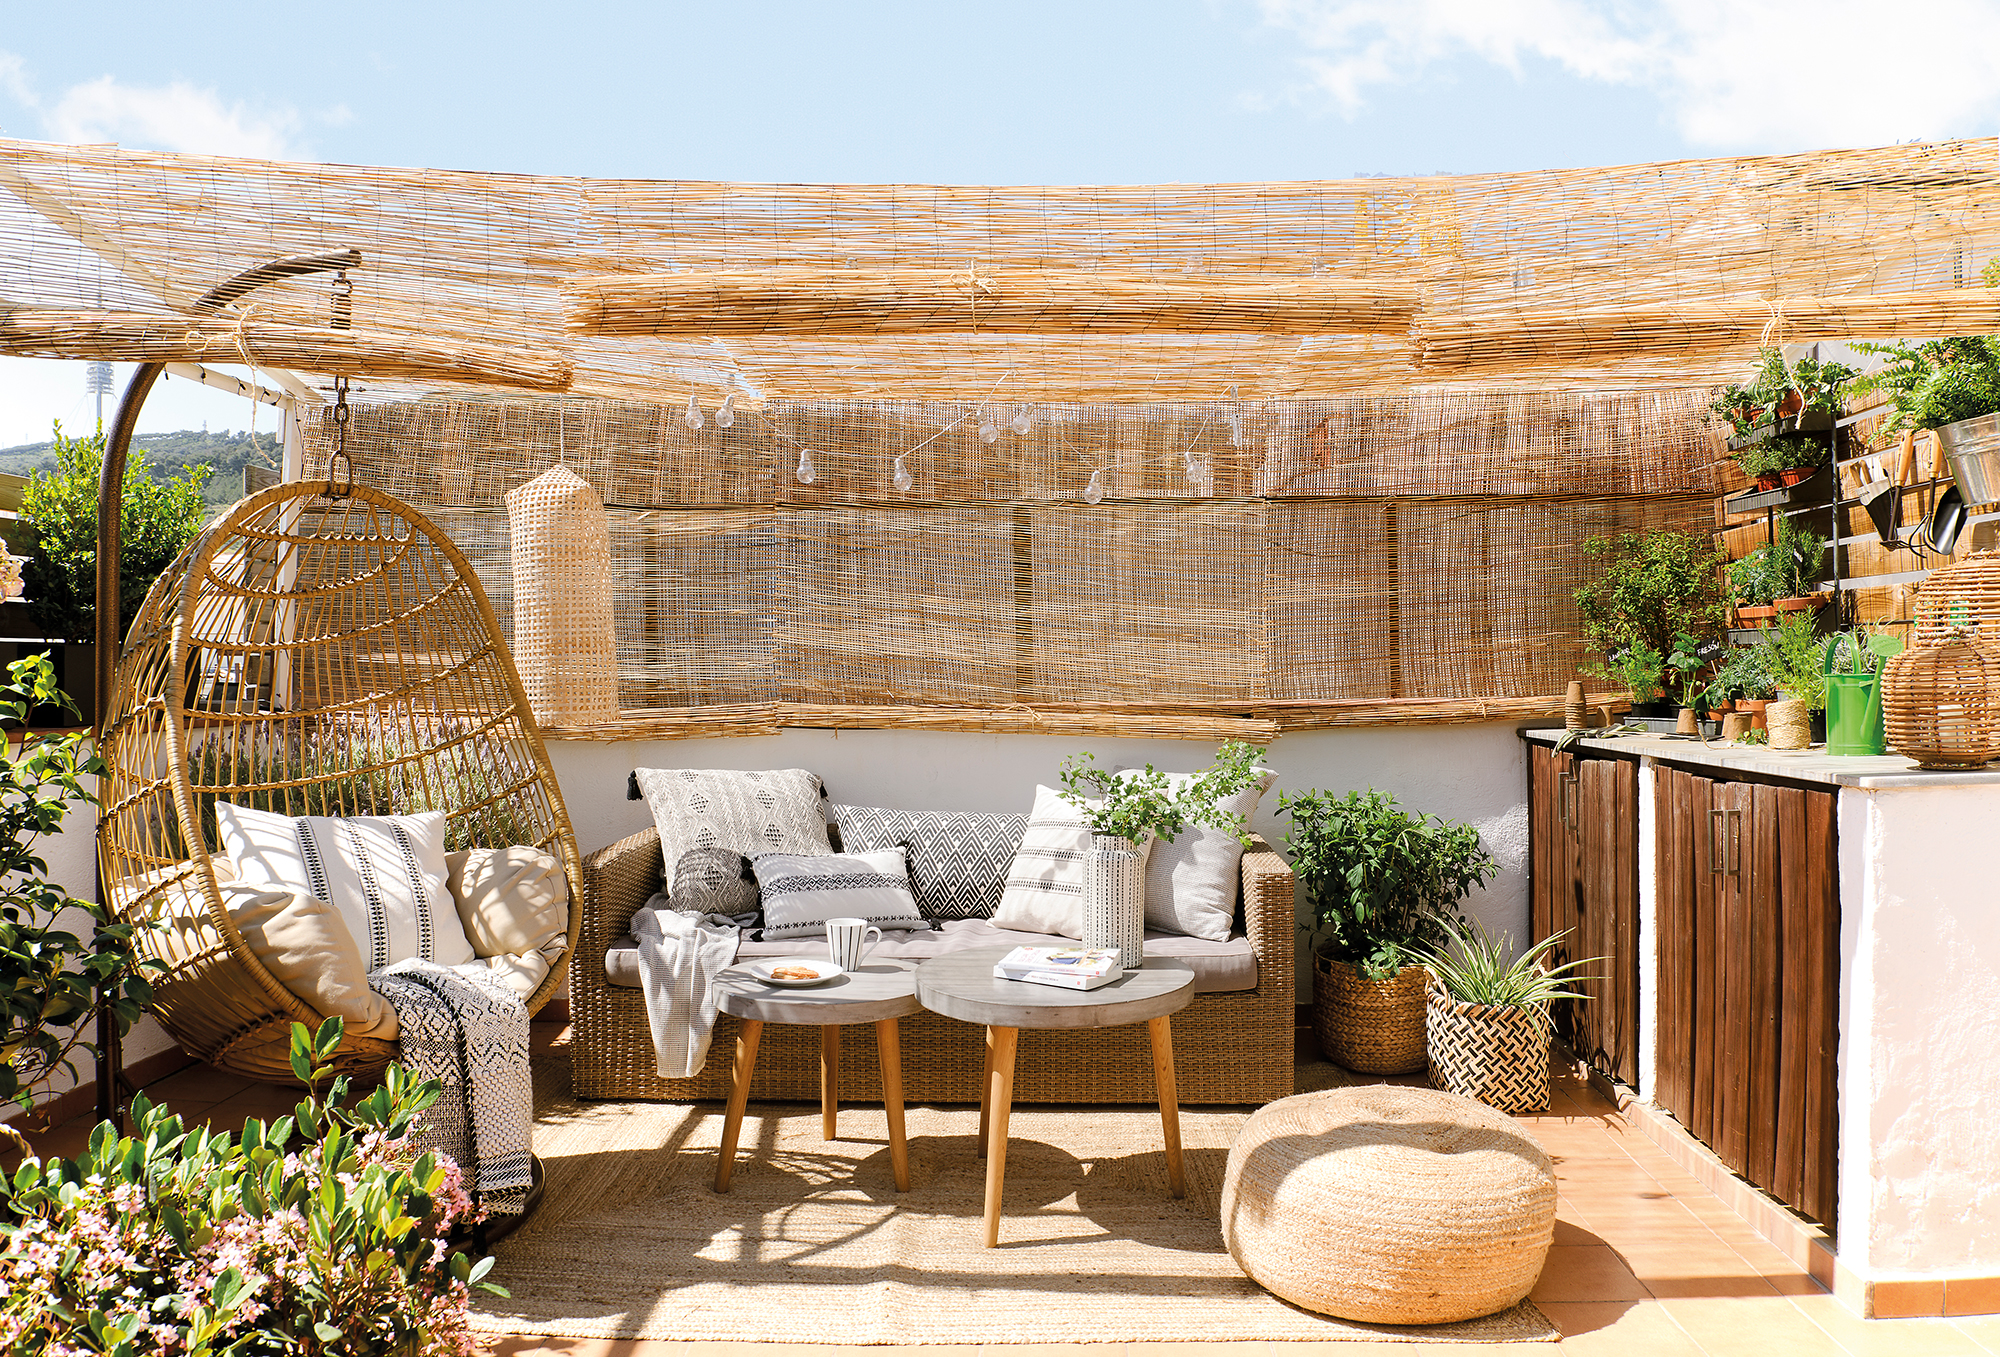 These days, lots of individuals like the boho look. They appreciate the unique charm resulting from the simultaneous appreciation of texture and pattern. It stands to reason that you would want to incorporate this aesthetic into your outdoor living area.
Bohemian patios bring the outdoors in, so to speak, with woven furniture, wicker storage, and woven accessories like a pouf or ottoman.
Add additional minimalism with the pegged legs that support your coffee tables. Cover the terrace with bamboo blankets as the last step.
1. A DIY Sail Shade for Your Patio Cover
This stylish DIY sail shade can cool down an overexposed patio or deck. While this shade appears to be uncomplicated at first glance, it just takes a few well-considered additions to transform it from merely useful to aesthetically pleasing.
Chris Lambton brings the outdoors indoors by draping a sail from a boat across the patio. Fasten the sail to ground-level posts to create shady areas, and you will protect your outdoor space from the sun with a triangle-shaped shade sail. You can buy a boat sail at any marine supply store or online. A useful hint is to wind the rope around a broomstick before beginning this operation if you want a tighter wrap around the 4×4 post.
References:
10. Jennasuedesign.com
9. Hydrangeatreehouse.com
8. Caradise.co.uk
7. Thisoldhouse.com
6. Thisoldhouse.com
5. Diydanielle.com
4. Instagram.com
3. Grayhousedesignco.com
2. Nextluxury.com, Onekindesign.com
1. Hgtv.com, Hgtv.com