
Pouring Concrete Patio: A First Timer’s Guide

Updated: May 24, 2023
Poured concrete makes a terrific backyard patio and it's easier to succeed than you might think. Here's how to get great results.
A poured concrete patio can transform your backyard. If you’re considering taking on this project, your success depends on preparation. Start by reading this guide.
On This Page
About Concrete Patios
Durable, attractive, long-lasting and easy to keep clean — these are the advantages of a concrete patio. Unlike paving bricks or patio slabs, a poured concrete patio greatly reduces gaps and cracks that can lead to weed growth and ant infestations.
It’s a big job to pour a patio properly and you don’t want to skimp on quality. Follow these guidelines and your concrete patio will give you years of enjoyment.
How Much Will You Save?
You’ll save 40 percent to 50 percent by pouring your patio yourself. (Taking the DIY route also means you can be sure the technical details are done correctly.) You’ll save even more if you mix your own concrete instead of having a ready-mix truck deliver it.
What to Consider
Size, situation, time and budget are the main things to consider when planning a concrete patio. More specifically, think of these items as you plan:
Is the area level? You may need to add compacted fill to the area to level out a sloped site for a patio.
Will you excavate by hand with a shovel, rent a small excavator or hire a pro to do the digging? Although your patio will sit on top of the ground, you should remove sod and top soil before building forms and pouring concrete. The size of your planned patio, the texture of the soil and your level of physical fitness determine whether you do this digging by hand or not.
How thick will your patio slab be? Four inches is the minimum thickness for a concrete patio. You’ll want to make it six to eight inches thick if the patio will support a structure such as a gazebo or hot tub.
Tools
- Shovel
- Wheelbarrow
- Hand saw
- 48-inch level or laser level
- Hammer
- Drill driver
- Trowel
- Broom
Materials
- 2×6 or 2×8 lumber for forms
- 1-1/2-in. x 1-1/2-in. x 18-in. wooden stakes (one for every 36-in. of form length plus one for each corner)
- #10 x 3-1/2-in. deck screws for form assembly
- Bagged concrete mix or Portland cement and sand to hand-mix, or ready-mixed concrete by truck
- Crushed stone
- Concrete reinforcing fibers
- Spray paint
- String and stakes
Equipment
- Portable cement mixer (unless you’re ordering ready-mixed concrete)
- Masonry cut-off saw
The Process
There are several main steps to pouring a concrete patio, including marking and excavating, assembling and leveling forms, mixing and pouring concrete, finishing the concrete and more. Here’s the process in more detail:
Mark your work area: Use spray paint or strings and stakes to mark out your patio. Make this area 18 inches longer and wider than the finished size of the patio you want. You’ll need this room for the forms and the space required for working around them.
Excavate the area: Use a shovel or rented mini-excavator to dig up the sod and top soil in the area of your patio. Aim to go down six to eight inches below the current soil level.
Assemble forms: Join 2×6 or 2×8 lumber to form the outer shape of your patio. Use #10 x 3-1/2-in. deck screws to join the corners, three screws per corner.
Square the form: If opposite sides of your form area are the same length (and they should be), then equalizing diagonal measurements taken corner to corner automatically makes the corners square. Pound one stake into the ground at each corner to hold the form square after it has been adjusted.
Straighten the form: You can never trust lumber to be straight. That’s why you must use strings along the sides of the form as a straight reference line. Place stakes every 36 inches along the outside face of the form to hold the edges of the form straight.
Level the form: Determine the highest corner you want for your patio, raise the top of the form to that level, and then drive a deck screw through the stake and into the form to lock it in position. This is your starting reference point. Use a 48-in. level or a laser level to raise the entire perimeter of the form to a level height, then drive a single deck screw through the stake and into the wood form. Double-check that the entire top edge of all form boards are level with each other.
Saw the stakes: When it comes time to level your concrete you’ll be drawing a long, straight piece of wood across the top edges of the form as you’re finishing the concrete. This is called “screeding” and it’s why you need to saw the stakes flush with the top edges of the form. Do this step now using a handsaw.
Add crushed stone: Shovel in and level crushed stone to make the bottom of the excavation more uniform and to create a space for water drainage. Rake the crushed stone so it’s a consistent depth down from the top edge of the form boards. This depth determines the thickness of concrete of your completed patio.
Add reinforcement: Concrete should be reinforced to minimize patio cracking. Some people use reinforcing steel mesh, but 1/2-in. rebar on a 12-in. x 16-in. grid does a better job. Place the mesh or rebar on the bottom of the form, then lift it up during the pour so the reinforcement is two inches off the bottom.
Formula for determining concrete quantity: (Thickness x width and length of patio in feet) divided by 27 = Concrete volume required in cubic yards.
Pour and finish the concrete: If your patio is tiny you can buy bags of just-add-water concrete mix. Add this to a portable drum-type concrete mixer with a quantity of water to create a uniform blend that’s the consistency of stiff cake batter.
You can save money on large patios by buying Portland cement, sand and crushed stone separately, then mixing all these components yourself in the mixer at a ratio of one part cement, two parts sand and two parts crushed stone.
Ordering ready-mixed concrete delivered by truck is the most costly option, but it makes sense for patios that require more than one cubic yard of concrete. Concrete reinforcing fibers will make your patio more durable and crack resistant. You can buy reinforcing fibers to add to site-mixed concrete, or you can ask for fibers to be added to ready-mixed concrete. I never pour concrete without using this fiber in addition to reinforcing rod.
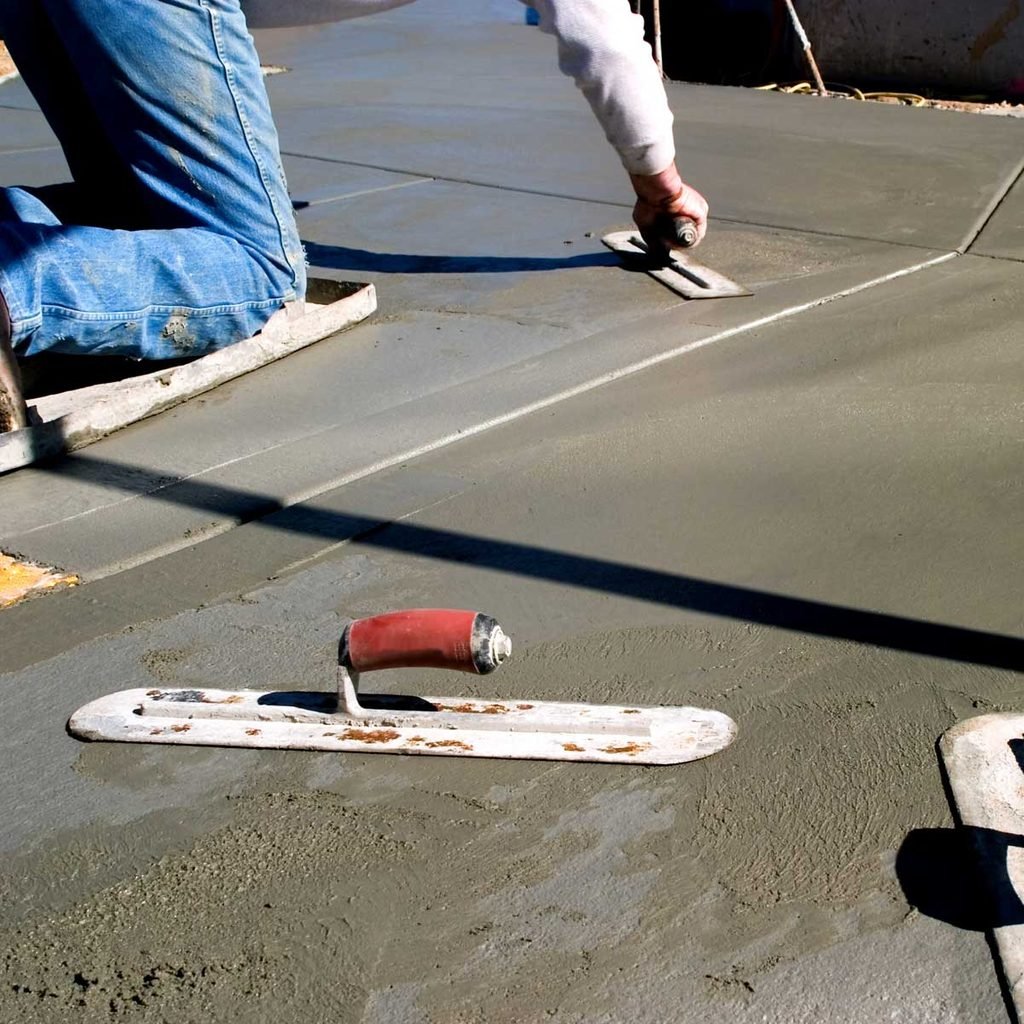
Fill the forms with concrete, then use a straight piece of wood drawn across the top edges of the form to smooth and level the concrete. Leave the concrete alone until the surface water dries but the concrete itself is still soft, then immediately continue smoothing the surface with a trowel. A special trowel for edges lets you make the concrete look like the edges of a sidewalk.
If you want a rough, high-friction surface, use a broom to texture the concrete before letting it harden. Keep the surface damp with periodic use of a garden hose or wet sheets and blankets.
Remove forms: Let the concrete cure for three days, then remove the deck screws, pull the stakes, remove the lumber than scrape and clean off the concrete residue from the wood, if you want to reuse it. Back fill around the patio with top soil to fill in the space left by the removal of the forms.
Make crack control cuts: Even with reinforcing rods or mesh in place, concrete slabs tend to crack over time. Crack control cuts direct this cracking along a single line, so the results look better. Let the concrete cure for two weeks, then rent a masonry cut-off saw and create cuts 1-1/2-in. to two inches down in a grid of about 10 feet x 10 feet.
Things I Wish I Would Have Known Before Pouring My Concrete Patio
- It’s easy to mix concrete so it’s too wet;
- Concrete cures much quicker during hot weather — too quick sometimes;
- Concrete slabs crack unless you go all out to prevent and control those cracks;
- If something is worth pouring, it’s worth using reinforcing fibers in the concrete.